
PhotoLesa's photography gear provided by:


Unfortunately, every photo-taking device, every scanner, and every lighting situation creates some type of color cast. Lucky for us, getting back to the original color is easy if you follow a few simple steps in either Photoshop or Photoshop Elements.
We're going to use Curves to tell Photoshop what's supposed to be black in our photo, what's supposed to be white, and lastly, what's supposed to have no real color at all (think gray bits). One could use Levels if one wanted, though I'm partial to Curves. Don't ask me why because I don't know :) No seriously, Curves supposedly (allegedly, reportedly) gives one more precise control over tonal values. Anyway. Read on.
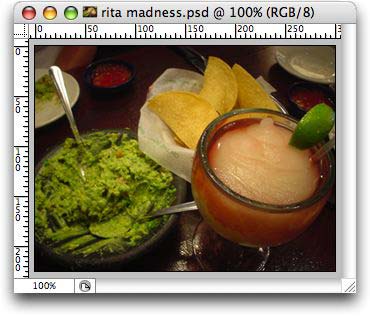
Let us practice now on this photo of a beautiful frozen margarita (complete with a shot of Chamborde) that I enjoyed in my hometown of Fort Worth, TX last week (dang I miss Tex-Mex!).
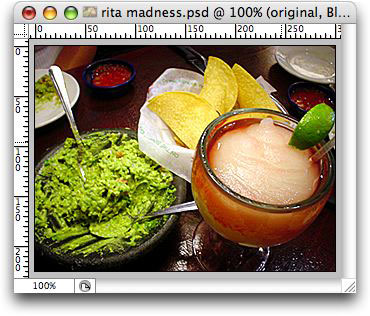
Step 1: Open the offending image, and rename the background layer (renaming the layer isn't necessary, but it's a good habit to get into!). In our original, you can see how the image looks kind of dark and dreary.
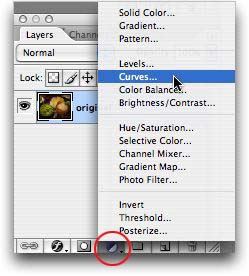
Step 2: To ensure that we don't harm our original image, we're going to create an adjustment layer by clicking once on the half black/half white circle icon at the bottom of the Layers palette, and choose Curves from the flyout menu.
NOTE: In Photoshop Elements (a scaled-down, though extremely powerful version of Photoshop), the adjustment layer button lives at the top of the layers palette. However, you're going to choose Levels instead of Curves. The dialog box will look slightly different, though you'll still have access to the black, white, and midtone point eye-droppers discussed below.
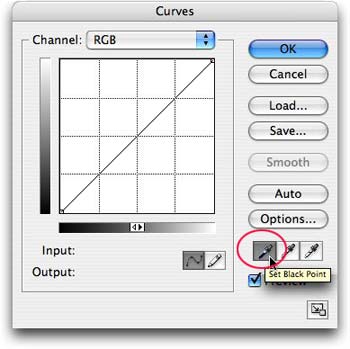
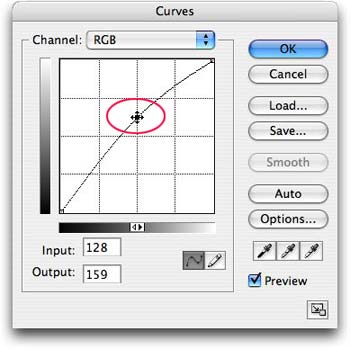
Step 3: Towards the bottom right of the Curves dialog box below, you'll see three little eyedroppers. Click the black eyedropper (circled below in red), and then click on the darkest bit of your image (what you think is closest to black). This is called setting the black point.
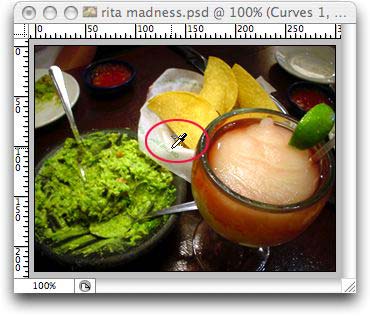
In our case, I'm going to choose the side of the little hot sauce holder (circled in red below).
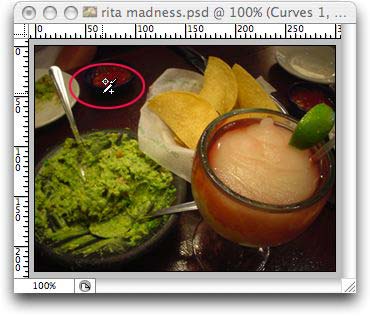
NOTE: To pick another spot, just continue to click around with the eyedropper. To reset all Curves values and start over, simply press and hold the Option key on a Mac (Alt on a PC) and the Cancel button changes to Reset.
Step 4: Back in the Curves dialog box, click the white eyedropper on the far right, and choose the lightest area of your image (what you think is closest to white). It's a gamble, but I'm going to pick the paper beneath the chips. This is called setting the white point.
NOTE: It's important here to not choose a reflective white, as in a light spot on the image created by the camera flash or another light source. You want to choose something that really *is* white, or close to it.
Step 5: Our image is really starting to brighten up, but I'm not done yet. Click the eyedropper in the center (for midtones) and choose a point in your image that has no color at all, such as something gray. I chose the top bit of the lower spoon.
Step 6: Lastly, back in the Curves dialog box, click and hold in the center of the diagram and pull up just a bit to brighten the image. You'll notice that I don't have any of the eyedroppers selected.
Step 7: When you’re satisfied with the results (or when you start salivating), click OK. The beauty of using an adjustment layer is that you haven't altered any of the original image data--it remains infinitely editable.
As you can see below, our margarita and guacamole is looking very tasty :)
Another handy thing you can do with color correction via adjustment layer is apply it to other photos.
Say you’ve got a group of photos shot under the same lighting conditions. Instead of color correcting each one individually (yawn), simply drag the adjustment layer of one color corrected image onto any other open Photoshop document. Poof! It’s click and drag color correction! That's because Photoshop treats adjustment layers just like any other layer and makes ‘em draggable. Very slick indeed.
Be sure to come back next week and I'll show you a trick for finding the true black and white points of your image :)


PhotoLesa's photography gear provided by: