Turning New into Old
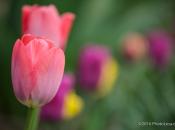
You know, photographers spend an enormous amount of time tweaking and adjusting their photos so they look all sparkly and new. So this week I thought we'd chat about making a new photo look really old. Using a few well- placed filters in Elements, you can take a new photo and make it look vintage and antique. Below lie three tips to take your photos from new to old in minutes.
NOTE:Click here to see the Photoshop version of this tutorial.
Tip #1: Make it a sepia tone
Sepia is defined as “shades of brown found in pictures from very early photography.” This quick color change can make a big difference and add an aged feel to your photo.
Step 1: Open a photo and duplicate the Background layer by pressing Ctrl + J (Mac: Command + J), and immediately turn off the visibility eye of the Background layer.
To convert the photo from color to grayscale, click the QuickFix button at the top right of your workspace (near the edge of the screen). In the resulting Color palette shown below, drag the Saturation slider all the way to the left to create a grayscale image.
Tweak the sliders in the Lighting palette to create maximum contrast. When finished, click the Standard Edit button at the top right of your workspace to accept the changes.

NOTE: As soon as you adjust the Lighting sliders, the Saturation slider pops back to it's midpoint position. Odd yes, but it happens.
Step 2: With the grayscale layer selected, trot up to the Filters menu and choose Adjustments > Photo Filter. Choose Sepia from the pop-up list and enter 75% for Density. Press OK.

Tip #2: Add streaks
Step 3: Over in the main Toolbox, click the foreground color chip and choose a nice brown, then make the background color chip white. Create a new layer at the top of the layers stack and choose Filter > Render Clouds. You'll see fluffy brownish-white clouds appear in your document. Press Ctrl + F (Mac: Command + F) to run the filter a few more times.

Step 4: Hop back up to the Filter menu and choose Blur > Motion Blur. Enter 90 in the Angle box and push the Distance slider all the way to the right. This is going to make the clouds look like vertical streaks. Press OK.

Step 5: Back in the Layers Palette, change the Blending Mode of the cloud layer to Hard Light. Lower the Opacity to 85%

This is what our images looks like now:

Tip #3: Apply spots with a white brush
Step 6: Create a new layer and place it on the top of the layers stack. Back in the main Toolbox, press X to swap color chips and make the foreground color chip white. Press B to select the Brush Too and from the Options bar the top of your screen, choose Thick Heavy Brushes from the pop-up menu. Click once on the Rough Round Bristle brush toward the bottom of the list.

Step 7: Mouse over to the photo and increase the brush size by pressing the right bracket key (]) repeatedly (my brush is almost as large as the photo). Click to apply age spots anywhere you'd like. If necessary, decrease the opacity of the spots layer to lessen their effect.

Here's the finished product:

As you can see, these three quick techniques made a huge difference and successfully transported a photo back several years in time. By creating a new layer for each level of aging, you can toggle them off and on to your liking and adjust their opacity to suit.
Until next time, happy photo aging!


