
PhotoLesa's photography gear provided by:


In most situations oversharpening is a very bad thing. However, when it comes to making eyes sparkle, it's just what ye ole doctor ordered. Today I'm going to show how oversharpening just the eyes can improve a portrait by galactic amounts. It can be done in either Photoshop or Photoshop Elements, and literally takes about 5 minutes.
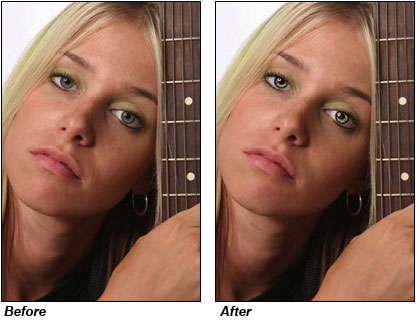
Take this shot of a pretty blonde girl and her guitar from iStockphoto.com. It's certainly a good photo, but wait till you see it after we make her eyes all bright and super sparkly.
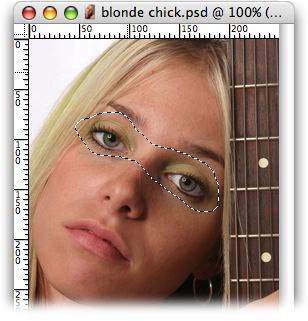
Step 1: Snatch the Lasso tool by pressing L.

Step 2: Draw a big selection around both her eyes. Don't try to get in close, we'll fix that in a minute.
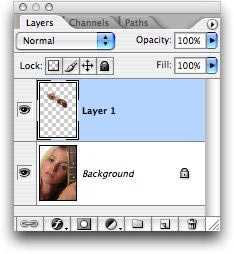
Step 3: Press Command +J (PC: Ctrl + J) to "jump" the selection up onto its own layer. This will isolate her eyes on their own layer, giving us more flexibility later on. NOTE: Command +J is the keyboard shortcut for duplicating a layer. If you don't have anything selected, it'll duplicate the entire layer instead.
Your layers palette should now look like this:
Step 4: Choose Filter > Sharpen > Unsharp Mask. Take those settings where they've never gone before! The sky's the limit! Remember our goal is to oversharpen.
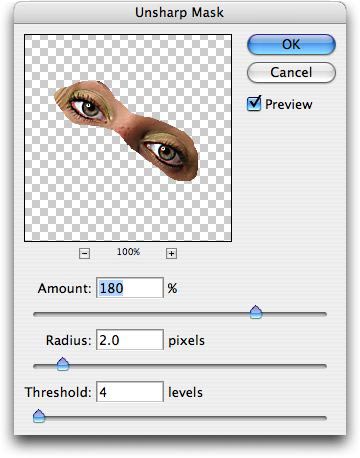
Step 5: Press Command + F (PC: Ctrl + F) to rerun the Unsharp Mask filter again. Yes you read that right. Resist the urge to question my sanity, and just go with it. TIP: Command + F always reruns the last filter.

Step 6: Turn off the Background layer (click the little eyeball to its left in the layers palette), and make sure the eye layer is selected. Grab the Eraser tool (press E) and zap everything except her eyes. This includes eyelashes, the white bits, everything.
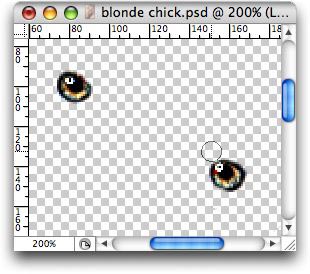
TIP: I always use the Eraser tool set to Brush mode. That way I can cycle down in brush size by pressing the left bracket, [, or up by pressing the right bracket, ]. Zoom in or out by pressing Command + or - (PC: Ctrl + or -).
Step 7: When finished, turn the Background layer back on to see what you've got. If the effect seems a little extreme, just lower the opacity of the eye layer. Therein lies the wisdom of performing this retouch on its own layer.
TIP: The cursor will magically turn into a scrubber when hovering above the word opacity in the layers palette.
As you can see, oversharpening only her eyes made a huge difference, and turned a good photo into something truly beautiful.


PhotoLesa's photography gear provided by: