
PhotoLesa's photography gear provided by:


After having a bit of a "holiday themed tutorial" break, it's time to continue on into the wide world of blending modes. Therefore, I would like to welcome you to the fifth installment of our journey which focuses on a brand new blending mode called Darker Color. It's new in Photoshop CS3, though it doesn't yet live within Elements.
This mode is very similar to one we've already discussed called Darken, wherein the colors of two layers are compared and the darkest ones win (which usually results in a darker image overall, except where white is concerned). With Darker Color, Photoshop compares the luminance data (think light value) of the colors in each layer. This mode doesn't really blend the colors of the two layers together like the other modes in the Darken category. Instead, the darkest areas just come shining through so to speak.
Don't worry, it'll make sense in a minute :)
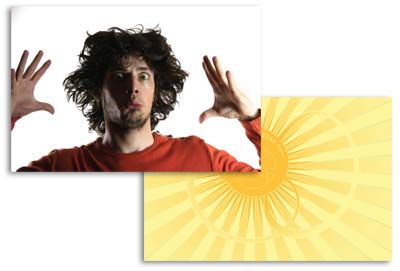
If you'll remember in our practical example with Darken mode (node#279), we successfully used it to zap the white background of one image and swap it with another image that was darker in color. Basically we took these two images (on separate layers in one document, of course):
And created the following by changing the blend mode of the darkest layer (the sunburst) to Darken. A layer mask was added to the sunburst layer to hide the area of the underlying image (the crazy dude) that was darker in color than the sunburst--his cheek and hand. The technique worked really well because heck, *anything* is darker than the original white background.
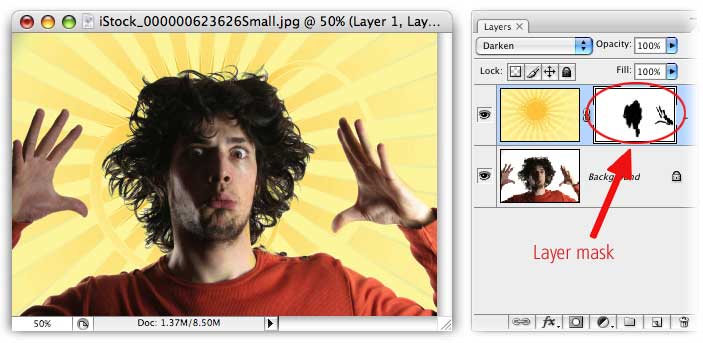
But if we were to use the Darker Color mode instead, we'd get something like this:
Since the sunburst is darker than the white, the method indeed worked; however, there's really no blending of colors. Notice how there is still a decent amount of white in the hair area (circled in red above).
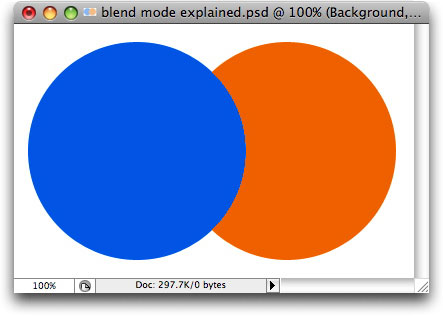
To illustrate further, let's return to our original example of orange and blue circles.
Darken mode
With Darken mode, Photoshop compares the color channels in both layers, picks the darkest ones and combines the result where the two layers intersect. Thus, a new color is created (green).

Darker Color mode
In this mode, Photoshop compares the luminance channels (think light value) instead of the color channels. Since blue has a darker luminance value, it wins out over the orange. However, note that no new color is generated where the layers overlap. That's because there's no real color blending going on. The darkest color--in lightness value--is what remains where colors of both layers intersect.
So how does this help you? A good question indeed. As you've already guessed, if you're trying to zap a white background, Darker Color probably won't be the best tool (though it's easy enough to toggle between Darken and Darker Color modes to see). However, Darker Color has the potential to produce some pretty interesting Collage Opportunities, namely when it comes to textures (because theyr'e usually very dark).
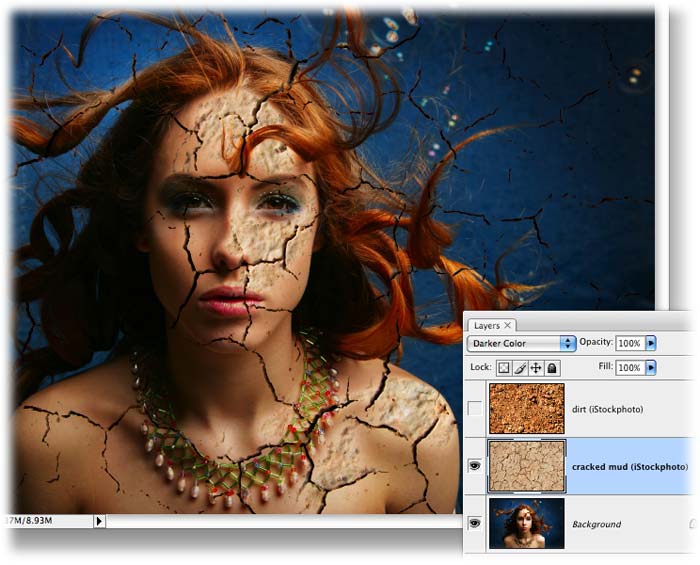
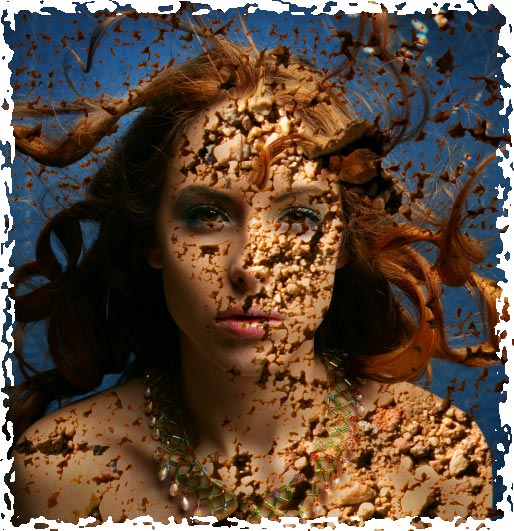
After searching for "dirt texture" in the photo database of iStockphoto.com, I downloaded a couple of little ditties for use with this beautiful mermaid (also from iStockphoto). As you can see, I've got cracked mud and dirt in my Layers palette. By changing the cracked mud layer to Darker Color, only the bits of mud that are darker in light value than the original photo show up. It looks like the whole photo is cracked.
Interesting yes, though it gets better if we try this with plain old dirt:
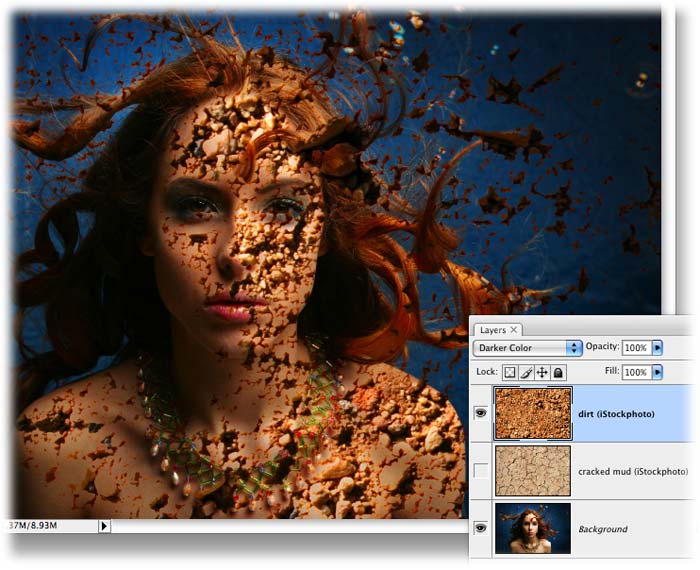
Now we're cooking! In fact, she looks a bit cooked--like a vampire who's in the process of meeting the sun, perhaps (muhahahahaha!).
To show you how very different this mode is from the others in the darken category (which is all we've worked with so far), I offer the following comparison using the same images:
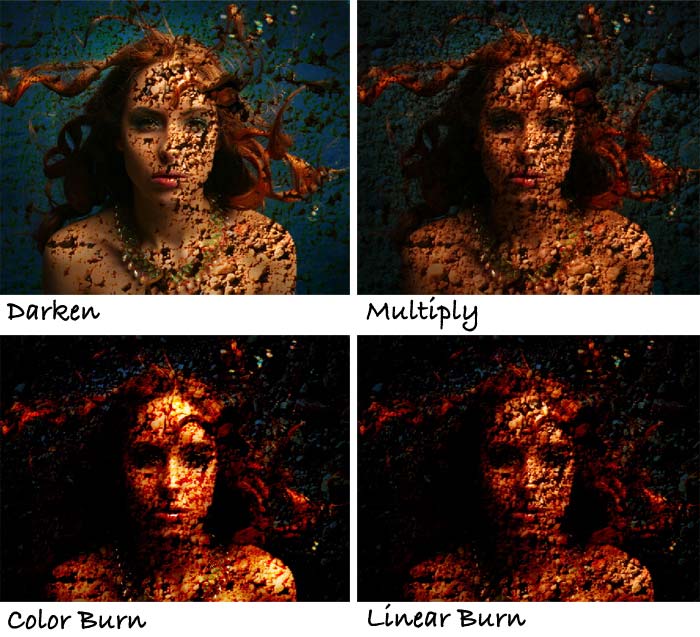
Notice how Darken introduces a new color where the colors intersect (that of green), and all of them produce more of a blended photo look (albeit with varying degree of contrast and brightness). Color Burn will have the highest contrast and most vivid colors, and Linear Burn will be the darkest overall.
The new Darker Color mode is the only one that truly isolates the darkest areas without blending/darkening the whole image, as shown below. Until next week, may the creative force be with you all!
Poor little mermaid ;)


PhotoLesa's photography gear provided by: