
PhotoLesa's photography gear provided by:


Welcome to the second installment of our journey through Photoshop and Elements' blending modes.
This week we'll continue on through the second category of blend modes that begin with Darken. As you might suspect, modes in this group have the potential to darken the underlying image. Convenient naming, that!
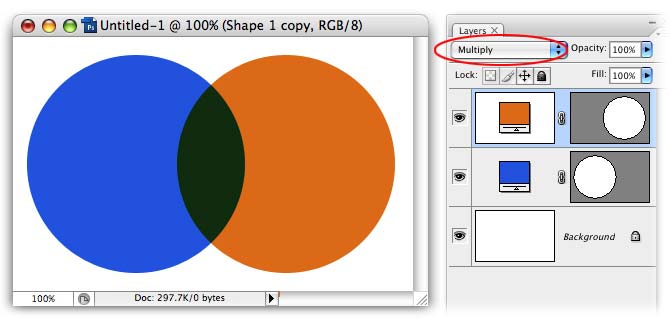
This week is all about the Multiply mode. It will indeed make an image appear darker, and my good buddy Ben Willmore says it's handy to think of this mode as actual ink. Here's what it looks like using the blue and orange circles from last week:
Ben wisely notes that if you were to place a 35mm slide on top of another, the second one would darken the first. He also points out that if you were to run a piece of paper through an inkjet printer, wherever color landed on paper the image would get darker as well. Nothing would happen to areas that were white of course, because a printer does not print white—it just ignores those parts of the image instead. It is these reasons that the Multiply mode is great for:
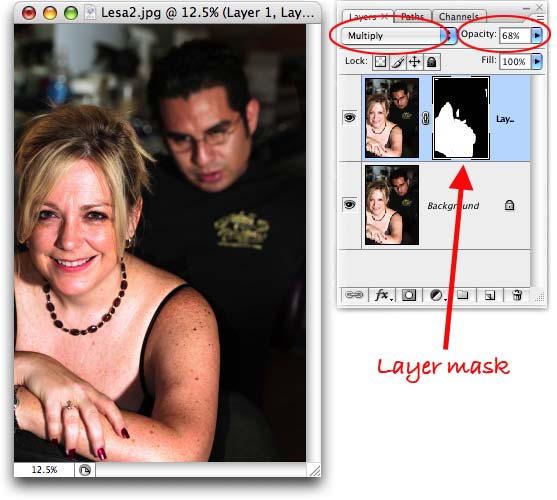
For years I've used the Multiply mode for the second reason, to fix photos that were overexposed or that contained blown out highlights (that is, before the Shadows/Highlights adjustment came along which does basically the same thing but in one step). I still use the old ways every now and then so for the sake of nostalgia—and those poor souls who are stuck with older versions of PS—I'll detail it here using a picture of me getting inked in Austin Texas earlier this summer.
Step 1: The first step is to duplicate the background layer by pressing Command +J (PC: Ctrl + J). Change the blending mode of the duplicated layer to Multiply and you get a darkened version of the image:

And as per usual, another part of the image will now be too dark.
Step 2: Add a layer mask to the duplicated layer by clicking the circle within a square icon at the bottom of the Layers palette. Set the top color chip to black, press B to select the Brush tool and then paint with black those areas you want to hide. In this case, it's the darkened bits of the background. If the effect is still too dark, lower that layer's opacity, as shown below.
See what I mean? It's a pretty fast and easy fix for stuff like this. Now let's look at another practical usage: knocking out a white background.
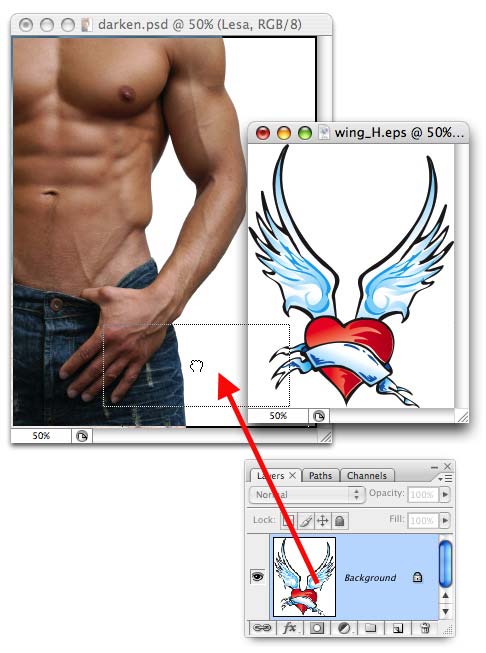
Since it's my birthday this Saturday, I decided to treat myself to a very special photo for use in this tutorial, and it fits nicely within the theme of the images above, which involve a tattoo. Using an image of a rather attractive man (!), we'll use the Multiply mode to blend the two images together (both were snatched from iStockphoto.com).
Step 1: Pop open both images and make sure both document windows are visible. Click and drag one of the images into the other *from the Layers palette* as shown below.
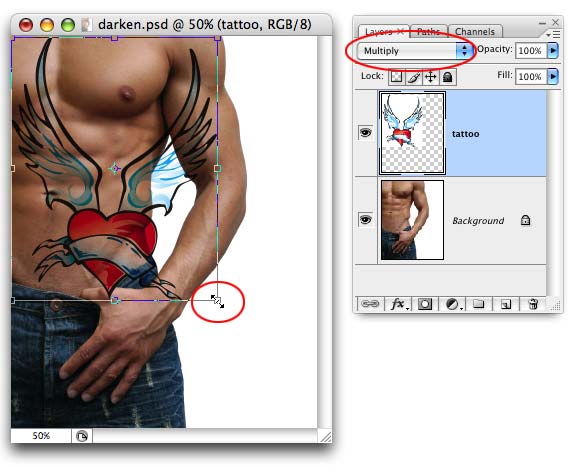
Step 2: Change the tattoo layer's blending mode to Multiply. Press Command + T (PC: Ctrl + T) to summon Free Transform and while holding Shift key, drag a corner handle inward to make the tattoo smaller. Press Return when finished.
Step 3: Zoom into the image by pressing Comand + (PC: Ctrl +) then press T to select the Type tool. Add some text then click the Type Warp button in the Options bar at the top of your screen (circled in red below).
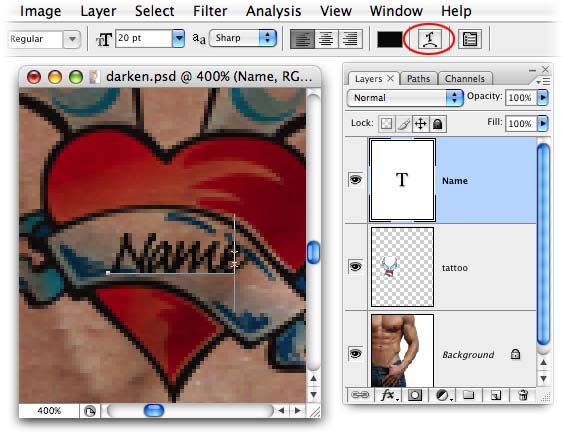
Step 4: In the resulting Warp dialog, choose Arc from the Style pop-up menu and tweak the Bend slider to control how much the text curves.

Step 5: Zoom back out of your masterpiece by pressing Command – (PC: Ctrl –) and say, "Ahhhh."
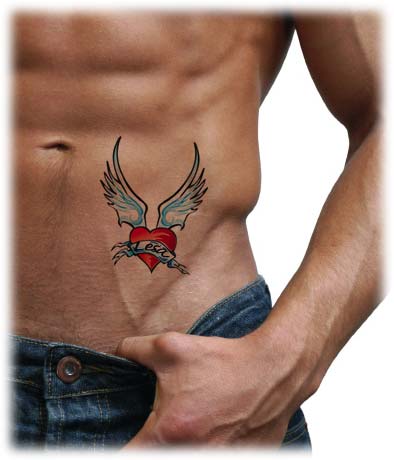
That was fun. As you can clearly see, all the white in the image has been removed allowing the two images to blend perfectly with nary a selection or layer mask.
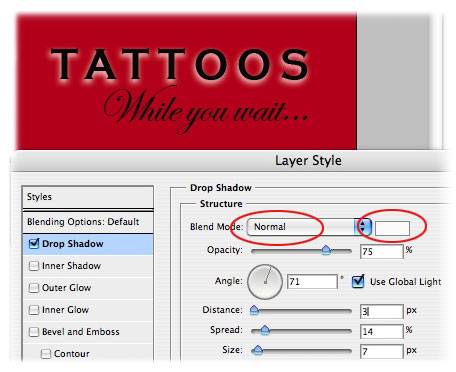
Another great use for Multiply mode is for that of drop shadows. In fact, by default this is the mode used in the Layer Styles drop shadow option. The only problem is that prevents you from easily creating a light-colored drop shadow. The fix is to change the blending mode of the drop shadow itself, as shown below:
What makes this fake sign funny is that it's not fake at all. During a trip through the Smoky Mountains on our motorcycles, my husband and I actually saw a sign like this. We almost fell off the bikes laughing because we couldn't figure out how else a tattoo could be done :)
That's all for now, but check back next week for more on Blending Modes. May the creative force be with you!


PhotoLesa's photography gear provided by: