
PhotoLesa's photography gear provided by:


Ah, Paris. Just look at this famous view of the Eiffel Tower painted brilliantly by so many Masters of years past. But wait... what's that pointy thing toward the right?! Ugh, it's an antenna.

Has that ever happened to you? You snap the perfect photo only to find it riddled with antennas or power lines? I'll go all in and bet the answer is yes. Luckily, there's a tool in both Photoshop and Elements that's surprisingly adept at eliminating unwanted bits against the sky, though it may never occur to you to actually use it.
Today I'm going to show you how to use the Spot Healing Brush to repair the sky and while we're at it, we'll zap some power lines from beneath some unsuspecting birds. It's much easier than you thought, though it does take some time and patience.
Step 1: Pop open a photo in Elements and immediately double-click the background layer to make it editable.
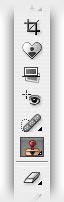
Step 2: From the main toolbar on the left, go grab the Spot Healing Brush.

Step 3: This tool uses a regular brush cursor, so just begin to paint out the ugly antenna, as shown below.

See how it disappears? This is because the Spot Healing Brush is sampling adjacent pixels and blending them to remove the spot, or line in our case.

TIP: Now I'll warn you, it doesn't always work perfectly. Sometimes you'll get blurry areas, as shown below. When that happens, try adjusting your brush size by pressing the left bracket, [, to cycle down in brush size or the right bracket, ], to cycle up. Just press Command + Z (PC: Ctrl + Z) to undo any brushstroke and begin again.

Step 4: When you get to an area of varying hue like the horizon below, experiment between clicking and/or dragging the brush in different directions. In this case, dragging from right to left worked best.

Step 5: When you encounter an area with texture, such as this piece of metal around the stone chimney...

Hop on up to the Options toolbar and click the Create Texture radio button and then resume painting.

Step 6: Last but not least, I zapped the really tiny antennas by reducing my brush size and dragging straight downward, as shown below.

Here's the much improved finished product (the Masters would be proud, don't you think?):

Admittedly, the Spot Healing Brush wasn't a tool I would have first considered for zapping antennas and power lines, but it sure can do the trick!
Let us now take this technique a step further and use it in conjunction with the Clone Stamp Tool to rip the lines out from under these birds I snatched from iStockphoto.com.

Step 1: Use the Spot Healing Brush as we did on the Eiffel Tower shot above.

After spending about 10 minutes alternating between just clicking and clicking and dragging, this is what we have:

Step 2: To finish up the bits around the birds, grab the Clone Stamp Tool from the toolbar to copy areas of the sky onto the blurry areas.
Step 3: Hold the Option key (PC: Alt) and click once to choose a sample point. This is the area you'll be copying from when you paint.

Step 4: Mouse over to the area you need to cover and begin to paint. You'll see the sample point as you move the brush.

After a few moments, we have some nice floating birds.

The key to success with the Clone Stamp Tool is to choose sample points often, and as usual when using a brush cursor, remember to experiment with brush size by using the left and right bracket keys to cycle down or up.
Until next time, happy line zapping!


PhotoLesa's photography gear provided by: