
PhotoLesa's photography gear provided by:


")
If I could have my pick of superpowers, turning someone to stone would be near the top of my wish list. Especially today. Oh come on, you know you've thought about it too. It's the perfect revenge when someone tries to steal your taxi, take the last seat on the subway, stubbornly debates the reason behind global warming (we're on the tail end of an ice age people) or COMPLAINS that you didn't ASK them if they were hungry BEFORE you made them a delicious ham, mushroom, and swiss omelette... sigh.
Just think about it, a quick digital snapshot of that special someone, an image of marble or concrete from iStockphoto, the Hard Light blend mode plus a layer mask and POOF! You're relaxed and in your happy place.
All kidding aside, this is a really neat technique and one that showcases how layers interact with one another when you change their blend modes. Today we'll flex our sculpting skills on a handsome man I bought from iStockphoto.com (I think he looks quite statuesque) and this slab of marble I found bu searching for "stone background". Let the carving begin!
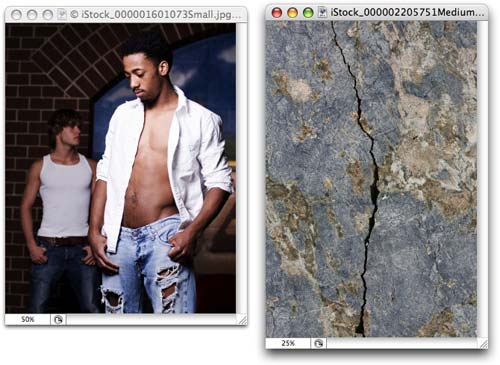
Step 1: Open the offender's image and immediately duplicate the background by pressing Command + J (PC: Ctrl + J).
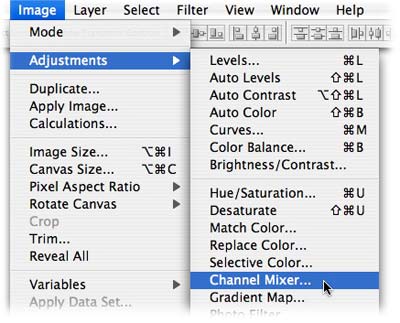
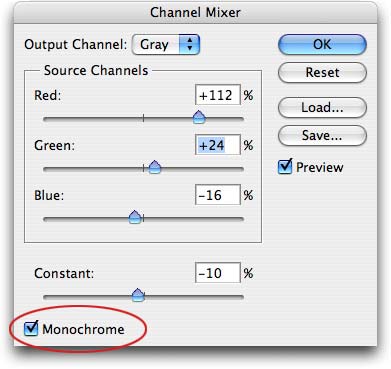
Step 2: Turn the layer copy into grayscale using the method of your choice (NOTE: You don't have to do this, but I like the end result of beginning with a grayscale image). Personally, I like using the Channel Mixer. Just hop up to the Image menu and choose Adjustments > Channel Mixer.
Step 3: In the resulting dialog, click the Monochrome button at the bottom left and adjust the channel sliders until you have some nice contrast going on. Click OK.
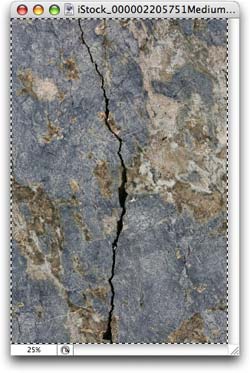
Step 4: Pop open the stone image and press Command + A (PC: Ctrl + A) to select all. Copy it by pressing Command + C (PC: Ctrl + C).
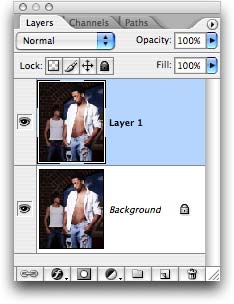
Step 5: Select the offender's image once again and press Command + V (PC: Ctrl + V) to add the marble onto its own layer.
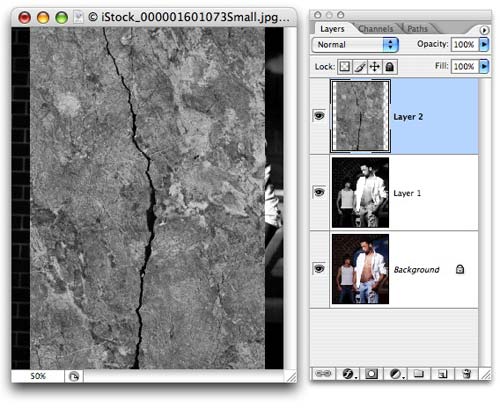
Step 6: Turn the stone to grayscale (if you want--again, this is a choice) by using the Channel Mixer method described above, or simply press Shift + Command + U (PC: Shift + Ctrl + U) to desaturate it. This is what we have now:
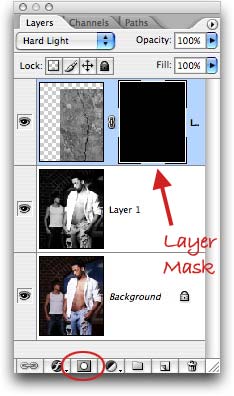
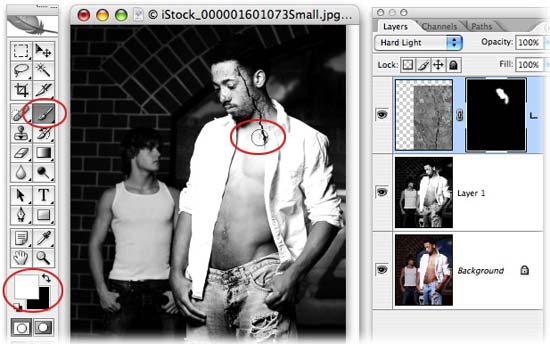
Step 7: In order for the original image to show through, we need to change the blend mode of the marble layer to Hard Light. Grab the Move tool by pressing V and move the marble into place.

Step 8: Option click (PC: Alt click) the circle within a square icon at the bottom of the Layers Palette to add a layer mask filled with black (this will hide the marble layer completely).
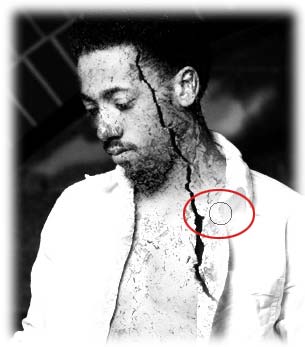
Step 9: Press B to grab the Brush tool and with white as the foreground color chip (just press X to swap them if black is on top), begin to paint the skin area. This will allow the marble to show back through the mask, but only in that area.
Step 10: If you paint in too much of the marble in, just press X to swap color chips so that black is on top, and then paint over that area to hide it once more.
TIP: Zoom in/out of the document by pressing Command +/– (PC: Ctrl +/–).
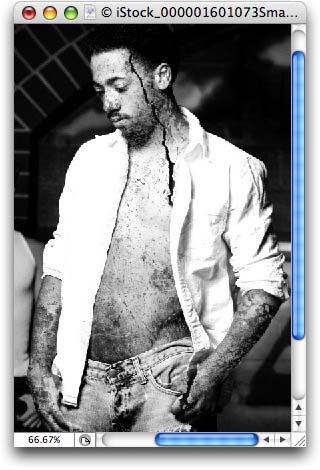
Here's what we have now:
Step 11: Not bad, but I'd really like to move the crack in that marble around. To do so, we need to unlock the mask from the marble image by clicking the little chainlink icon between the marble and mask thumbnails (circled in red below). Press V to select the Move tool, select the marble thumbnail in the layers palette (notice the hairline border around it, as shown below), then mouse over to the document to move the marble while the mask stays in place.
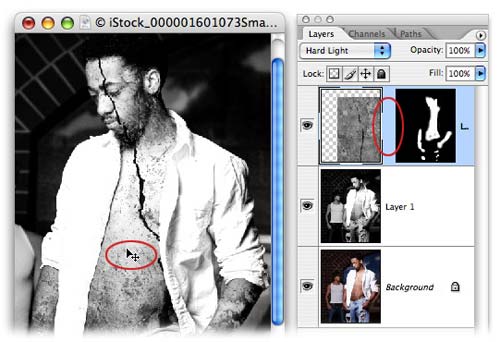
When finished, you can lock the layer mask again by clicking once between the image and mask thumbnails to bring back the little chainlink.
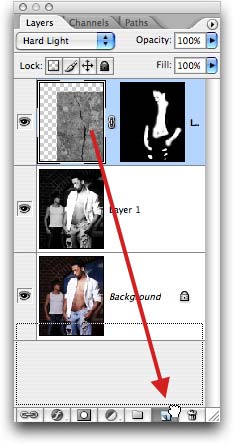
Step 13: Increase the effect by duplicating the stone layer. Just click and drag it to the bottom of the Layers Palette and release when it touches the New Layer icon, as shown below:
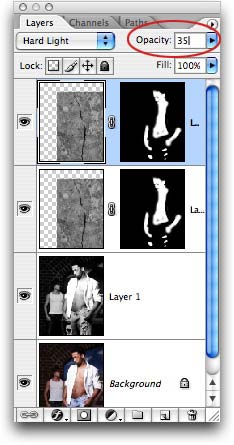
Step 14: Lower the opacity of the duplicated marble layer to 35%.
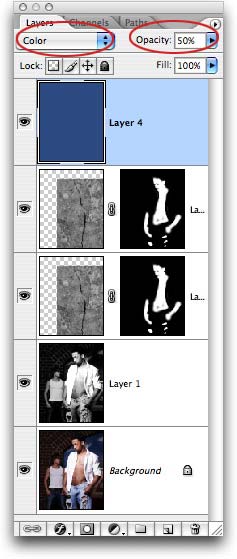
To spice things up a bit more, I gave the entire image a blue tint by adding a new layer which I filled with blue. I changed the blend mode of that layer to Color, and lowered its opacity to 50%.
Here's what my Layers Palette looks like:
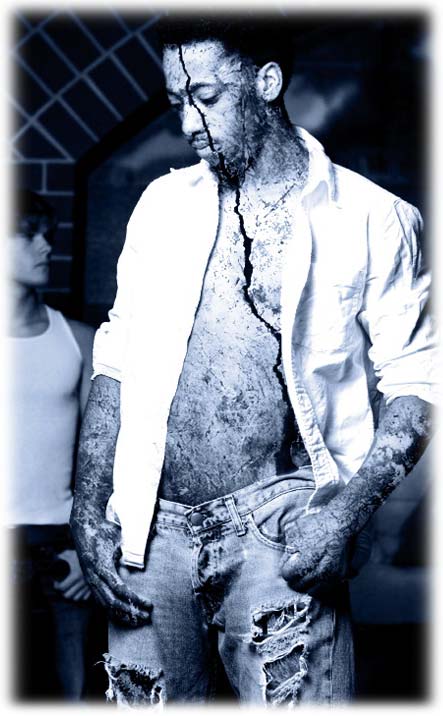
Fix yourself a nice cup of tea and gaze upon the final image. Breathe deeply, inhale the calming aroma of your brew and smile—you've now embraced your inner Medusa.
See? It's okay to use Photoshop for a little evil sometimes. See you next week!


PhotoLesa's photography gear provided by: