
PhotoLesa's photography gear provided by:


No, I don't mean the weird bits, I mean the creative bits! Today I'm going to walk you through creating a colorful effect that's extremely enjoyable to reproduce in Photoshop Elements (or Photoshop for that matter, the steps are the same).
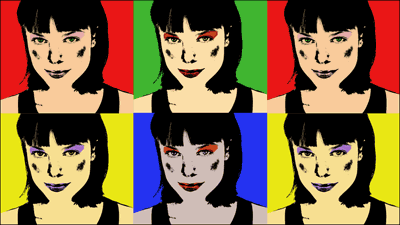
The technique involves making a super high contrast photo and creating bright blocks of color underneath. The end result is very stylized and unique to your own personal vision. It's a little like creating a cartoon character or painting-by-numbers (though you get to pick which areas and with what color you'd like to paint).
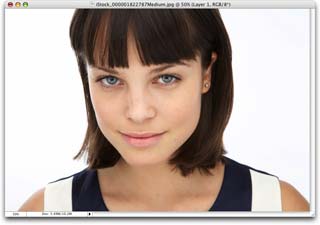
One of the secrets of success is starting off with a headshot-type photo on a white or other light colored, solid background. This makes the background drop right out. To illustrate, we'll use an image of a beautiful girl from iStockphoto.com, found by doing a search for "white background", then adding "woman" in the search within field.
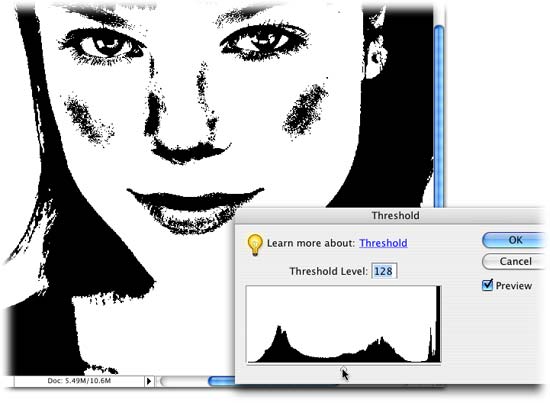
The very first task is to seriously increase the contrast in our Soon To Be A Serigraph image, and that means turning it into pure black and white (you can't get more contrast than that!). It just so happens that the Threshold filter is perfect for turning an image into a bit-mappy, black and white, high-contrast image. The shadow areas (the darkest areas) of the image become black, and the highlights (the lightest areas) become white. This is exactly what we want to create the "Pop Art" look that Warhol was famous for.
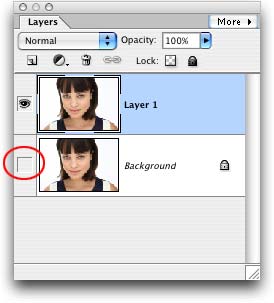
Step 1: Pop open a photo in Elements and immediately press Command + J (PC: Ctrl + J) to duplicate the Background layer. This is a purely self-protective move, so feel free to toggle the original Background layer's visibility eyeball off in the Layers Palette (circled below in red).
Step 2: We've got a decent amount of contrast in the photo, though her lips might get lost if we don't darken them up a bit. To do so, select the Burn tool (looks like a small hand—just click and hold the button just above the color chips in the main toolbox) and lower the Exposure to 5% in the options bar at the top of the screen. Likewise, if there are areas of the photo that appear too dark, switch to the Dodge tool to lighten them. (The Dodge tool looks like a lolly-pop and can be found in the same location as the Burn tool. Remember to lower the Exposure before you use it too.)
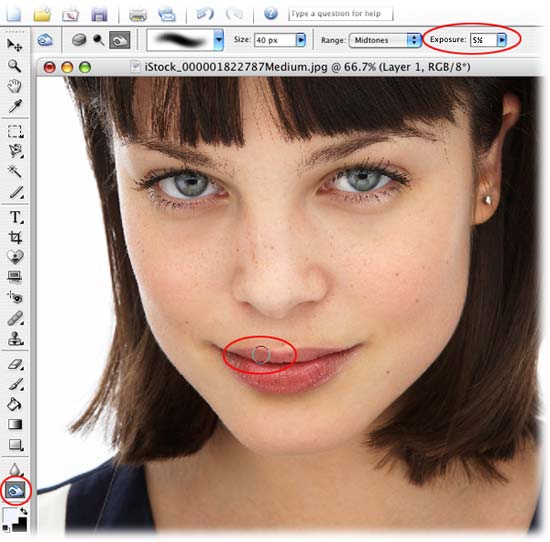
TIP: Both the Burn and Dodge tools use a brush cursor. To cycle down in brush size, press the left bracket key, [. To cycle up in brush size, press the right bracket key, ].
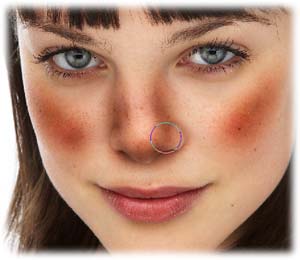
I also used the Burn tool to dark her cheeks and nose. Don't panic if your image looks a little clownish, step 3 will fix all that.
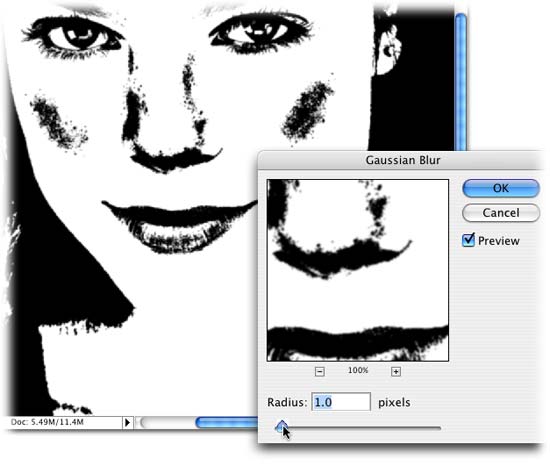
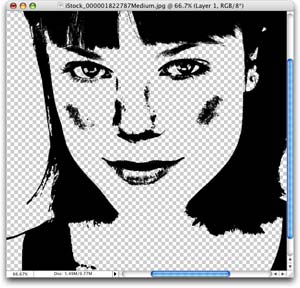
Step 3: Choose Filter > Adjustments > Threshold and adjust the slider until you have a nice, high contrast image and click OK.
TIP: If you don't like the results of your Burning and Dodging attempts mentioned above, just click cancel and continue editing with those tools as you wish. When satisfied, choose the Threshold filter once again and judge your success. Repeat as needed.
Step 4: Soften the image just a bit by choosing Filter > Blur > Gaussian Blur. Enter a pixel value of 1 and press OK.
Step 5: Press W to select the Magic Wand and click within a white area. Choose Select > Similar to instruct Elements to grab all the remaining white pixels and then press Delete. This will zap the background completely. Press Command + D (PC: Ctrl + D) to deselect and get rid of the marching ants.
That's all for this week! Check back next week when we'll learn how to paint blocks of color onto the face and create a repeating image.


PhotoLesa's photography gear provided by: