
PhotoLesa's photography gear provided by:


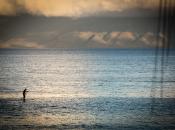


The weather is warming here in Nashville, TN, and back home in The Great Country of Texas the Bluebonnets and Indian Paintbrushes will soon be colorfully dotting the hillsides and medians. I do miss my home state, and with that in mind, a quick search on iStockphoto for "bluebonnets" yielded a gorgeous photo for use in today's tutorial.
In order to show off these bountiful blooms, I'm going to illustrate how to easily use Photoshop Elements to convert this image into grayscale, then bring back just a bit of color in the areas of your choice.
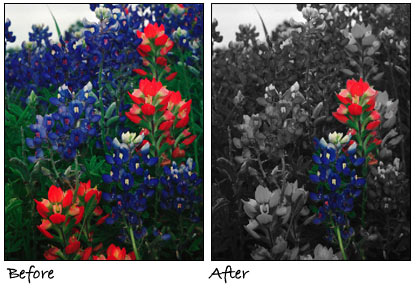
And to show you the wonderful tutorial goodness that is yet to come, here's what we'll start with and what we'll end up with:
Indeed this photo is beautiful as is, but as you can see, it can become even more visually interesting by highlighting just a couple of the wildflower blooms. Luckily, Photoshop Elements makes this trick super easy to perform. NOTE: The steps are identical in Photoshop CS2.
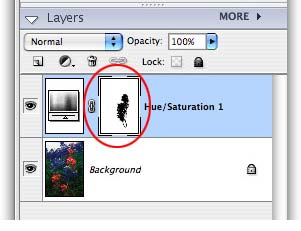
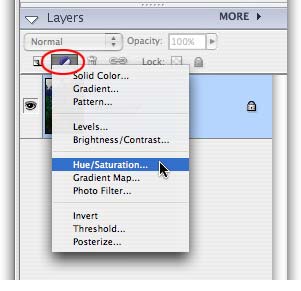
Step 1: Pop open an image in Elements and proceed immediately to the Layers Palette. Click the half black/half white circle and choose Hue/Saturation.
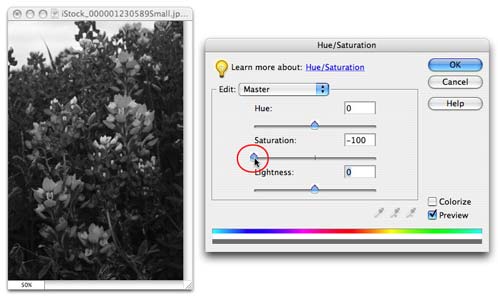
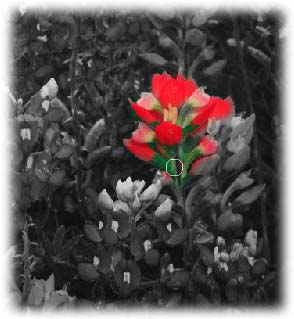
Step 2: Grab the Saturation slider and drag it all the way to the left and press OK. This should make all the color drain from the photo, as shown below.
First, a word (or 20) on layer masks.
What *is* a layer mask anyway?
A layer mask allows you to hide and protect things, in exactly the same way that masking tape applied lovingly to a baseboard protects it from that new bright orange wall paint. Same thing with a layer mask, and with the painting metaphor to boot!).
When a mask is applied to a layer in Elements (or Photoshop), you gain the ability to hide areas of whatever lives on that particular layer and you control it all by painting onto the mask with the Brush tool. In the realm of the layer mask, there's a little rhyme to help you remember which color to paint with:
Black conceals, and white reveals
Simple enough. As you might suspect, painting with shades of gray falls somewhere in between concealing and revealing. A dark gray would allow just a little of that area to show through the mask, while a light gray would allow almost all of it to show through (think opacity here).
For more on using grays in layer masks, see the tutorial on gradient fades I did last Thanksgiving for the "Free the Turkeys" campaign :)
Photoshop vs. Elements
One of the differences between Elements and the full-blown Photoshop is that Elements doesn't support layer masks, *officially*. Yes it is true that you can't just create a layer mask on the fly like you can in Photoshop; however, every adjustment layer comes *with* its own mask. This allows you to apply the effect of an adjustment layer to only certain bits of the photo, instead of the whole thing.
You might recall that we just created an adjustment layer in Step 1 and used that to drain the photo of color. Let us proceed.
Because we want to hide the effect of the adjustment layer (since that's what zapped the color), we want to paint with black. Black conceals, remember?
Step 3: First, we must select the layer mask. Click on the layer mask thumbnail in the Layers palette, as shown below.
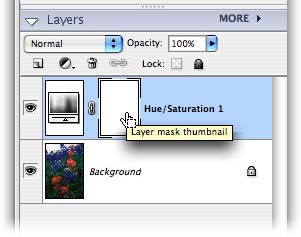
Step 4: Press B to select the Brush tool, and take a peek at the color chips at the bottom of the Toolbar. Press X until the black color chip is perched on top.
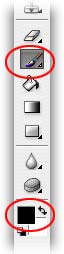
Step 5: Begin to paint the areas where you want color to show through.
Step 6: If you mess up and paint in too much color, just press X to swap color chips so that white is on top, then paint that area back out.
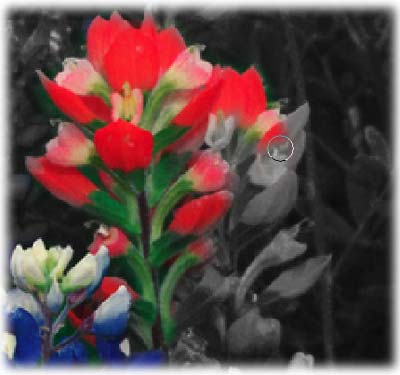
As you paint, notice what's happening on the layer mask thumbnail; the mask has taken the shape of the blooms, more clearly illustrating how the mask works:
And again, here's our before and after:
And that's all there is to it! A really simple though very classy effect. See you next week!


PhotoLesa's photography gear provided by: