
PhotoLesa's photography gear provided by:


Sometimes I wonder about the people who discover advanced tools hidden deep within software. Take this week's tip for instance, which involves iPhoto 6 and its photo editing tools.
Somehow, Rob Griffeths of Macworld Magazine discovered that if you hold down a magical combination of three keys *before* choosing either the red-eye or retouching brush while in the Editing mode of iPhoto 6, you get a much more powerful tool for each. In addition to that, he discovered modifier keys that let you toggle between these hidden tools.
Right.
How did he find this? Did he press every keyboard combination possible while choosing every tool until something odd happened? This baffles me completely. This could be either very amazing or very sad--maybe both.
Nevertheless, thank you Rob, for discovering the hidden power lying in wait within iPhoto 6. For the rest of us mere mortals, here's how to access it.
Step 1: Double-click the offending photo so that it opens within iPhoto's editing pane.
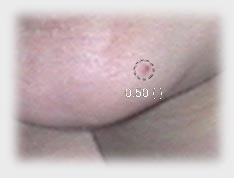
Step 2: Press Control + Caps Lock + 9 and choose the Red-eye tool (yes you read that right). You'll see a rather large shaded, cross-hair tool appear, like so:
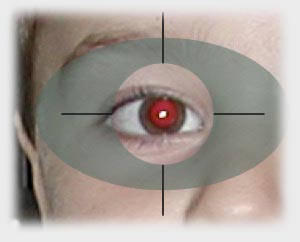
Step 3: Using the left bracket key, reduce the size of the cross hair until it fits nicely onto the offending red-eye area.
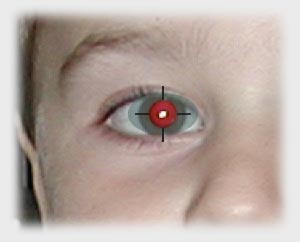
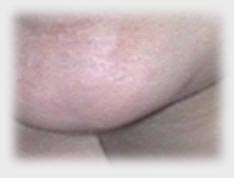
Step 4: Click once to send the red-eye packing. Here's what we have:

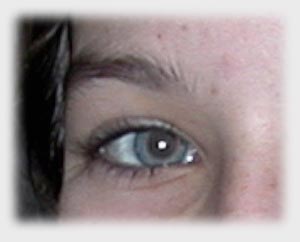
Follow exactly the same steps as above, though hold the Shift key while pressing once to zap the red-eye. It does pretty much the same thing, though doesn't make the pupil quite as dark, as shown below:
Step 1: Open the offending photo in iPhoto 6's editing pane.
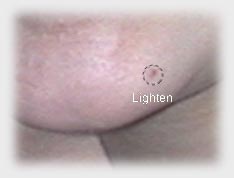
Step 2: Press Control + Caps Lock + 9 and choose the Retouch brush, mouse over to the area you want to correct and press the Tab key one time to get the first enhanced brush, as shown below.
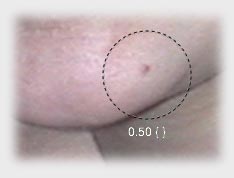
Step 3: Use the left or right bracket keys to resize the brush to fit the offending blemish.
Step 4: Click one time to zap the blemish.
Alternately, press Tab one more time to bring up the Lighten brush. Again, size the brush to fit the blemish and click once to send it packing.
Amazing isn't it? Oh and by the way, you also have unlimited undos when in this enhanced mode. Who'd have thought?!
Thanks to the wise and wonderful Pat Faquet of Washington Apple Pi for telling me about all this!


PhotoLesa's photography gear provided by: