
PhotoLesa's photography gear provided by:


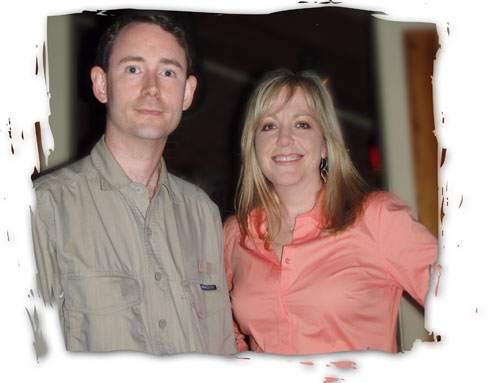
Last night I had the pleasure of doing a little ditty on photography and Elements for the Danbury Area Computer Society, and consequently meeting John Leko and his lovely mom Judy. John's wife Mayra couldn't make it so we took a photo to commemorate the gloriously geeky event (though she couldn't be there, she sent brownies--what a woman!). I took a peek at the photo and unfortunately, both John and I suffered from an acute case of shiny skin. You know, those hot spots that are a touch overexposed and leave you looking as if you're glistening when you've got no cause to be.
Therefore, I thought we'd take a look at how to zap those little buggers using Photoshop Elements (though the steps are identical in Photoshop). It just so happens, that we can use the same technique to zap the shadows so prevalent in double... ahem... chins. Let's get started!
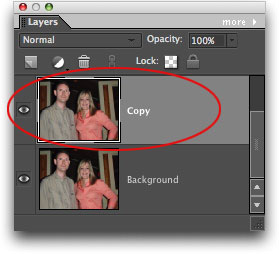
Step 1: Open the offending photo and immediately duplicate the layer by pressing Command + J (PC: Ctrl + J).
We'll use some non-shiny skin to repair the shiny skin. Think of it as a little skin graft.
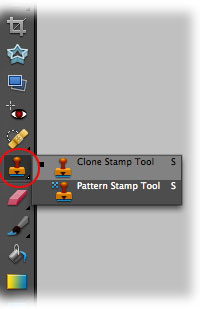
Step 2: Grab the Clone Stamp Tool from the main Tools palette.
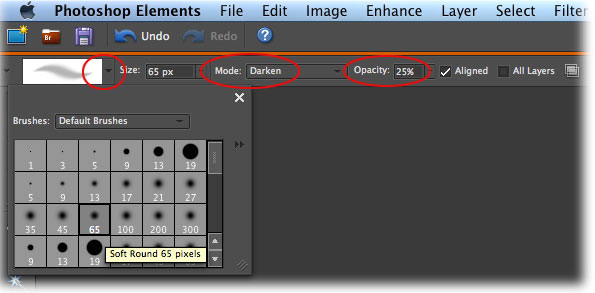
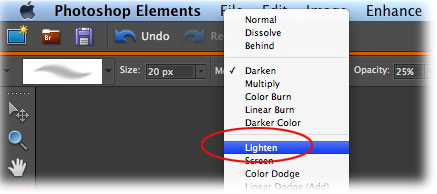
Step 3: Hop up to the Options bar and choose a nice soft brush from the brush picker (circled below). Change the blending mode of the tool to Darken and lower the Opacity to 25%.
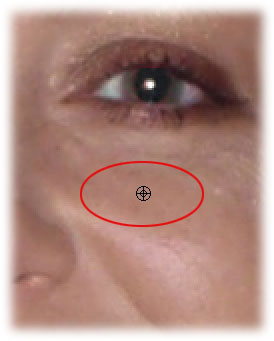
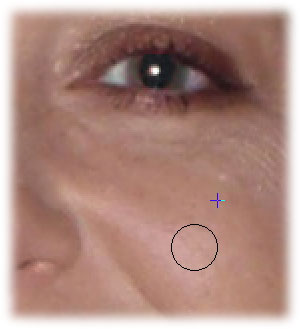
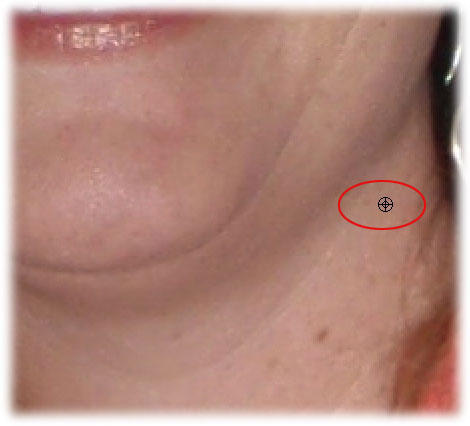
Step 4: Next, we need to tell Elements where the good skin lives. Do that by clicking the area while holding the Option key (PC: Alt). Your cursor will turn into a little cross-hair that looks like this:
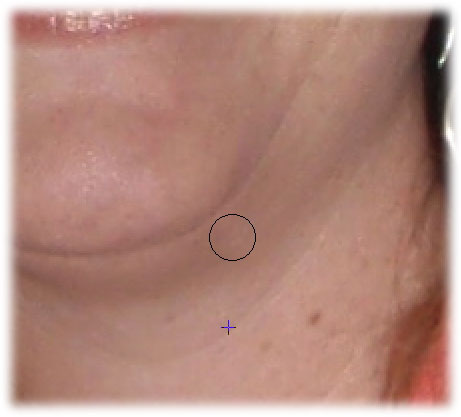
Step 5: Brush the new skin over the shiny skin. You'll see a little plus sign that lets you know where Elements is "sampling" from (or rather, where the good skin is coming from). The sample point will move as the cursor moves.
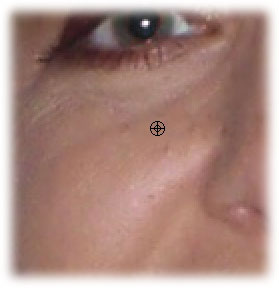
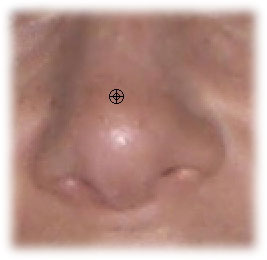
Step 6: Move to another area of the photo and choose a new sample point by Option (PC: Alt) clicking. It's important to choose the sample area as close to the shiny area as possible (so the color and texture match).
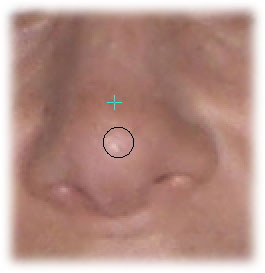
Step 7: Brush the bad skin away, as shown below.
Step 8: Keep repeating this process on each shiny area, being careful to make the sample point close to the shiny patch.
Step 9: Continue to brush away the shine.
As luck would have it, this technique also works to brush away shadows, which can do WONDERS for double-chins.
Step 10: With the Clone Stamp tool selected, change the blending mode to Lighten.
Step 11: Option click (PC: Alt) to choose a new sample point.
Step 12: Brush away the shadows in the same manner that we brushed away the shiny spots. TIP: Don't erase all the shadows, else your face will end up looking unnaturally flat.
Here's the before and after:
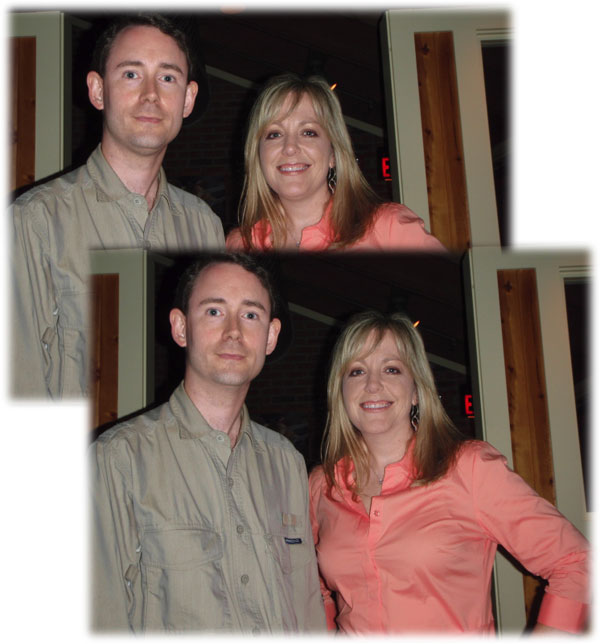
Much better, isn't it? And here's what the photo looks like after blurring the background, and spicing up the edges with the Cookie Cutter tool:
Until next week, may the shiny and shadow zapping force be with you all!


PhotoLesa's photography gear provided by: