
PhotoLesa's photography gear provided by:


The Background Eraser makes short work of zapping backgrounds, as it deletes pixels similar in color to the ones you paint across. However, the trick to using it successfully—especially on images that include fine details such as hair—lies in its Options bar settings and a good deal of patience. In this column, you’ll learn how to use it to remove the sky behind these people. Take a deep breath and read on!
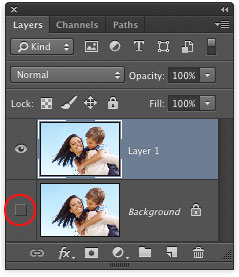
Step 1: Open a photo, duplicate the image layer by pressing Command+J (PC: Ctrl+J) and then hide the original layer by turning off its visibility eye (circled). If something goes haywire, you can toss the duplicate layer and you’re back to square one.
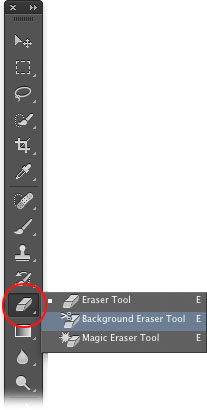
Step 2: In your Tools panel, open the Eraser toolset and from the resulting menu, choose the Background Eraser.
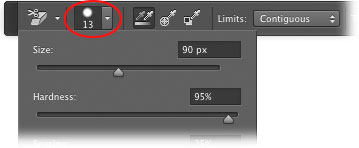
Step 3: In the Options bar, click the Brush Preset picker and lower the Hardness slider to about 95% for a slightly soft-edge brush. Don’t worry about brush size; you’ll change it with a keyboard shortcut later on.
Step 4: Change the Sampling method to Once by clicking the second icon to the right of the Brush Preset picker. Sampling controls how often Photoshop looks at the color your brush cursor is touching in order to decide what to erase. If your background has a lot of color variation, leave it set to Continuous so Photoshop keeps a constant watch on what color pixels you’re painting across. If the background’s color is fairly uniform (like this sky), changing it to Once makes Photoshop checks the color one time, meaning it’ll only erase pixels that closely match it.

Step 5: Set the Limits menu to Discontiguous. By default, this field is set to Contiguous, wherein the tool erases only pixels adjacent to those you paint across. To erase similar-colored pixels elsewhere in the image (say, the sky through this lady’s hair), use Discontiguous instead.
Step 6: Turn on the Protect Foreground checkbox and tell Photoshop which color to protect by Option-clicking (PC: Alt+clicking) a strand of hair.
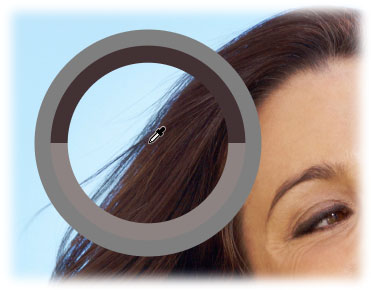
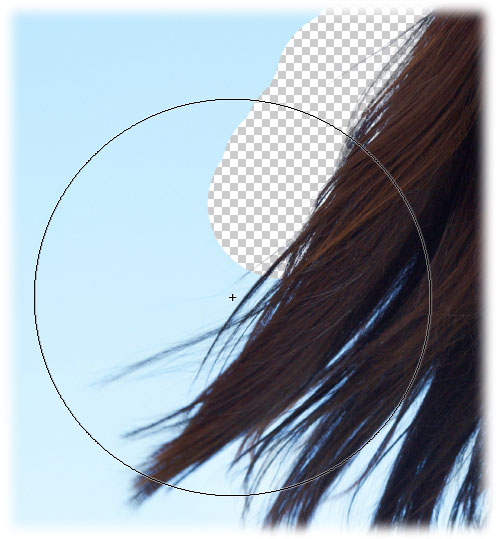
Step 7: Now you’re ready to erase the background (whew!). Mouse over to your image and your cursor morphs into a circle with tiny crosshairs in the center. The trick is to let the crosshairs touch only the pixels you want to erase. Use the cursor’s outline to tell Photoshop how far into your subject you want it to erase the background pixels. For example, use a really big brush for soft areas, where the background peeks through strands of hair (as shown here), and a small brush for hard edges around the shirt and arms. To increase or decrease brush size, press the left and right bracket keys ([, ]) on your keyboard, respectively. It’s also important to keep a close eye on the edge color you’re erasing around. Whenever it changes, be sure to update the color Photoshop’s protecting by Option+clicking it (PC: Alt+clicking). You’ll alter brush size, as well as change the protected color, several times in this example image. Be sure to do your erasing a little at a time by releasing your mouse button often. This lets you press Command+Z (PC: Ctrl+Z) to undo a specific spot in order to use a different size brush or tolerance setting, as well as alter the protected color.
Tip: If the tool is erasing too much or too little, tweak the Tolerance setting in the Options bar. If an area in the image is almost the same color as the background, lower the tolerance to make the tool pickier about what it’s erasing. Likewise, if it’s not erasing enough of the background, raise the tolerance to make it less picky. A setting of 65% was used here.
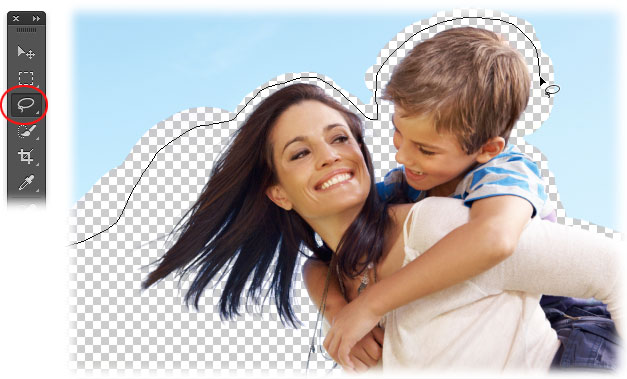
Step 8: Once you get a clean outline around your subject, switch to the regular Eraser tool to get rid of the remaining background quickly. Alternatively, you can use one of Photoshop’s selection tools (say, the Lasso tool) to quickly select the remaining areas and then press the Delete key (PC: Backspace) to get rid of them.
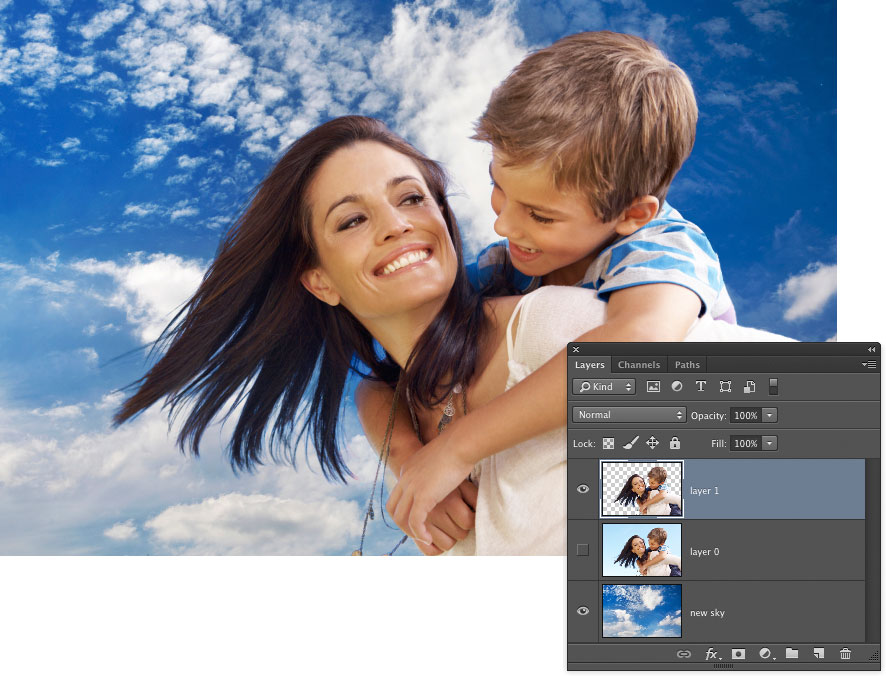
Step 9: To add a new background, open another image (say, a new sky) and choose Select> All. Activate the document you did the erasing in and choose Edit> Paste. In the Layers panel. drag the new layer below the erased layer and voila! You’ve got a brand new sky.

As you can see, this technique is time-consuming though the results are well worth it. While you could load the erased layer as a selection and use it to add a mask to the original image layer, your edges would never look as accurate. That’s why it’s important to do your erasing in small chunks so you can use the Undo command in order to perfect them. The more you practice using this tool, the better you’ll get at using it. Until next time, may the creative force be with you all! (A big thanks to Photoshop guru, Jack Davis, for reminding me of this technique recently.)


PhotoLesa's photography gear provided by: