
PhotoLesa's photography gear provided by:


 I don't know if folks are preparing for Spring Fever or what, but lately I've gotten a several emails asking how to change the color of cabinets, shutters, and walls. Maybe people are just getting stir crazy from being cooped up in the house this winter.
Nevertheless, changing the color of anything has never been easier in both Photoshop and Elements. Though when Elements 6 for the Mac is released this March, it'll get easier still! As you might suspect, to get much anything done in either software you must tell said software what it is that you want to change. This act, dear friends, is called creating a selection.
There are no fewer than 100 ways to create selections in either software, so the important skill to have is knowing which tool will get you the farthest in the least amount of time. Though sometimes it's easier to select the area you *don't* want to alter, and then inverse the selection to get what you do want, so just keep that in mind. Either way, take a few moments to look at the item that needs selecting and ask yourself the following questions:
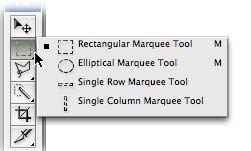
Is it square or circular in shape? If so, reach for the Rectangular or Elliptical Marquee tools.
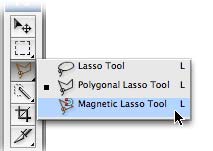
Does it have a lot of straight edges? If so, use the Polygonal Lasso tool, or if you want the software to help you, reach for the Magnetic Lasso tool. Incidentally, a color changing tutorial using the Magnetic Lasso tool lives here.
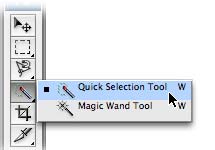
Is it solid color or close to it? If so, use the Magic Wand or if you want the software to guess what you're trying to select in order to help you, choose the Quick Selection tool.
With either tool, use the Tolerance setting in the Options bar at the top of your screen to tweak the tool's sensitivity.

Would you rather use the Brush tool to "paint" the selection? You can do this in Photoshop by using the QuickMask mode (fodder for another tutorial).
No matter which tool you use first, you can always switch to another to refine the selection. Also, once you have the "marching selection ants" (that's really what they look like), you can add or subtract from the selection by using modifier keys:
This particular tutorial is going to focus on a rather new selection tool on the scene called the Quick Select tool. It's new in Photoshop CS3 and it will be new in Photoshop Elements 6 for the Mac (I believe PC users already have it).
Step 1: Pop open the image and grab the Quick Selection Tool in either Photoshop CS3 or Elements 6. Brush across the area you wish to select and watching the marching ants pop into place.

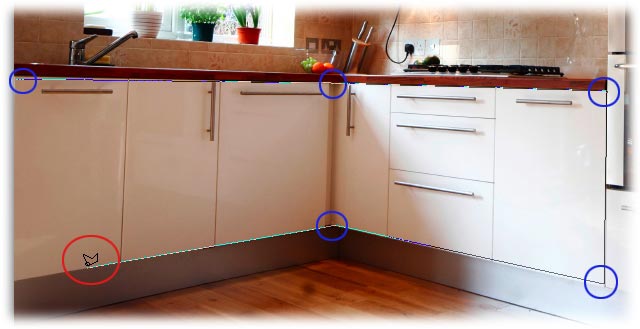
Step 2: Use the modifier keys mentioned above to either add or subtract from the selection (Shift or Option, PC: Alt, respectively). Remember too, that you can switch selection tools if there's one that fits the job. In the case below, we can switch to the Rectangular Marquee to deselect the area circled in red.
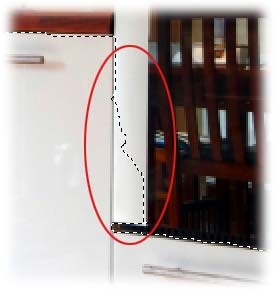
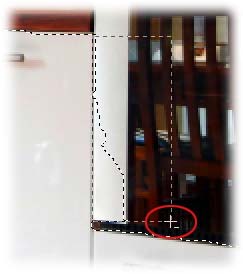
While holding the Option key (PC: Alt) to subtract from the selection, draw a box around the offending area. You'll see a tiny minus sign appear next to the cursor (circled below in red).
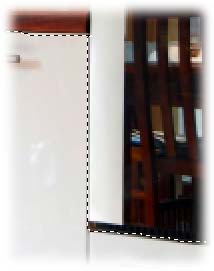
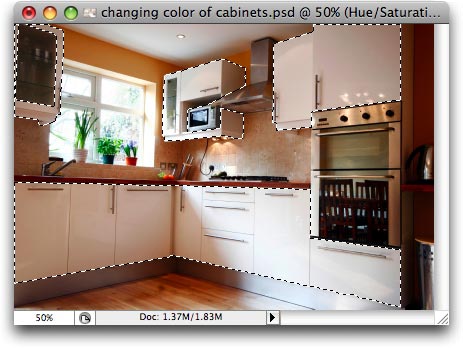
When finished, the selection will look like this:
Selecting with the Polygonal Lasso
Since the cabinets have a lot of straight lines and edges, you could also use the Polygonal Lasso tool to create the selection instead. Just grab the tool, click once to start the selection, drag to the next corner and click again to set another point, drag to the next spot where the direction needs to change and click to add a point, and so on. The blue circles below denote each click point:
No matter which tool you use, in the end you'll have a selection that looks like this:
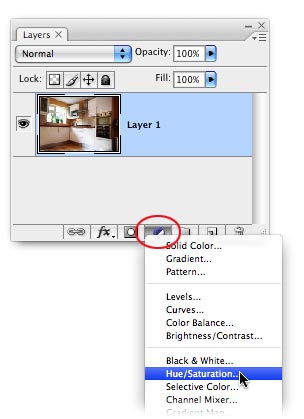
Step 3: Now that the appropriate cabinet bits are selected, create an Adjustment Layer by clicking the little half black/half white circle at the bottom of your Layers Palette (circled in red below). In Elements this lives at the top of the layers palette and in Photoshop it lives at the top. Choose Hue/Saturation.
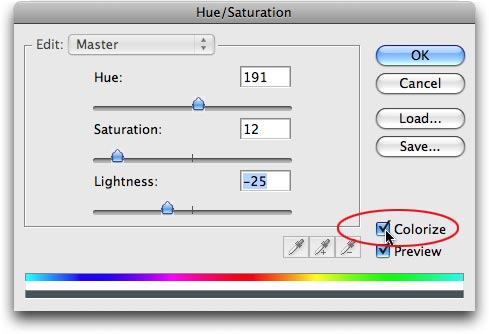
Step 4: In the resulting dialog, click the Colorize button at the bottom right. This will allow you to change the color where there may be no color to begin with (i.e. white areas). Grab the Hue slider and give it a tug in either direction, then adjust the Saturation and Lightness sliders to get the exact color you want. When finished, press OK.
With this method, you can decide if you'd rather have blue, peach, or cream colored cabinets before buying the paint.
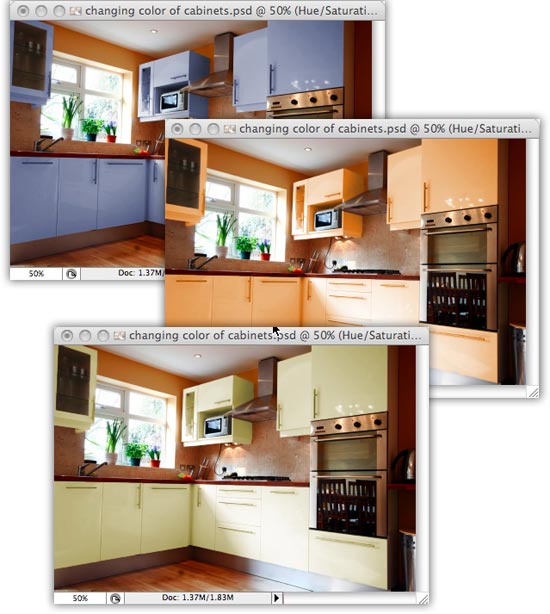
Or, you could just turn off the visibility eye of the Hue/Saturation adjustment layer and decide not to paint them at all :)
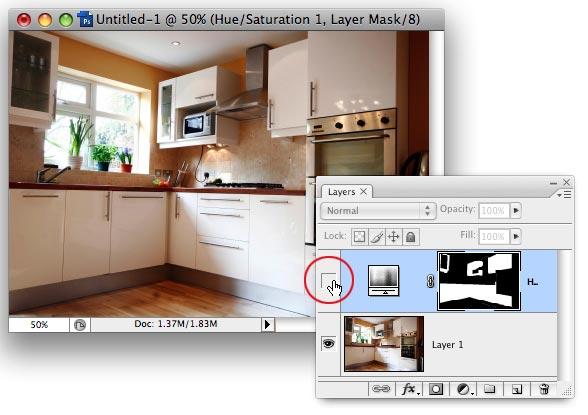
The hardest part of this technique is creating a selection, but once you do, you can use a Hue/Saturation adjustment layer to change the color of quite literaly anything: cabinets, hair, clothes, cars, or whatever.
Until next time, happy color changing!


PhotoLesa's photography gear provided by: