
PhotoLesa's photography gear provided by:


Note: This technique also works in Photoshop CC.
To avoid running into unexpected printing costs, it’s a good idea to print separations (called seps around the water cooler) before sending your image to a print shop. That way, you can make sure an extra color hasn’t snuck its way into your document—especially if you’ve toyed with some spot colors that you’re not going to use. However, you probably won’t use Photoshop to print separations—in most cases, you’ll place an RGB or CMYK image in a page-layout program along with text and other images, and then use that program to print the separations. But if you ever do need to print separations from Photoshop, here’s how to get it done:
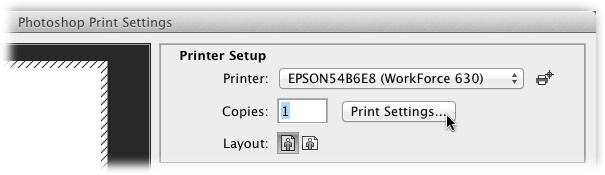
Step 1: Open a CMYK image and then choose File > Print and Photoshop opens the Photoshop Print Settings dialog box. Choose your printer model from the Printer menu.
Step 2: Click Print Settings to open your operating system’s print dialog box. From the Paper Size or similarly named pop-up menu, choose the paper size you want to print on and then click Save to close the dialog box.

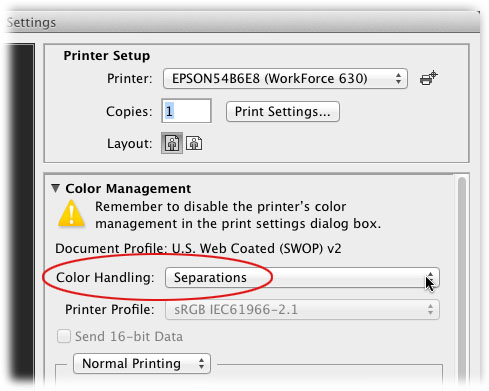
Step 3: Back in the Photoshop Print Settings dialog box, locate the Color Management section and choose Separations from the Color Handling pop-up menu.
Step 4: Use the scroll bar on the far right of the window to scroll down to the Printing Marks section (this options was new in CS6). Turn on all the checkboxes so you can see where your document will be trimmed when it’s printed, as well as document name and which plate was printed. Peek at the image preview on the left side of the Photoshop Print Settings dialog box to see if your image looks the way you want it to.

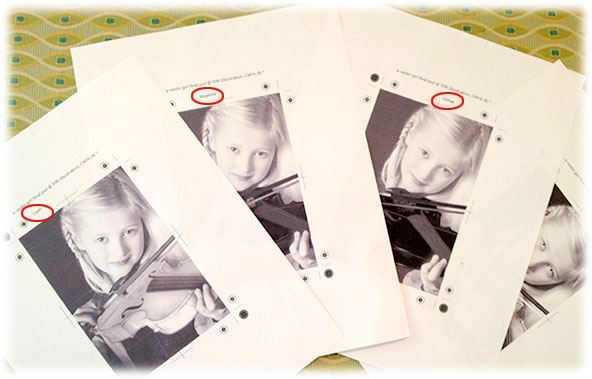
Step 5: Click Print to send your separations to your printer. What you get is a black-and-white version of each color plate—one for cyan, magenta, yellow, and black—just like what you see in your Channels panel. If you’ve added any spot channels, those print separately, also in black and white. (Printing plates are black and white because it’s the ink on the actual press that determines the color that gets printed.) Here’s the finished product:

As you can see, each print is labeled according to which plate it represents. Until next time, may the creative force be with you all!


PhotoLesa's photography gear provided by: