
PhotoLesa's photography gear provided by:


 Have you ever wanted to float a piece of text behind a portion of an image? It's really easy to do using layer masks in Photoshop, though Photoshop Elements doesn't support layer masks. Never fear for clipping groups are here!
Today I'm going to show you how to trick Elements into giving us a layer mask to use on this fun little Christmas card project. We'll use it to hide a portion of a holiday greeting behind the Mom's head, and last but not least, at the end of this tutorial, we'll even give Dad a bit more of a smile.
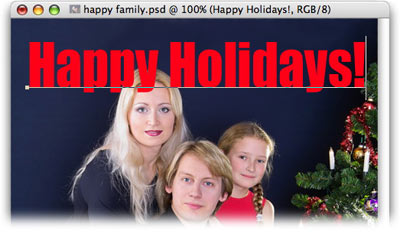
Let's create a fake holiday card by using this "happy family at Christmas" picture I snatched from iStockphoto.
Step 1: Pop open the aforementioned happy family photo and press T to select the Type tool. Type Happy Holidays, or something similar, in a nice big font in a festive color.
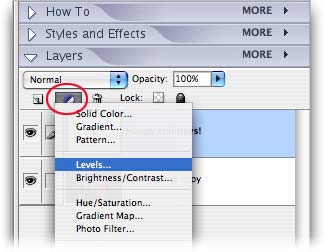
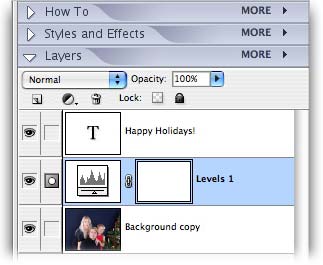
Step 2: In the layers palette, click the half black/half white circle to create an adjustment layer and select Levels. Immediately click OK in the resulting dialog box. We're only creating the Levels adjustment layer because a layer mask automatically comes with it. Oh yes, sneaky ones are we ;)
Step 3: For this layer masking trick to work, we need to put the adjustment layer beneath the text layer, so just grab it and drag downward until your layers palette looks like this:
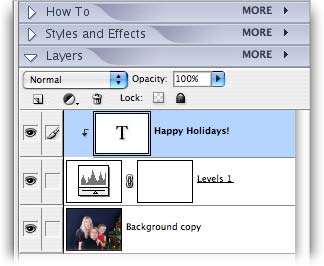
Step 4: In order to apply the layer mask to the text layer we need to clip them together. Select the text layer in the layers palette (it will turn a light shade of blue) and trot up to the Layer menu and choose Group with Previous. If you're a keyboard shortcut aficionado, just press Command + G (PC: Ctrl + G). Take a peek in the layers palette and you'll see that the two layers are indeed clipped together.
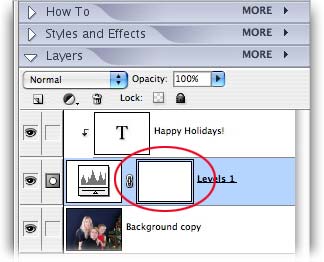
Step 5: Select the layer mask thumbnail in the layers palette (circled below in red). You'll see a tiny little border appear around it. Now we're ready to paint on it.
Step 6: In the realm of layers masks, painting with black hides and painting with white reveals. Since hiding is what we want, take a looksee in your Toolbox and make sure black is the topmost color chip. If white is on top, just press X to swap them out.

Step 7: Press B to select the Brush tool, and pick a fairly small, soft brush from the options toolbar at the top of your screen.
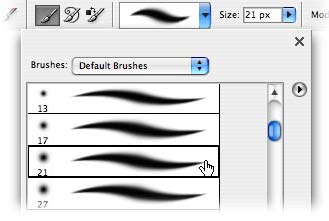
NOTE: The reason for choosing a soft brush (one with a feathered edge) as opposed to a hard brush (one with, well, a hard edge) is so the area between the letter and Mrs. Smith's hair will be softened slightly, enabling it to blend and look more realistic.
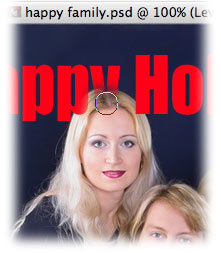
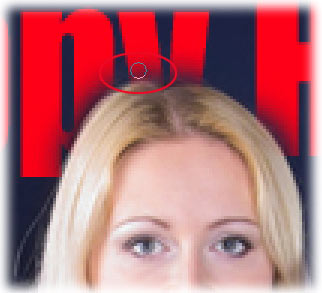
Step 8: Mouse over to the document and begin painting over the area of text you want to hide, such as the "y" in "Happy".
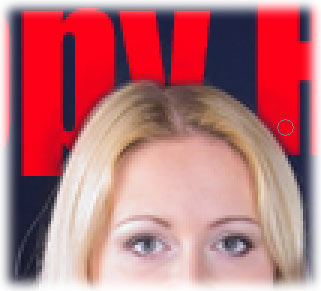
Step 9: If you hide too much of the letters, press X to swap color chips so that white is on top, and paint the area back in. For example, my brush was a little too big so I hid too much of the letters behind Mrs. Smith's head. I zoomed in by pressing Command + (PC: Ctrl + ) to better see what I was doing, pressed the left bracket, [, to go down in brush size, and I painted those bits of the letters back in, like so:
NOTE: When creating a layer mask, you'll probably do a lot of swapping color chips, thus alternating between hiding (with black) and revealing (with white) pixels. The beauty is that you're not deleting any bits of the letters, you're merely hiding them. This enables you to tweak the layer mask until you get it just right.
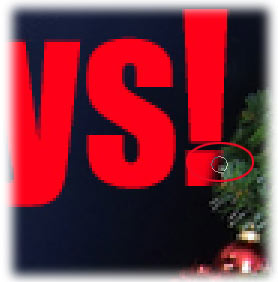
Step 10: Now that the area around Mrs. Smitih's head is fixed, I'm going to press X to swap color chips so that black is on top, so I can hide a small portion of the exclamation point where it touches the Christmas tree on the far right.
Zooming back out by pressing Command – (PC: Ctrl – ), here's what the image looks like now. I also added another layer of cursive type to personalize the image:

Last but not least, let's give Dad a bit more of a smile using a built-in filter called Liquify. This is a really handy trick to have up one's sleeve, especially when dealing with group family shots.
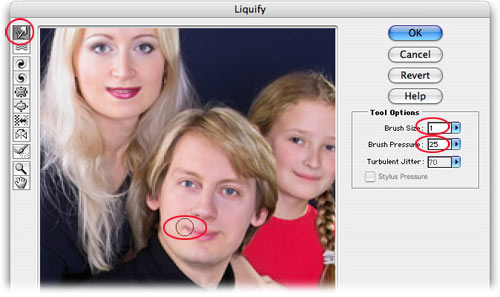
Step 11: With the photo layer selected in the layers palette, choose Filter > Distort > Liquify.
Step 12: In the resulting dialog box, lower the brush pressure and increase the brush size. That's the secret to success with this particular filter.
Step 13: Position the brush at the corners of Dad's mouth, and raise them up just a bit. Heck, while we're here, let's just give everyone a slightly bigger grin. Click OK when finished.
Here's the finished product:
I hope this quick tutorial on using a layer mask to place type behind an object illuminates all kinds of gloriously creative possibilities for your images. Something as simple as what we did today can add that extra bit of spice to an otherwise ordinary photo.
Happy holidays to you and yours :)


PhotoLesa's photography gear provided by: