
PhotoLesa's photography gear provided by:


The other night I had the immense pleasure of presenting to the Apple Dayton group, a right proper little MUG about 45 minutes outside of Cincinnati, OH. During my Elements tips & tricks session, a gentleman asked me how to stick a photo inside text. I could have *sworn* I had a tutorial on that already so I popped upon my website confidently, grinned smugly as the Elements Tutorial index loaded, and guess what? It wasn't there. Turns out, I had written one in Photoshop CS2, but not Elements. Yipes! And though the steps are the same, the screen shots differ just a hair.
So now, for my new friends in Dayton, this one's for you. Today I'm going to show you how to place text inside a photo. It's easy enough to do in Elements, though the secret lies in how you stack up the layers. Let's get started!
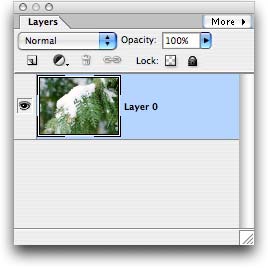
Step 1: Pop open a Soon To Be Seen Only Through Text photo in Elements, such as this beauty from iStockphoto.com (found by searching on the keyword "snowflakes" and restricting it to photographs in the search pop-up menu), and double-click the background layer so that it's editable.

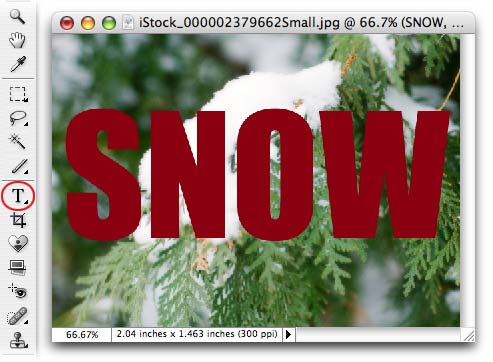
Step 2: Press T to select the Text tool. Type a word. Up in the options bar, be sure to use a nice, big and thick font like Impact so the picture has room to be seen.
NOTE: It doesn't matter a bit what color the text is. Honest.
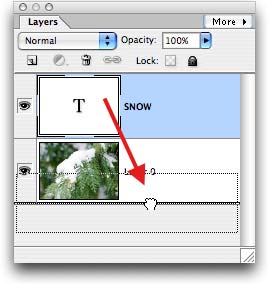
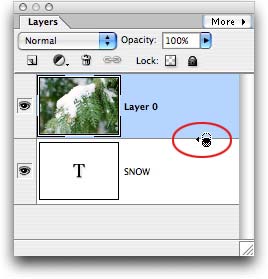
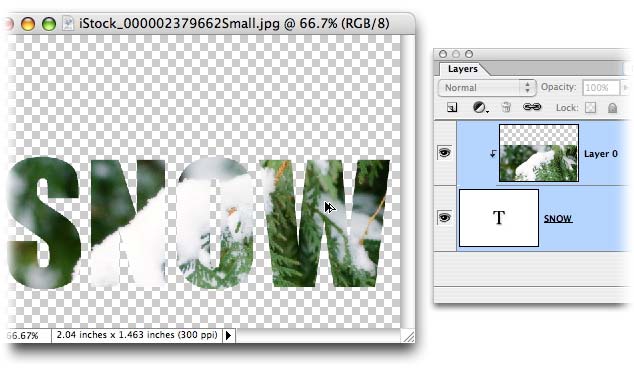
Step 3: In the Layers Palette, drag the type layer below the background layer, as shown below:

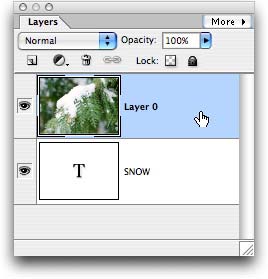
Step 4: Select the photo layer (should be at the very top of your layers stack) so that it turns light blue.

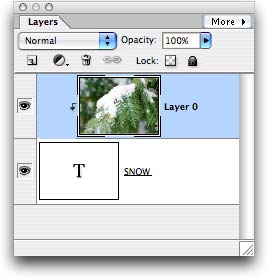
Step 5: With your mouse, hover the cursor between the two layers and press the Option key (PC: Alt). When the cursor morphs into intersecting circles, click once. This will clip both layers together.

The photo layer will actually scoot slightly to the right in the layers palette:

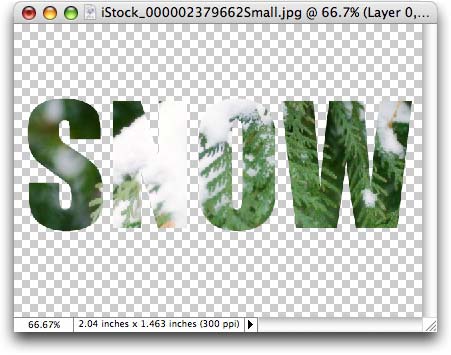
And shazam! The photo now lives inside the type.

A neat trick, but what if you want to move the photo and/or type around? A burning question indeed.
To move the photo only
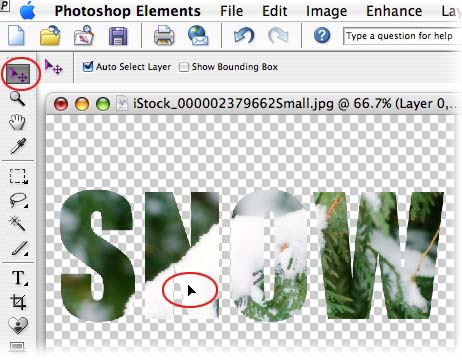
Step 6: Press V to select the Move tool, mouse over to the document and begin to move the photo around. The text stays still, but the photo will move inside of it.

To move everything
Step 7: To move everything, you have to select both layers. Select one layer, then hold the Shift key as you select the other. When they're all blue, you're free to move about the country, er, move the type with the Move tool.

Yeah it's pretty, but how do you get rid of that gray and white checkerboard behind it? Piece of cake. We should have to put something there.
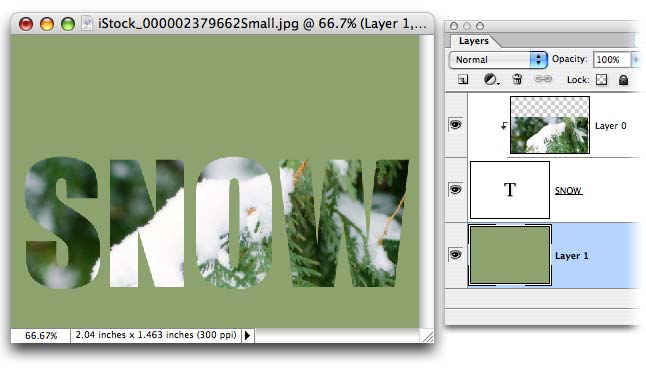
Step 8: Select the type layer (should be the bottom layer in the stack) and Command-click (PC: Right click) the new layer icon in the (circled below in red). This will create a new layer below the one currently selected (you could also just create a new layer, then drag it to the bottom of the layers stack).

Step 9: Click the foreground color chip in the main toolbox, and pick a color from the resulting Color Picker. With the new layer selected, press Option + Delete to fill the layer with color (or choose Edit > Fill from the menu at the top of your screen).

TIP: While the Color Picker is open, mouse over to the photo area and your cursor will turn into an Eyedropper. Click anywhere in the photo to snag a color from the photo itself.
And there you have it! A simple, yet timeless, effect that you can get lots of mileage from. Below I've turned off the color layer and tacked a drop shadow onto the type layer:

Until next week, may the creative force be with you all! And keep a watch out for any of that fluffy white stuff floating around! I hope I get to see some soon :)


PhotoLesa's photography gear provided by: