
PhotoLesa's photography gear provided by:


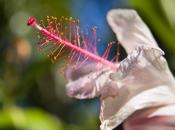


Recently, a weekend trip to Atlanta, GA took my husband and I through Chattanooga, TN. After gleefully following the touristy signs leading to the actual Chattanooga Choo-Choo train, we found ourselves standing in front of the little engine that could. Unfortunately, it was encircled by row and after row of the type of cheese-ball souvenir shops becoming all too common in America these days. Ugh.
Deflated, we succumbed to poking $2 into a photo machine parked not five steps from the train. Instead of spitting out the usual strip of goofy photo poses, it proposed to make a sketch of our photo. An interesting twist! And though we were *far* from looking our freshest, we ended up with a visually pleasing sketch worth keeping.
That got me thinking of how mundane images, even those with bad lighting, skin blemishes, etc. can be saved by using this technique in Photoshop. So today I'm going to show you how, using a photo of a mother and daughter (from iStockphoto.com) with less than optimal lighting. Yes we could fix it in Photoshop, but let's say we're going for a more nostalgic look and feel. Something a little different; something special.
The first step is to zap all color from the image. Though this can be done in several ways (see Goin' Grayscale), I'll use my own personal favorite method.
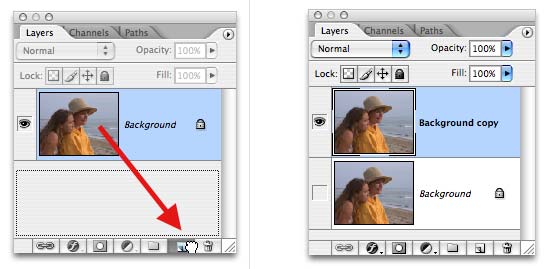
Step 1: Pop open a photo and immediately drag the Background layer to the New Layer icon at the bottom of the Layers Palette (or just press Command + J on a Mac, Ctrl + J on a PC). This gives us a backup copy in case we mess up. Click the visibility eyeball of the original layer to turn it off.
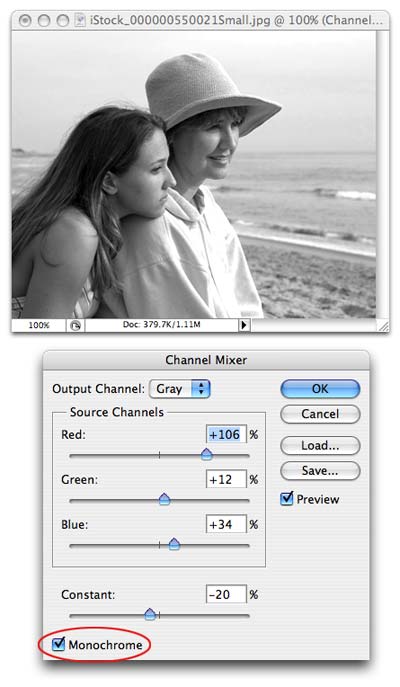
Step 2: Choose Image > Adjustments > Channel Mixer. In the resulting dialog box, click the Monochrome button at the bottom, then tweak the various sliders until you get a nice black and white image with a fair amount of contrast. To brighten up this image, I boosted the red, green, and blue channels, and decreased the Constant (rather, overall brightness). Click OK when finished.
Step 3: Choose Filter > Stylize > Find Edges. Don't panic when your image immediately turns into something rather freakish, we'll fix it in the next step.
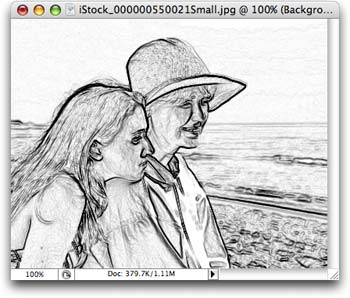
Step 4: Choose Edit > Fade Find Edges. This will allow us to back off the effects of the Find Edges filter. Beware: This command is only available *immediately* after running the filter, else it'll be grayed out.
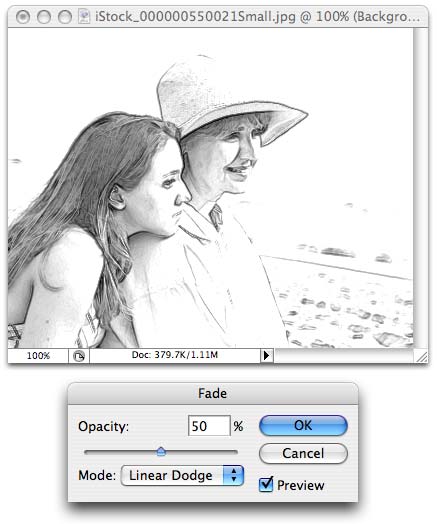
Step 5: In the resulting dialog box, lower the Opacity to about 50% (this will vary by image), and change the Blend Mode to Linear Dodge. This gives us a nice soft sketch feel. TIP: Try Hard Mix for a darker sketch.
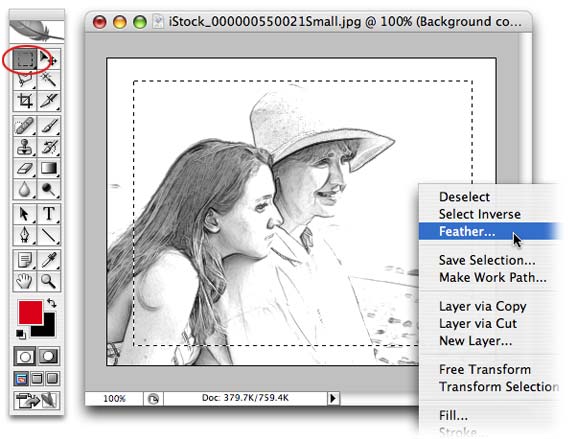
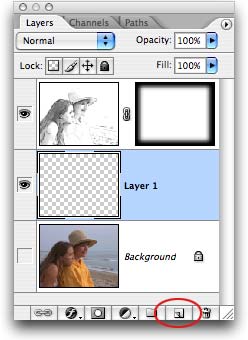
Step 6: Press M to select the rectangular marquee selection tool and draw a selection around the image about 1/4 way in, as shown below. Control click (PC: Right click) within the selected area (inside the marching ants) to bring up the shortcut menu and choose Feather. Enter 10 pixels and press OK.
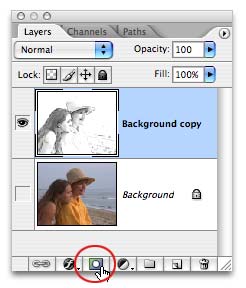
Step 7: Instead of deleting the edges of the image, we'll hide them with a layer mask by clicking the circle within a square icon at the bottom of the layers palette (circled below in red).
Step 8: Command click (PC: Ctrl click) the new layer icon at the bottom of the layers palette to add a blank layer beneath the one currently selected.
Step 9: Press D to set your color chips to the default of black and white, then press X until white is perched on top. Fill the layer with white by pressing Option + Delete (PC: Alt + Delete).

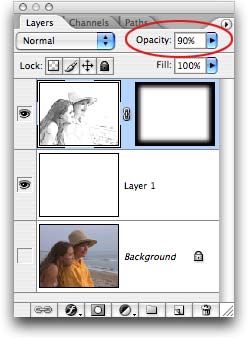
Step 10: Lighten the sketch slightly by reducing the Opacity of the sketch layer in the Layers Palette.
Sit back and gaze with awe upon our new creation:
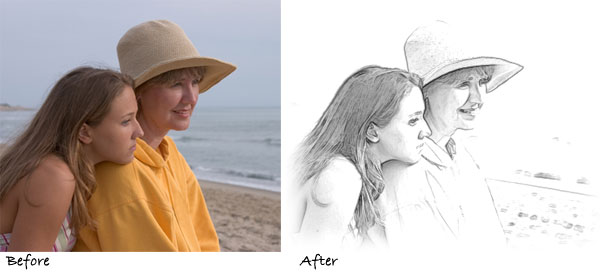
As you can see, this technique can evoke a completely different feel and do wonders to rescue a sub-par image. Until next week, may the Photoshop force be with you!


PhotoLesa's photography gear provided by: