
PhotoLesa's photography gear provided by:


Both Photoshop and Photoshop Elements come with some pretty cool brushes. Today I'm going to show you how to get creative and use them to paint in a photo, or rather, give it painted edges. The technique is very simple, we'll use Photoshop Elements' Group with Previous command to create a layer mask. It's also a non-destructive process, meaning we'll harm nary a pixel in the process.
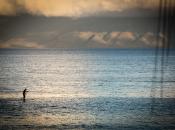
With Macworld right around the corner (my favorite time of year!), I thought it appropriate to use this box of crabs I shot while strolling around Fisherman's Wharf last January.
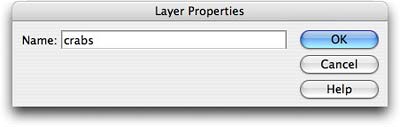
Step 1: Open a Soon To Have Painted Edges photo and double click the Background layer to make it editable. Give it a name if you wish and press OK.
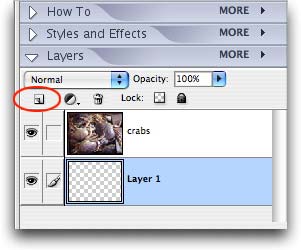
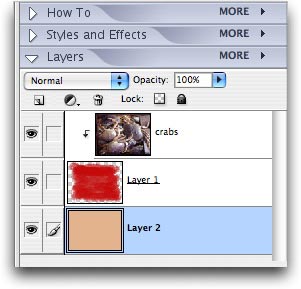
Step 2: Add a new layer below the photo by clicking the little icon at the top left of the layers palette (circled in red below). Drag the new layer beneath the crab layer. This layer will soon become a mask, so it must live on bottom of the layers stack for this trick to work.
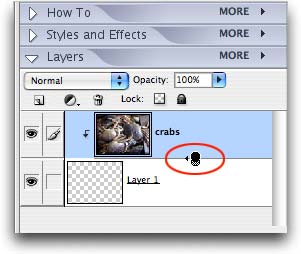
Step 3: Select the photo layer and from the Layers menu at the top of your screen, choose Group with Previous (Mac: Command G, PC: Control G). NOTE: You can also position your cursor on the line between the two layers, press the Option key (PC: Alt), and click once when the cursor morphs into an interlocking circle. Your Layers Palette should now look like this:
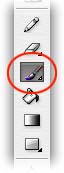
Step 4: Back in the Layers Palette, select the new blank layer at the bottom and press B to select the Brush tool.
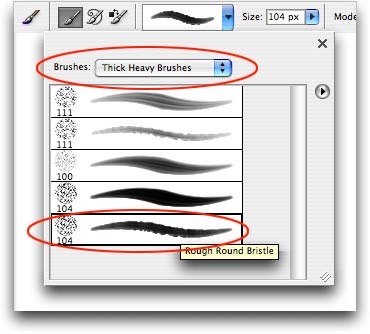
Step 5: From the options toolbar at the top of your screen, click the pop-up brush menu, choose Thick Heavy Brushes and pick the Rough Round Bristle brush.
TIP: Press the left bracket, [, to decrease brush size, and the right bracket, ], to increase brush size.
Step 6: Mouse over to your document and paint in the photo.
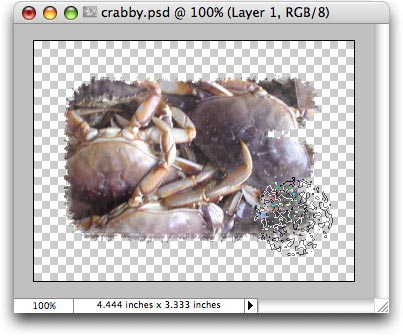
NOTE: See how the photo only shows through the area we painted? That's because it's now a mask. It makes *no* difference what color your color chips are because we're creating a Clipping Group, which means Elements is going to let our photo show through whatever *shape* we create, be that the shape of letters (as in type), a square, circle, a big curvy blob, etc.
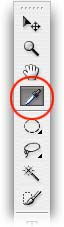
Step 7: To make the edges more visible, I added a another new layer and dragged it to the bottom of my layers stack like we did in Step 2 above. Select the Eyedropper tool and snatch a nice color from your photo. This will be your new background. Fill the new layer with said color by pressing Option + Delete (PC: Alt + Delete).
This is what my layers palette looks like now:
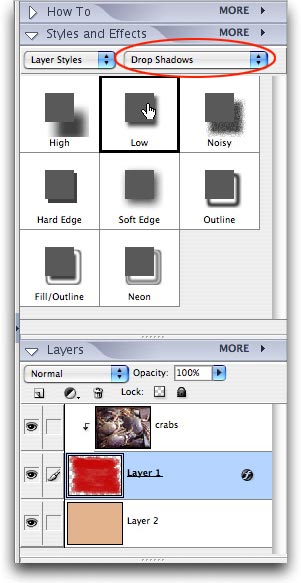
Tack on a drop shadow for a bit more visual interest and to further accent your creatively painted edges.
Step 8: Select the mask layer in your layers palette, click the Styles and Effects tab, choose Drop Shadows, and click Low. You'll see a little cursive "f" appear next to the mask layer in your layers palette, as shown below.
Here are the finished crabs:
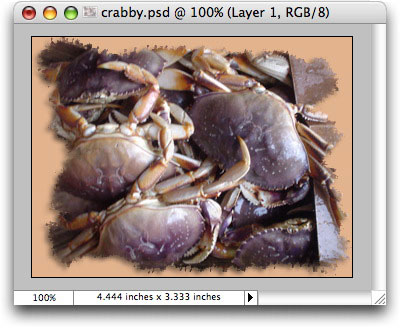
As you can see, this is a fun technique that adds creativity to a photo quickly. Be sure to experiment with different brush categories and brushes for just the right effect.


PhotoLesa's photography gear provided by: