
PhotoLesa's photography gear provided by:


Grungy, ornamental, highly-detailed vector illustrations are all the rage these days. Graphic designers are plunking them onto any and everything, and using them to spice up backgrounds, dress up the edges, and lead a viewer's eye. But it just so happens that these little works of art are also a *fantastic* option for photo framing. However, if you're not an illustrator or a high falutin' designer, the words "vector" and "illustration" probably sent chills down your spine.
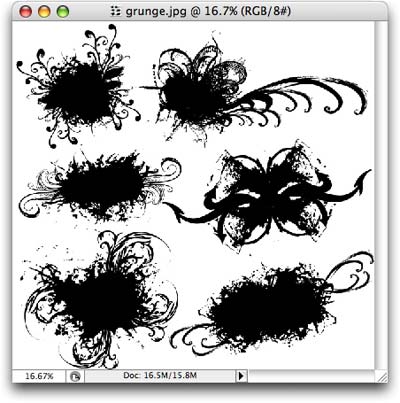
Never fear, for in my quest to avoid Photo Edge Boredom, I've whipped up a tutorial on how to use these little jewels to frame a photo without so much as launching Illustrator or casting a glance toward the evil Pen Tool. And just in case you have *no* idea what I'm talking about, take a peek at the swirling, ornamental elements in the following designs. These are the type of vector grunge, ornamental illustrations I'm talking about:

To start out you'll need a vector file that you've either created (shudder!) or purchased (yay!) from a stock company. The vector file can contain many illustrations or a single one. I found the following file on iStockphoto by searching the illustration database for "frame". TIP: Other good search terms are for similiar art are ornamental, background, border, and grunge.
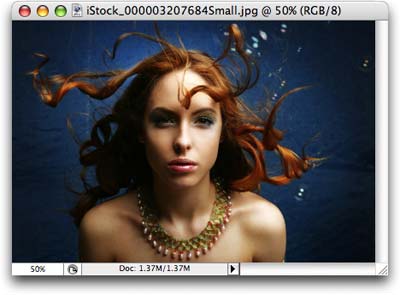
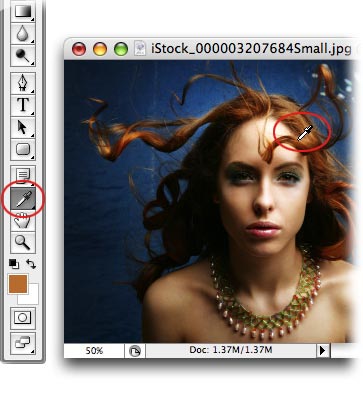
Step 1: Pop open the photo and double-click the background layer to make it editable. Create a new layer below the layer currently selected by pressing Command-clicking (PC: Ctrl-clicking) the New Layer icon at the bottom of the Layers palette.
Step 2: Press I to select the Eyedropper Tool and click once within the document to pick up a color from the image. This color will become the background for the soon-to-be-framed image. I picked a light rust color from her hair.
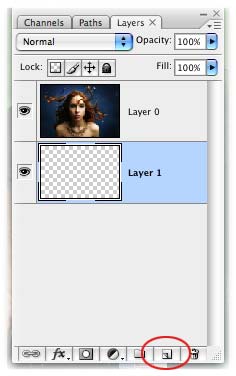
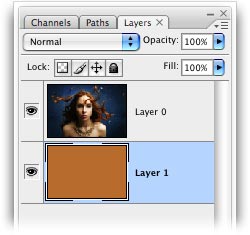
Step 3: Press Option + Delete (PC: Alt + Backspace) to fill the new layer with that color. Here's what my Layers palette looks like now:
Step 4: Select the photo layer in the Layers palette (it should turn light blue), then choose File > Place. Selecting the photo layer first just ensures that the illustration layer we're about to place will be at the very top of the layers stack.

Step 5: Navigate to the EPS file on your hard drive and press Place. NOTE: Make sure you pick the EPS file as it's the only format that can be enlarged with zero quality loss.
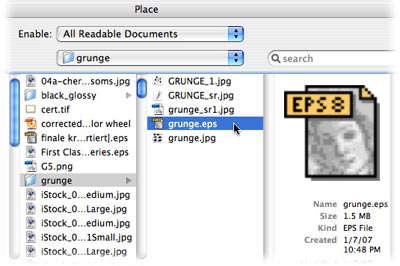
By placing an EPS file in this manner, you've created a Smart Object. This means that you can resize the object as much as you want--now or later--with zero quality loss and without having to replace the original. This is handy because you won't know exactly how big the vector needs to be to frame the photo, and you'll want the ability to tweak it without the edges becoming rough and pixelated.
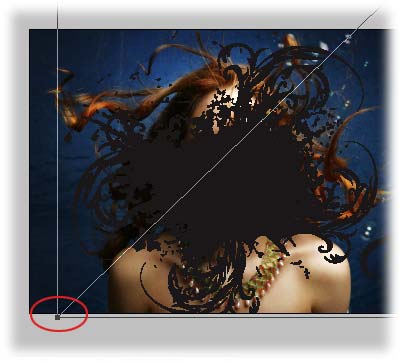
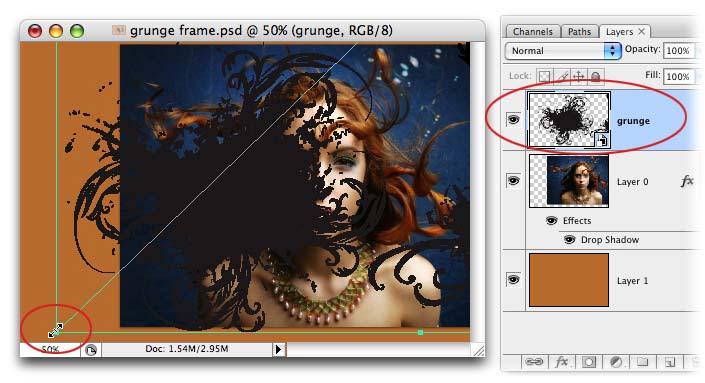
Step 6: When the vector layer first appears, it'll have resizing handles at all four corners. Grab any of them while holding the Shift + Option keys (PC: Shift + Alt) and drag outward to enlarge the vector element until it's big enough to hold the photo. If your frame is too big, just drag inward to make it smaller.
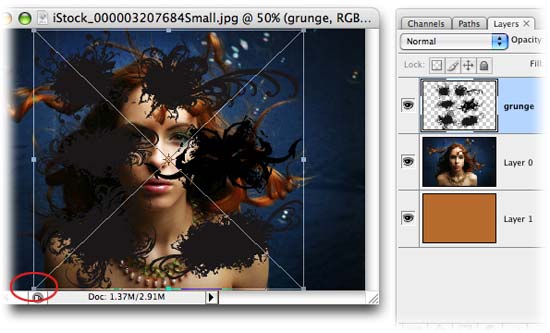
Click within the object to move it around on the photo, and continue resizing it, then press Return when finished.
Since I want flexibility in where I place the photo within the frame, I don't want to delete any of the original photo's pixels. Instead, I'll use the vector shape to create a layer mask so I can hide the photo's edges.
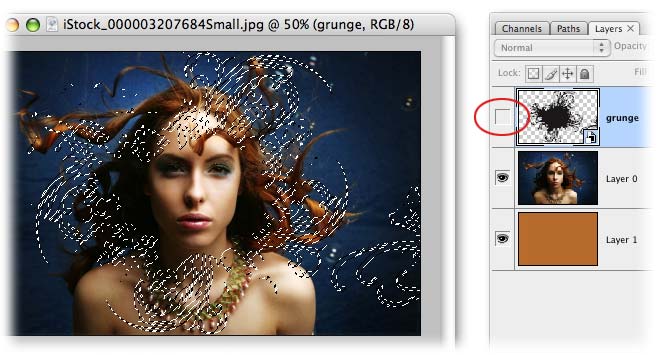
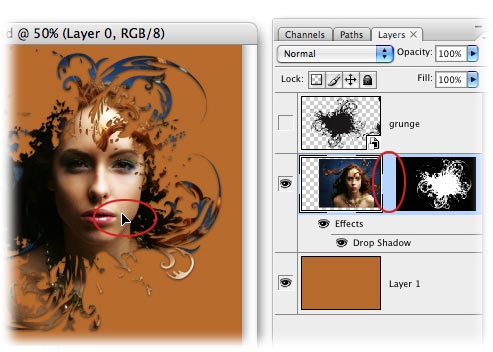
Step 8: When you get the vector object just right, Command-click (PC: Ctrl-click) its layer thumbnail in the Layers palette to create a selection (you'll see marching selection ants appear). Go ahead and turn off the Smart Object's visibility eyeball in the Layers palette as well (circled below in red). You won't need it again unless you want to resize the frame.
Step 9: Click once to select the photo layer and add a Layer Mask by clicking the half black/half white circle at the bottom of the Layers palette.

Step 10: Press V to grab the Move Tool and move the photo/frame layer anywhere on the document you'd like.
At this point, you're basically finished. However, if you're game, there are a few more things you can do.
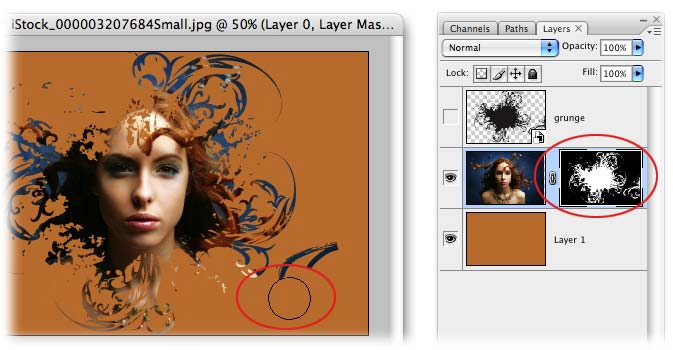
If the vector file you've used has many illustrations in it, you may want to erase some stuff. This is easily done by editing the mask.
Step 10: Press B to select the Brush Tool and make sure that the top color chip is set to black in the Tools palette. Click once to select the layer mask in the Layers palette and paint the bits you want to delete. If you mess up and erase too much, press the X key so that white is the top color chip, then paint those bits back in.
By default, the photo and layer mask will be locked together, so that when one is moved the other follows. If you want to move the photo inside the mask, or vice versa, you'll need to unlock them first.
Step 11: Click the tiny chainlink icon between the photo and layer mask thumbnails. Once it's gone, the photo or the mask can be moved independently. Just click the thumbnail of the item you want to move, press V to select the Move Tool and stick it wherever you'd like.
If the illustration isn't the size you want, you can delete the layer mask and have another go at it. Herein lies the beauty of placing the illustration as a Smart Object!
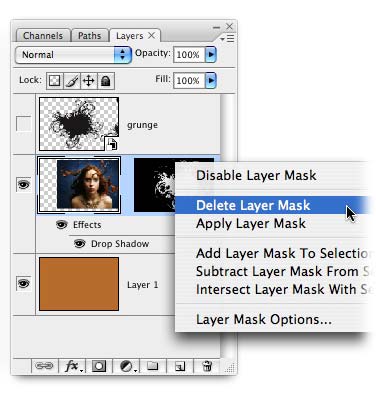
Step 12: Control-click (PC: Right-click) the layer mask thumbnail and choose Delete Layer Mask from the pop-up menu.
Step 13: Select the Smart Object layer and press Command + T (PC: Ctrl + T) to invoke Free Transform. Grab any corner handle like we did earlier to resize the object. Press Return when finished. Follow the steps above to create a selection of the object, and add a layer mask on the photo layer.
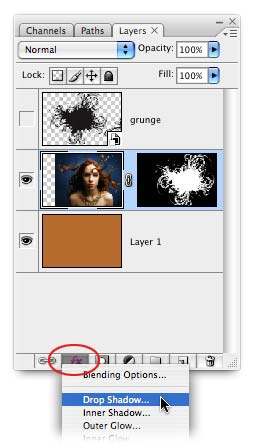
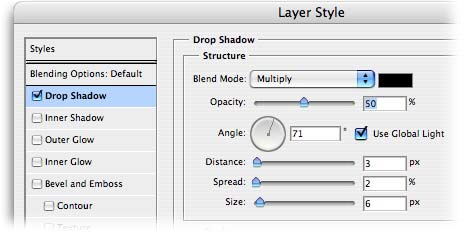
Step 14: Last but not least, give your creation some depth by tacking on a drop shadow using the Layer Styles icon at the bottom of the Layers palette.
Step 15: Lower the Opacity of the shadow to about 50% and use your mouse to position the shadow wherever you'd like (just drag around on the document and you'll see the shadow move with your cursor).
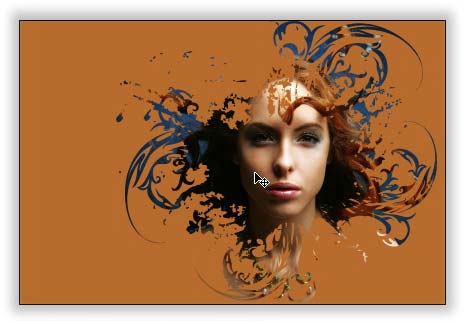
Here's the final product:
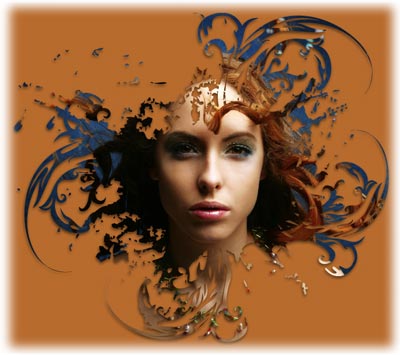
So many photo frame ideas, so little time! The creative possibilities with this technique are endless.
As a bonus, I've also included the following method for those of you who are using older versions Photoshop (those without Smart Objects).
Step 1: Open the vector in Photoshop and press W to grab the Magic Wand. Click once within the black area to select the framing element and press Command + C (PC: Ctrl + C) to copy it.
Step 2: Back in the photo document, Option click the circle within a square icon to create a layer mask filled with black.
Step 3: Option click the mask icon (PC: Alt click) and your image should disappear from view. This is because you’re viewing the mask that you haven’t put anything into yet, and it should be totally black. Paste in your new texture by pressing Command + V (PC: Ctrl + V).
Step 4: Resize the framing element if you need to by pressing Command + T (PC: Ctrl + T) while the marching ants are still active. Press Return when you’re finished resizing.
Step 5: With white as the foreground color chip, press Option + Delete (PC: Alt + Delete) to fill it with white.
Step 6: Click the photo thumbnail in the Layers Palette and the image will return through the frame. If you need to reposition either one, unlock the layer mask by clicking the little chain link icon between the image thumbnail and the mask thumbnail. Press M to select the Move Tool and move the frame as needed.
Step 7: Add a drop shadow and a new background below the photo layer. Voila! Marvel at your creativity :)


PhotoLesa's photography gear provided by: