
PhotoLesa's photography gear provided by:


Poor little Levels. It sits patiently in the adjustment layer pop-up menu, waiting to serve you. Quietly it watches you struggling to color correct photos. Flinching only inwardly, it is deeply saddened by your ignorance of its powers. Indeed, there are few who are wise to its color correction prowess.
I dare say it's time to give Levels a little lovin' :)
Let's continue on with our pretty kitty, Chloe, whose eyes we fixed in another tutorial. We're going to use Levels to color correct the photo, thus bringing out the regal beauty of this fine feline.
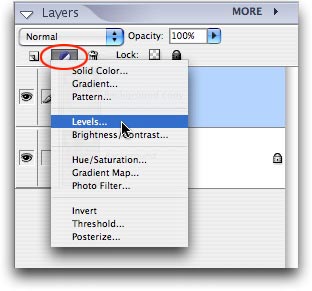
Step 1: Hop over to the layers palette and click once on the little half black/half white circle to create an adjustment layer. Choose Levels from the pop-up menu.
You'll be greeted with a mountainous graph called a Histogram. This is a visual representation of the information your photo contains. See the little sliders underneath the mountain? We want to move those closer to the mountain's edge because that's where the data lives. We'll do this in each of the three color channels: red, green, and blue.
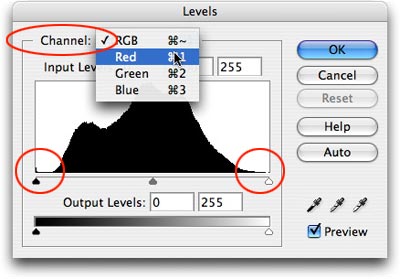
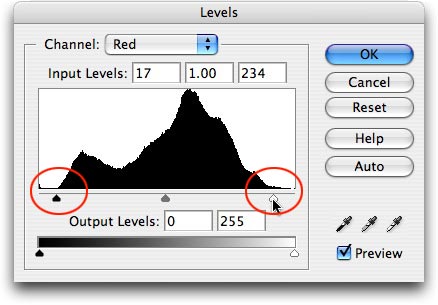
Step 2: Choose Red from the Channel pop-up menu at the top of the Levels dialog box, as shown below. Grab the black slider on the left and drag it to the edge of the data. Do the same with the white slider at the far right. Repeat the process for each color channel. TIP: To start over at any point in the process, just click the Reset button.
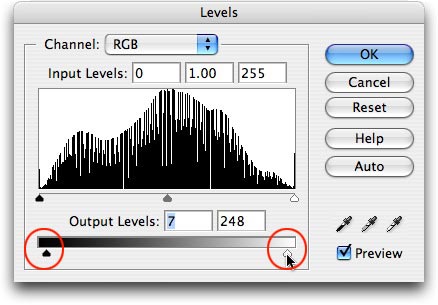
Step 3: Choose RGB from the Channel pop-up menu. You'll notice the historgram has changed significantly. Let's tweak the brightness of the photo with the Output Levels sliders at the bottom. Bring in both the black (shadows) and the white (highlights) sliders just a touch. Experiment with these sliders until you get the right level of brightness and contrast. Click OK when finished.
The beauty of using an adjustment layer is that we haven't harmed the original image. We also have the power to see a before and after view by toggling the visibility eyeball off and on in the layers palette, *and* we can adjust those levels even more by double-clicking the adjustment layer. Finally, we could start completely over by trashing the layer.
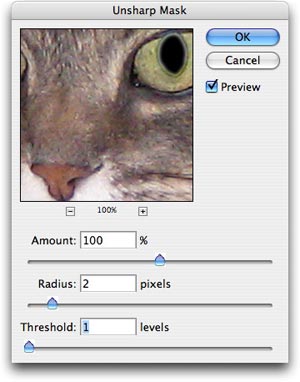
Step 4: Let's sharpen Chloe up with a bit. Click on the Chloe layer in the layers palette, and choose Filter > Sharpen > Unsharp Mask. Enter a Radius of 2 and a Threshold of 1, then click OK.
Step 5: Last but not least, let's get rid of the reddish cast. Click the half black/half white circle in the layers palette and create a Hue/Saturation adjustment layer. Choose Reds in the Edit menu and pull the saturation slider to the left just a bit. Click OK.

Here's our before and after, as the photo was originally shot before we fixed her eyes:
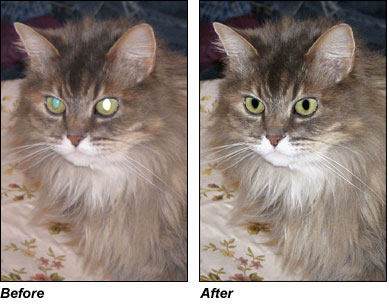
Now that's a much happier kitty. Until next time, have fun livin' the Levels life ;)


PhotoLesa's photography gear provided by: