
PhotoLesa's photography gear provided by:


Nothing says I love you like time spent doctoring a friend or loved one's photo... especially near Halloween! Take the photo of this innocent girl plucked from the bowels of iStockphoto.com, for example. It's a good thing I've no clue who she is because I'm about to make her look really... well, odd.
Today I'm going to share with you a few fun techniques that are sure to win you friends and help you influence people. They're time honored tricks, like how to blacken teeth, how to redden eyes, and how to create green skin. You know, basic stuff we all need to know. Here we go!
Step 1: Pop open the victim's photo and immediately do your best Bela Lugossi impression (you know, rub your hands together fiendishly and mutter "Muhahahahahaha").
We'll start with the easiest bit first and progress from there. If you've been reading my tutorials for any length of time, you'll know I'm a big fan of the Hue/Saturation adjustment layer. That's my method of choice anytime I want to alter the color of the original image (either in whole or in part) without harming any pixels (meaning I can change my mind at any time).
Step 2: Select the Magnetic Lasso tool and draw a selection around The Tooth of Choice. Click once to set a beginning anchor point, then move the cursor around the tooth. If the tooth is well defined, Elements will do a bang-up job of following its edges. However, if Elements starts to go wondering off in another direction, just keep clicking to set more anchor points.
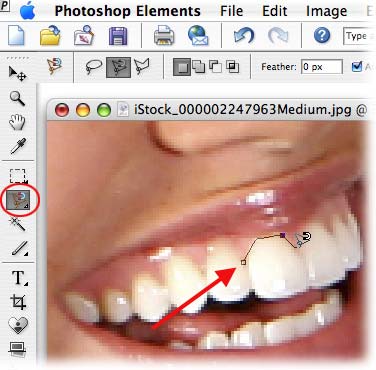
TIP: If Elements sets a stray point, hover over that point and press Delete. It'll also help to zoom in to see what you're doing by pressing Command + (PC: Ctrl+).
Complete the selection by hovering over the original anchor point and clicking once, as shown in the screen shot below.
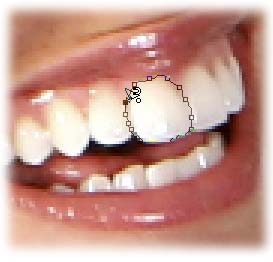
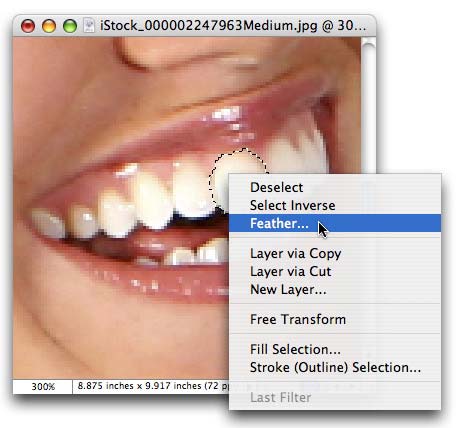
Step 3: You should now have marching ants around the tooth of choice. Control click (PC: Right click) within the selection and choose Feather from the contextual menu. Enter 1 pixel and click OK. This will help the black tooth blend in with the other white ones. It's all in the details ;)
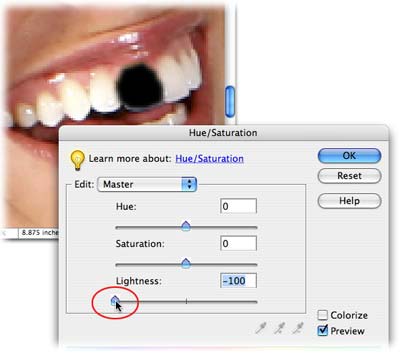
Step 4: Click the half white/half black circle at the top of the Layers Palette to create and adjustment layer and choose Hue/Saturation.
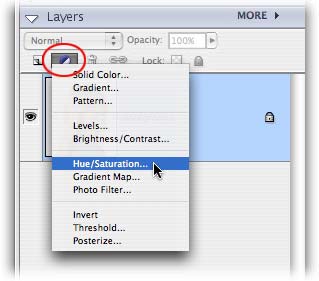
Step 5: Drag the Lightness slider all the way left and click OK.
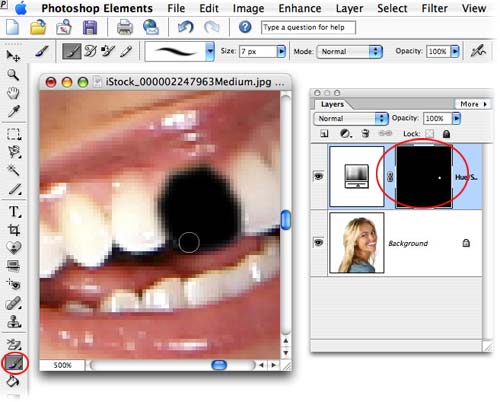
Step 6: If the selection wasn't perfect, and you didn't get the whole tooth, just click the Layer Mask (circled below in red), press B to select the Brush tool and with white as the foreground color chip in the main Toolbox, paint the remaining portion of that tooth.
If you selected too much of the tooth to begin with and need to remove some black, press X to swap color chips until black is on top and paint out your mistake.
Since we created the black effect with a Hue/Saturation adjustment layer, painting with black hides the effect, which brings the original white color back, and painting with white reveals the effect, which brings on the black.
Moving on to ever greater heights of mischief, let's use Elements' Replace Color brush to turn this girl's eyes to bright red (actually, this trick is great for changing any eye color to, well, any eye color).
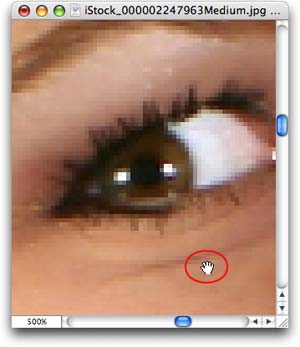
Step 7: While still zoomed into the photo, press the Spacebar and with the hand cursor, move the document around till you can see one of her eyes.
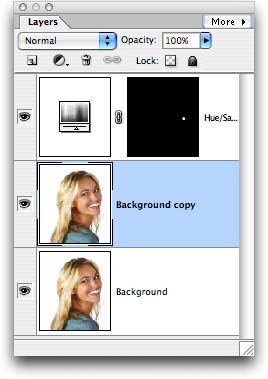
Step 8: Select the original layer in the Layers Palette and press Command + J (PC: Ctrl + J) to duplicate it.
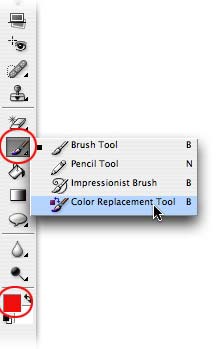
Step 9: Select the Color Replacement brush, and choose a nice bright red as the foreground color chip, as shown below:
Step 10: Make the brush size equal to the size of the iris. Since this tool uses a brush cursor, you can reduce the brush size by pressing the left bracket, [, or increase it pressing the right bracket, ]. Click or paint the new color by placing the cross hair (tiny little plus sign) of the brush on the color you wish to replace.

TIP: If the red goes outside the iris area, select the Eraser tool and paint that bit out. Since we're working on the background layer copy, anything we erase allows the original photo to show through. Here's where we are now:
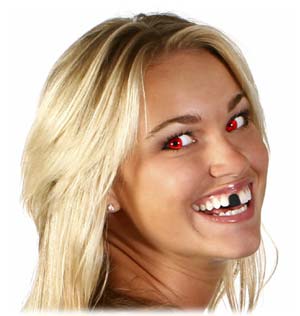
Respectable, yes, though we can do more.
Last but not least, we can turn this girl's skin green, something akin to a right proper Orion Slave Girl. We'll use the exact same method found in Colorizing a Grayscale Image so I won't bore you with all the details here (though please email me if you have any trouble following along).
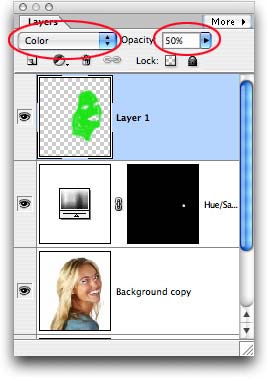
Suffice it to say I created a new blank layer--above all the other layers--on which my green paint shall live, and most importantly, I changed its blend mode to Color (if you forget this step, you'll see solid green when you paint, instead of the girl). I picked a nice, bright green as my foreground color chip and pressed B to select the Brush tool. With a fairly decent sized brush, I painted the skin area. If you mess up, just zap that area with the Eraser tool.

Last but not least, to make the effect slightly more realistic, I lowered the opacity of the green paint layer to 50%, and that of the black tooth adjustment layer to about 80%.
Here's the final result:
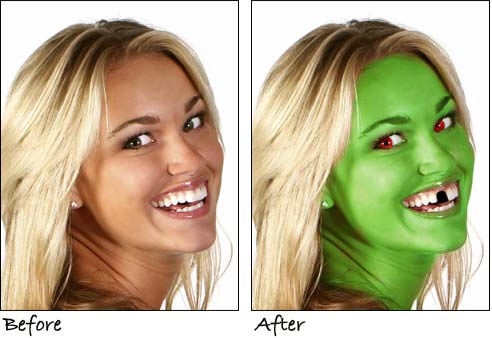
The only thing left to do is lean back and grin at the mischief you've just wrought.
Happy witching day!


PhotoLesa's photography gear provided by: