
PhotoLesa's photography gear provided by:


I'm feeling pretty feisty today: I'm going to try to convince you to use *several* steps to perform a technique that technically requires only one. Impossible you say? Could be, but I'm gonna give it a shot.
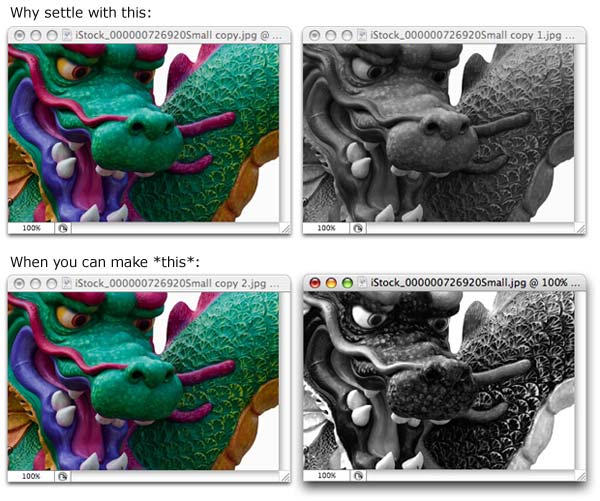
The technique I'm talking about is converting a color image into grayscale. Yes you could simply choose Image > Mode > Grayscale and be done with it; but, what's that my Daddy always said? "You get what you pay for, Lesa Kaye!"
Ah yes. The results of such a one-step conversion will be less than inspiring. However, with just a few more steps you can produce an image that has far more contrast; something even Ansel Adams might gaze upon with interest. Allow me to illustrate.
The trick is to start out with a color image and use Channels to produce a truly awe-inspiring grayscale image. And as with most things, there are a couple of ways to do it, so I'll show you both.
This first method is for non-tweakers. If you have no desire (or time) to tweak an image, fine-tuning every last detail to get it just right, this method is for you.
Step 1: Open an image and cycle through the different color channels by pressing Command 1, 2, 3, and 4, for C, M, Y, K respectively (PC: Ctrl 1, 2, 3, or 4). If you're working in RGB mode, you'll have three channels.
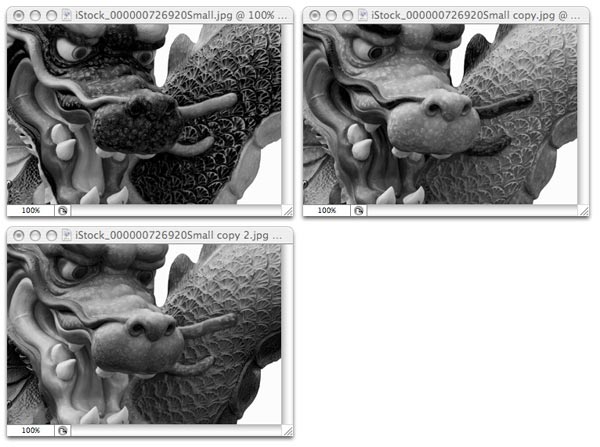
Using this super cool dragon image snatched from iStockphoto (where I really do always find the perfect image for every project), here's what we see in RGB mode. From left to right the channels are red and blue, then green on the second row:
And here's what we see in CMYK mode. From left to right the channels are cyan, magenta, then yellow and black on the second row:
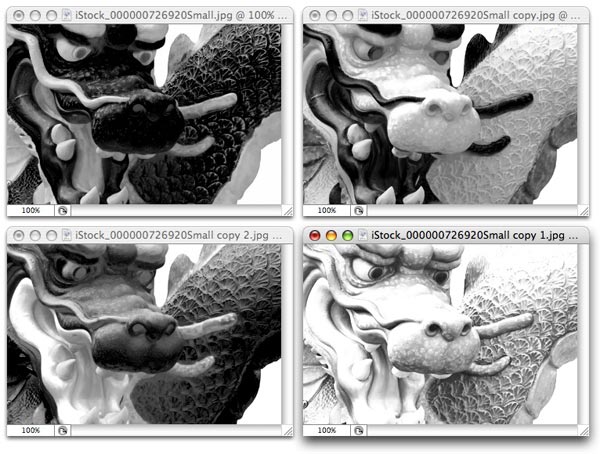
Amazing how many looks and moods can be evoked through the contrast differences revealed in each channel. We go from a fairly benign dragon to super evil dragon in a hurry.
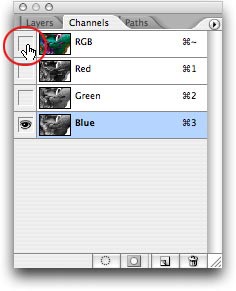
TIP: If you want to see the full color version again, just select the Channels tab in the Layers Palette, and click the RGB (or CMYK) channel at the very top, as shown below. Or just press Command ~ (PC: Ctrl ~).
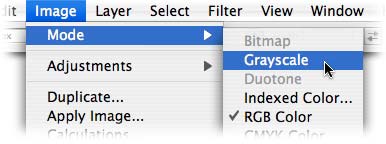
Step 2: If you're printing the image, and/or exporting it as a TIFF for inclusion in a newsletter or something, you can hop up to the Image menu and choose Mode > Grayscale. Click Yes when you’re asked if you want to toss out the other channels. This action will zap all color from the image based on the channel you currently have selected, and trash the data from the others.
NOTE: You don't *have* to change the color mode to Grayscale. If you're saving the image out for the web, for example, you can play with it in whatever color mode it began life in, with the unwanted channels turned off.
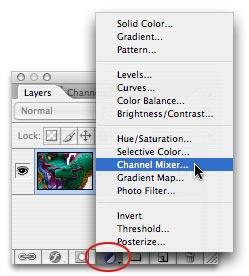
Step 1: Pop open the image and immediately click the half black/half white circle at the bottom of the Layers Palette. Choose Channel Mixer.
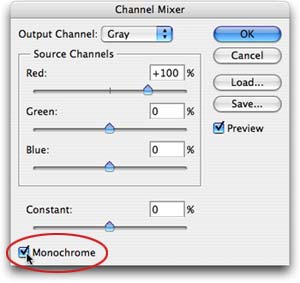
Step 2: Turn on the Monochrome option located at the bottom left of the resulting dialog box.
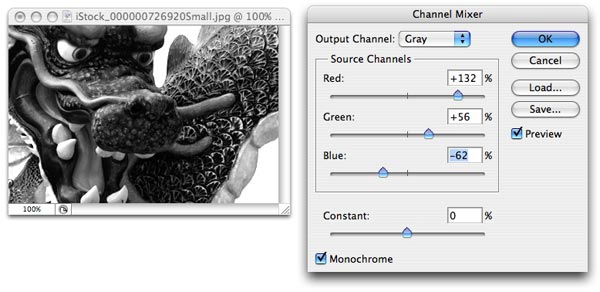
Step 3: Tweak the Source Channels sliders to your hearts content. By increasing the Red and Green channels, and decreasing the blue, I've created a truly menacing creature.
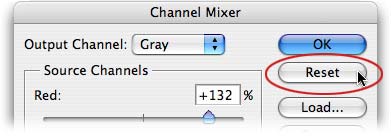
TIP: If you mess up or want to start over, just press the Option key (PC: Alt). The Cancel button will turn into a Reset button, as shown below. This works in *any* dialog box :)
The beauty of using an adjustment layer is that even after you click OK in the Channel Mixer dialog box, you can open it *back* up and tweak your tweaks by double-clicking the adjustment layer in the Layers Palette. Sweet!
That's all for today, folks. I hope you've enjoyed the tutorial, and that I've convinced you to expend the extra effort the next time you create a grayscale image. I think you'll be pleased with the results.


PhotoLesa's photography gear provided by: