
PhotoLesa's photography gear provided by:


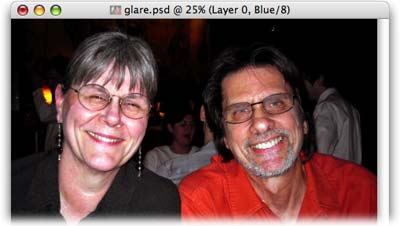
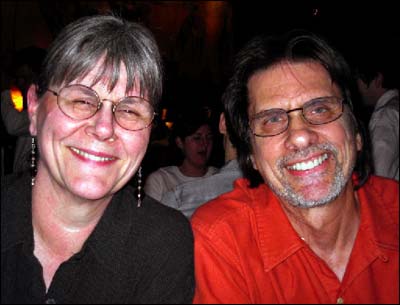
During a recent visit to Dallas, TX I had the opportunity to take my favorite college instructors from the Art Institute out to a nice dinner. I got a great picture of my information design instructor, Ester Kibby (whom I still affectionately call Ms. Kibby) and my very first HTML instructor (now a CSS wizard) and long-time friend, Wayne Batchelder.
But drats! The dreaded eyeglass glare strikes again. Unfortunately, there is no quick fix for lens glare and if you think about it for a moment, it's easy to understand why: An eyeglass glare is an overexposure, pure and simple. The reason there's no way to fix the problem is that there is literally nothing to fix--there is no information there; nary a pixel. Zip. Zilch. Nada. That's why fixing the glare is challenging, for the fix literally requires creating something from nothing.
The good news is that the Clone Stamp Tool is perfect for the job. For with it we can copy pixels from one area of the photo into the nothingness that is the glare. The bad news is that it takes time, and depending upon how big and bad the glare is, lots of it.
Because we're about to embark upon some pretty serious detail work, let's spend a few moments getting our nests built (aka arranging our workspace). WARNING WILL ROBINSON: Do not and I repeat do not size your image down. We need the maximum amount of pixels available to pull this off so save the cropping and downsizing until later.
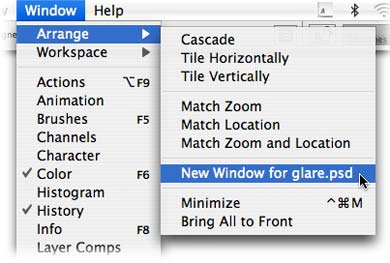
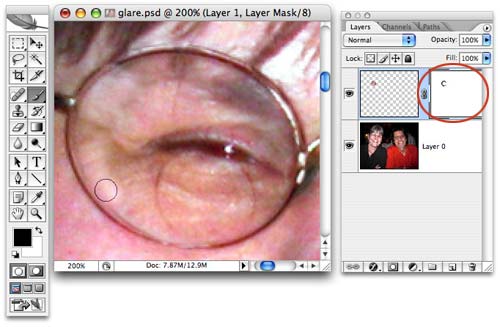
Step 1: Pop open the offending photo and choose Window > Arrange > New Window for [insert document name].
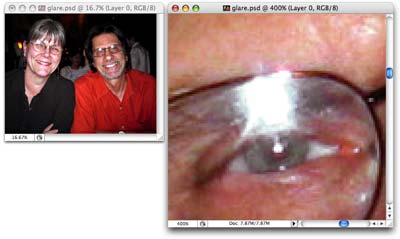
Zoom way into one window and leave the other one at about roughly the size you want it to be when you're finished. For example, I'm emailing the final image so it'll end up being around 320 pixels wide. This way I can see what effect my detail work is having on the photo at actual size as I work. This is what my workspace looks like:
The Clone Stamp Tool works by sampling one area of the photo which you use to paint onto another. To do so, we need to tell Photoshop where that sample area is, then mouse over to the area we want to fill in.
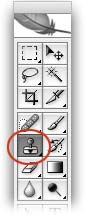
Step 2: Press S to select the Clone Stamp Tool.
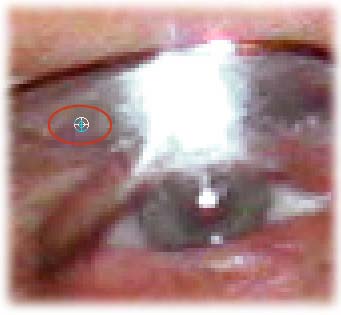
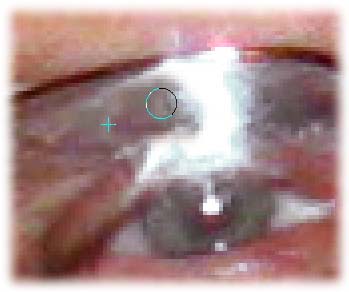
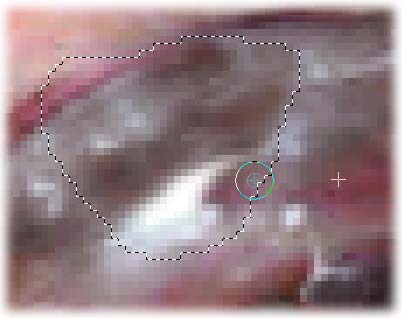
Mouse over to the document and press the Option key (PC: Alt) and click an area near the glare to sample it, like so:
Step 3: Mouse over to the glare area begin to gently paint. You may want to play around with the brush size and you'll want to do a combination of single clicks and short little drags. TIP: Cycle down in brush size by pressing the left bracket, [, and cycle up in brush size by pressing the right bracket, ].
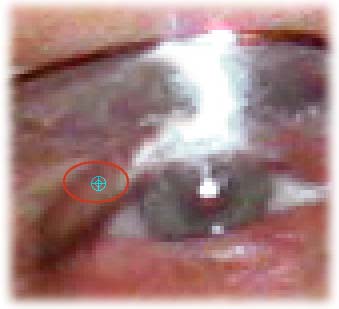
That's the process folks. To make it look real, you'll want to keep resampling other areas near the area you're fixing, and keep changing brush sizes. For example, to fix the eyelid area, I sampled a bit of the lid itself to keep the hue and texture as accurate as possible.
Now, let us modify this method slightly by making a selection of the offending area first. That way we don't mess up anything else around the glare.
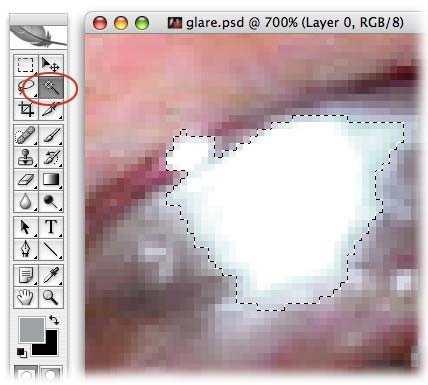
Step 1: Press W to select the Magic Wand and click once within the glare area to select it.
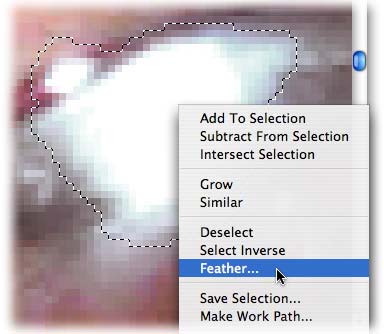
Step 2: Choose Select > Modify > Expand and enter 2-3 pixels. Feather the selection so that it doesn't have hard edges by choosing Select > Feather and entering 2-3 pixels again. TIP: You can also Control click (PC: Right click) within the selected area and choose Feather from the contextual menu, as shown below:
Step 3: Press S to select the Clone Stamp Tool and proceed exactly as we did above. Option click (PC: Alt click) to sample and area, then paint it over the glare area.
This time only the area within the selection is affected. In other words, you don't have to be as careful while painting. I'm not a huge fan of this method because the glare never seems localized quite enough for this method to work well, but I thought I'd mention it anyway.
Another way to fix a lens glare is to copy one good lens or eye to the other. Obviously this will only work if you have one eye that's okay (sans the glare), and luckily Ms. Kibby does.
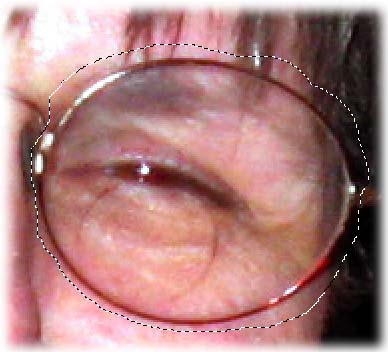
Step 1: Press L to select the Lasso tool and draw a selection around the good eye.
Step 2: Press Command + J (PC: Ctrl + J) to jump it up onto its own layer. Press Command + T (PC: Ctrl + T) to invoke Free Transform. Control click (PC: Right click) within the transform box and choose Flip Horizontal from the contextual menu. Press Return to accept the Transform.

Step 3: Press V to select the Move Tool and move the new eye into the right place. Over in the Layers Palette, reduce the Opacity of the new eye layer to around 50% so that you can see the old eye underneath.
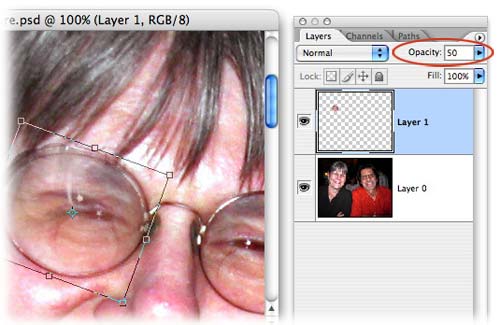
Step 4: Invoke Free Transform again by pressing Command + T (PC: Ctrl + T) and grab any corner handle and rotate the eye slightly. Now that you can see the old eye, just rotate the new one until they match fairly closely. When finished, press Return to accept the Transform then increase the Opacity of the eye layer back to 100%.
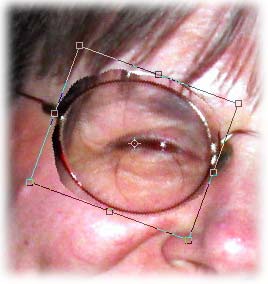
Step 5: Since my original eye selection wasn't perfect, I added a Layer mask so I could cover up certain bits of the new eye layer. Do this by pressing the circle within a square icon at the bottom of the Layers Palette.

Step 6: Press B to select the Brush tool and with black as the topmost color chip in your Toolbar, begin painting the areas of the new eye that you wish to hide. As you can see by the mask, I hid the left and bottom portion of the new eye layer.
Another thing I could do at this point (but you don't have to) is to apply the mask I just made and then merge the layers. Then I would be free to use the Clone Stamp Tool to continue correcting the color of the eye area to make it look real. Heck you might even try the Healing Brush to do some additional blending (it works in much the same way as the Clone Stamp Tool, in that you must Option click [PC: Right click] to select a sample area then brush over the area you want to fix).
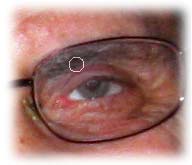
Here's where we have now. It's not bad, but there's still one thing we can do.
Step 7: Last but not least, let's darken Wayne's eyebrows by selecting the Burn tool.
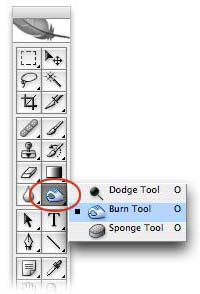
Step 8: With a combination of clicking and dragging, the Burn tool did a good job of darkening the eyebrows just a bit. Remember to press Command + Z (PC: Ctrl + Z) to undo if you go too far.
Here's our final product:
Not too shabby, but again, it took some time. However, this is a great exercise for increasing your retouching and painting skills (all the tools we used work with a paint brush cursor). In the end, if you have some time and patience, you can get really good at detail work like this.
Until next time, may the glare-fixing force be with you!


PhotoLesa's photography gear provided by: