
PhotoLesa's photography gear provided by:


You’ve probably learned the hard way that sharpening an image that contains noise or grain means that the noise and grain gets sharpened too. Instead of making the photo look better, it ends up looking ten times worse than it did. Bummer!
That’s why it’s important to get rid of (or at the very least, reduce) those nasties before you sharpen. Running the Reduce Noise filter (Filter > Noise > Reduce Noise) is a good solution because it lets you decide which channel to run the filter on, and when it comes to noise and grain, they love hiding in the blue channel. However, let’s say the filter didn’t do squat. What do you do? In that case, you can still bring out some of the detail in your image—without accentuating the noise and grain—if you sharpen everything except the blue channel. That’s right, by selecting the red and green channels before you run a sharpening filter, you restrict the sharpening to just those channels. Sweet!
Here’s how to do it:
Step 1: Open your image and make a copy of the layer you’re going to sharpen. If you’re working with a document that has just one layer, select it in your Layers palette and duplicate it by pressing Command + J (PC: Ctrl + J). If you’d like, double-click the layer’s name to rename it “sharpen.”
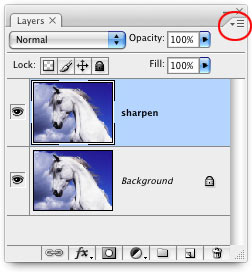
TIP: If you’re working with a multi-layered file, you can make Photoshop create a new layer for sharpening for you. Just open the Layer palette’s options menu (circled in red above) and while pressing the Option key (PC: Alt) choose Merge Visible (if you don’t use the modifier key, your file will get flattened and that’s not what you want). This will create a new layer that contains all the information from your other layers. Drag it to the top of your layers stack and you're good to go. Do this and surprise your online friends or free poker peers with your newfound Photoshop prowess!
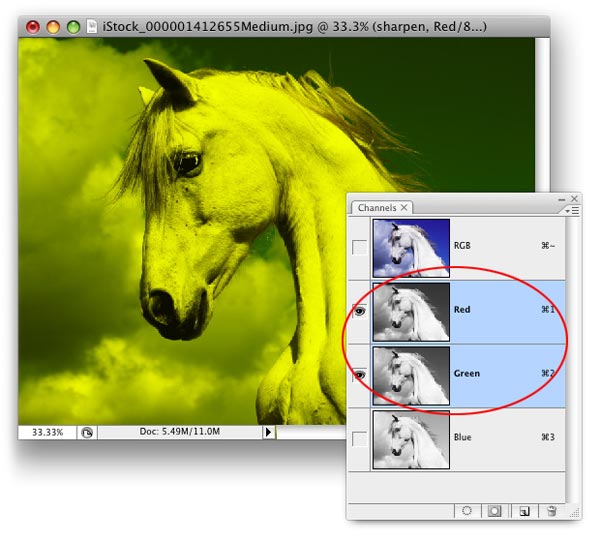
Step 2: Open your Channels palette (choose Windows > Channels) and click to select the red channel, and then Shift-click to green channel. They should both be highlighted in your Channels palette. Don’t panic if your image takes on a weird color (as shown below); Photoshop is just showing you what the image looks like in those two colors.
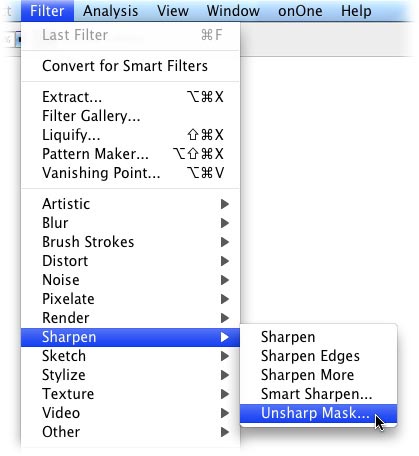
Step 3: Choose Filter > Sharpen > Unsharp Mask (or Smart Sharpen). By running the filter while you’ve got the two channels selected, Photoshop will only apply the sharpening to those channels.
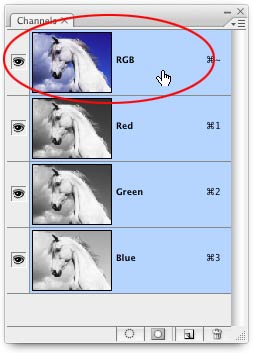
Step 4: In your Channels palette, turn on the composite channel so you can see the full-color image (circled below). To view a before and after of your image, open your Layers palette and on the duplicate sharpen layer, toggle the visibility eye off and on.
That’s it! By sharpening with this method, you won’t be making the noise and grain any worse than it originally was.
Until next week, may the sharpening force be with you!


PhotoLesa's photography gear provided by: