
PhotoLesa's photography gear provided by:


Chances are good that you’ve spotted the little pop-up menu at the top of your Layers panel in either Photoshop or Photoshop Elements. It’s called the blend mode menu and it controls how color on one layer interacts with color on other layers in your document. In some instances — as is the case with the modes in the Darken category — Photoshop looks at the colors on all layers and the darkest colors win; the light colors just drop right out. In other instances – when using the Lighten category — it’s the lightest colors that win.
In today’s tutorial you’ll learn how to use a blend mode in a category that does a little bit of both in order to create an instant metal reflection. Read on!
Blend modes in the Overlay category affect lighting—they do a little darkening and a little lightening in order to increase the contrast of your image, instead of the straight darkening or lightening performed by the other two categories mentioned. They have a neutral color of 50% gray, meaning 50% gray has no effect on the result color and thus disappears completely.
The Soft Light mode, in particular, is the equivalent of shining a soft light on your image (hence the name). It makes bright areas brighter (as if they were dodged) and dark areas darker (as if they were burned). If you paint with black in this mode, you’ll darken the underlying image; if you paint with white, you’ll lighten it. You can use this mode to make an image look like it’s reflected in metal (as shown below) or to add texture to it. Seasoned Photoshop jockeys use this mode with the Dodge and Burn tools to retouch portraits. Its keyboard shortcut is Shift-Option-F (PC: Shift + Alt + F).
Here’s how to use it to make an instant reflection in metal:
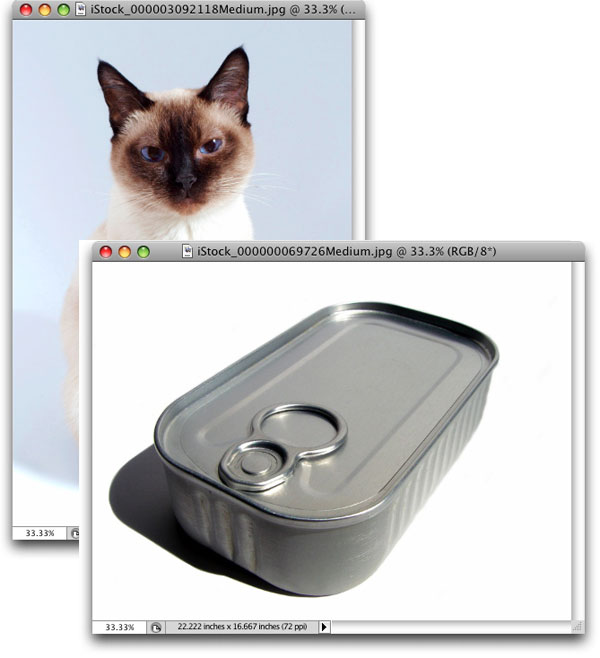
Step 1: Open two images, such as the ones shown below, and combine them into the one Photoshop document. This is easily done by opening one and pressing Command + C to copy (PC: Ctrl + C) and then activating the other document and pressing Command + V to paste (PC: Ctrl + V).
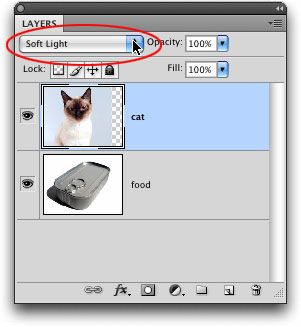
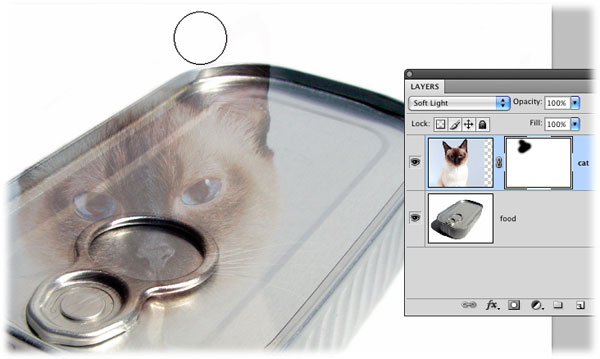
Step 2: In your Layers panel, click once to select the layer you want to be reflected; in this case, it’s the cat layer. At the top of your Layers panel, change its blend mode to Soft Light.
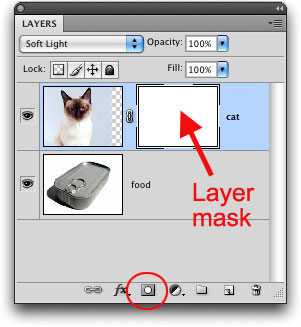
Step 3: If you need to hide additional areas of the reflection layer (the kitty), simply add a layer mask by pressing the circle within a square icon at the bottom of the Layers panel.
Step 4: Press B to select the Brush tool, and then press D to set your color chips to the default of black and white. Press X to swap color chips so that black is on top, and then

Step 5: Mouse over to your document and begin to paint the area you wish to hide, like the kitty’s ears.
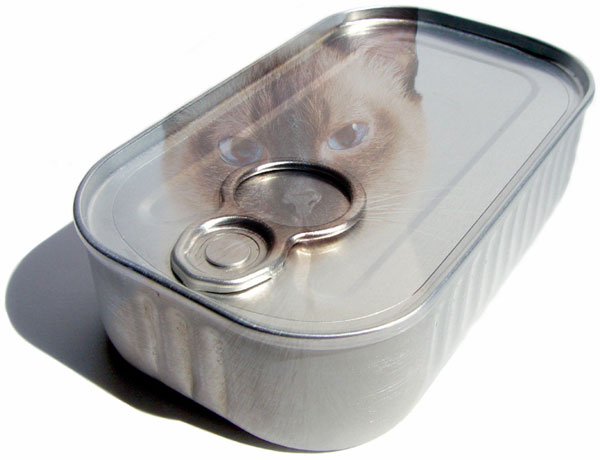
Here’s the final result:

As you can see, using the Soft Light blend mode made short work of creating a reflection in this metal. Until next week, may the reflection force be with you all!


PhotoLesa's photography gear provided by: