
PhotoLesa's photography gear provided by:


Graphic designers, this one’s for you! If you need to reverse the colors in your image—turn orange to blue, yellow to purple, and so on—you can use an Invert adjustment layer to make it so. There’s no need to select an item and use any other kind of color-changing voodoo because an Invert adjustment layer instantly turns black into white, blue into orange, and so on.
But how do you know what the reverse (or opposite) color will be, you might ask? Since Adjustment layers are non-destructive—the adjustment itself happens on another layer—you can just add one to find out, or you could use a color wheel.
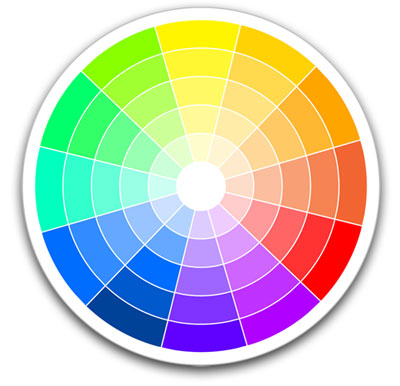
A color wheel is a tool for helping you pick colors that are visually pleasing when used together. Without diving too deeply into color relationships—lest you leap off the nearest ledge!—suffice it to say that all colors are related because they’re derivatives of one another. The color wheel, which dates back to the 17th century, places visible colors on a round map according to their relationships. It’s based on the three basic colors: yellow, blue, and red—known as primary colors—from which all other colors spring. By mixing equal amounts of the primary colors, you get a second set of colors called—surprise—secondary colors. As you might suspect, by mixing equal parts of the secondary colors, you get a third set of colors called tertiary colors. Together, all of these colors form the color wheel shown below:
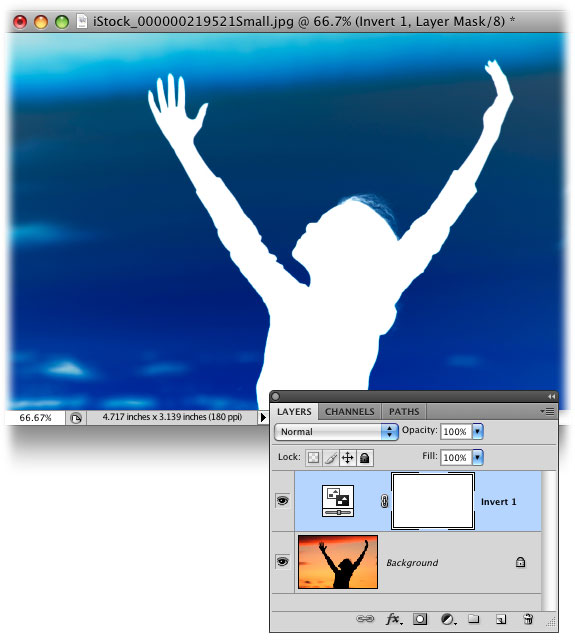
If you’re a photographer, you might use an Invert Adjustment layer to turn your image into a negative (which might be useful on Halloween or other creative situations). Also, if you’ve got an image of a black silhouette that you want to make white, an Invert Adjustment layer could do it with a single click.
Now that you know what you might do with it, here’s how to get it done:
Step 1: Open a Soon-To-Be-Inverted image. Don’t bother double-clicking the Background layer to make it editable as you won’t be editing the original image.
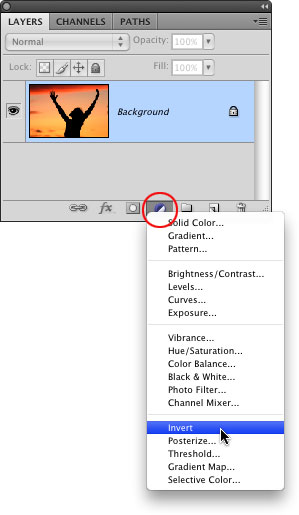
Step 2: To add an Invert adjustment layer, click the half black/half white circle at the bottom of the Layers panel and choose Invert. If you’re using CS4, you can create an Invert adjustment layer by opening the new Adjustments panel (choose Window > Adjustments). Root around for the icon that shows two smaller squares with shapes inside ‘em and click it once.
Either way, Photoshop will add an Invert adjustment layer to your Layers panel and promptly reverse the color in your image, as shown below:
Here are a few more examples to give you a better idea of what this adjustment can do:

As you can see, this adjustment can be a useful trick! Until next week, may the color-reversing force be with you all :)


PhotoLesa's photography gear provided by: