
PhotoLesa's photography gear provided by:


 While at Photoshop World in Miami recently, I picked up a super quick method of drawing the eye to the heart of an image. By using a filter you've probably never heard of, you can produce an effect that truly beautifies a portrait, and looks like something you'd get from a real portrait studio (Olan Mills, anyone?).
I've included a before and after shot early in the tutorial to lure you in. (Did it work?!) The whole trick lies in tweaking two sliders in this particular filter's humongous dialog box (just wait till you see this thing; it's massive).
First, I'll show you how to do the effect in Photoshop CS2, where it literally takes two steps. Honest. Then I'll show you a method for getting it done in earlier versions of Photoshop, which by the way, also works in Photoshop Elements.
Let's get started!
Since I haven't had a proper portrait taken in years, I snagged a photo of three pretty girls from iStockphoto. Since I just needed web resolution, it set me back a buck. Sweet!
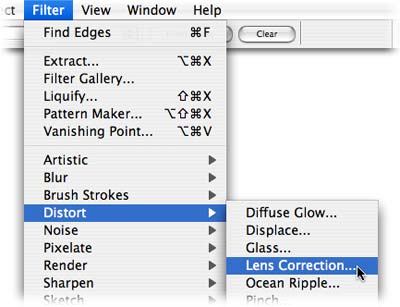
Step 1: Pop open your Soon To Be Spotlighted Image. Proceed immediately to the Filter menu and choose Distort > Lens Correction.
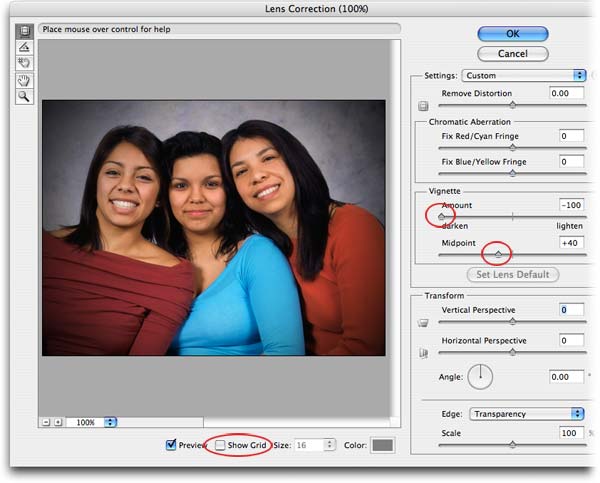
Step 2: At the bottom of this dainty dialog box (ha!), uncheck Show Grid, so you can actually see what you're doing. Grab the Vignette slider and drag it all the way to the left. Now grab the Midpoint slider and drag it *slightly* leftward, to about +40. Click OK.
Finished! I told you it was quick. Here's our before and after:

See what a galactic different that makes? It's very subtle but sometimes the smallest thing makes the biggest difference. Details baby, details.
If you haven't been gifted with CS2 just yet, never fear. The following method works in earlier versions of Photoshop (not sure how far back, but at least 3-4 versions) plus it works in Elements. Alas, I must confess that instead of two steps, it takes four. I know, it's a lot to ask, but hang in there, I know you can do it!
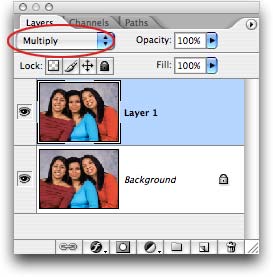
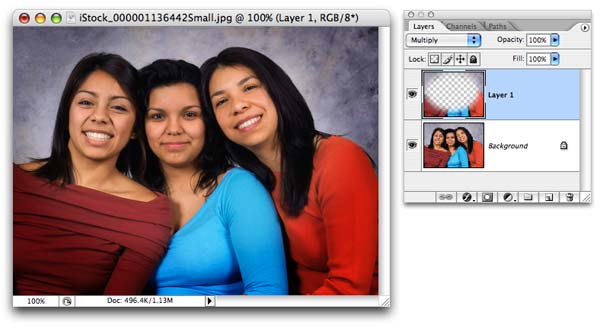
Step 1: Pop open a photo and immediately press Command + J (PC: Ctrl + J) to duplicate the layer. Change the blend mode of that layer to Multiply, as shown below. This will make the entire image really dark, but don't panic; we'll fix it in the next step.
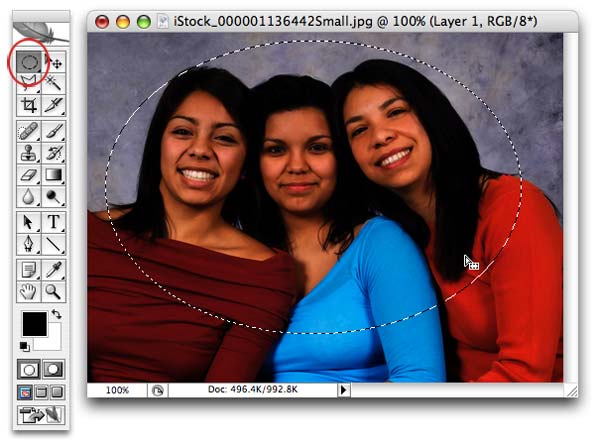
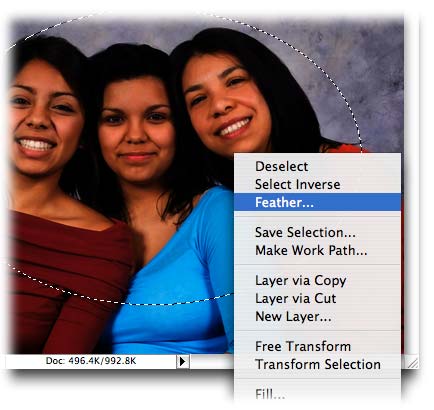
Step 2: Grab the elliptical marquee selection tool from the Toolbar (circled below in red), and position the cursor in the center of the focal point of the image (like the nose of the lady in the middle). Press and hold the Option key (PC: Alt), and draw a selection. TIP: Holding Option draws the selection from the inside out. Once you've got the selection, you can move it into just the right spot on the photo (your cursor should now be an arrow, as shown below).
Step 3: Control click (PC: Right click) inside the selected area (rather, marching ants) to bring up the shortcut, or contextual, menu. Choose Feather and enter 20 pixels. Click OK.
Step 4: Press the Delete key, then press Command + D (PC: Ctrl + D) to get rid of the marching selection ants. Poof! Now we've created nearly the exact same look as we did in CS2, sans the fancy filter.
NOTE: Instead of deleting the pixels above in Step 4, I could have inverted the selection and hidden the inner area of the photo with a layer mask. However, I deleted the pixels for two reasons:
- I had a safe copy of the image, the original Background layer, to go back to in a pinch
- Elements doesn't support layer masks (well, not without a little trickery, see How to Create a Layer Mask in Elements).
And there you have it: A super simple, easy spotlight effect, perfect for portraits. Who needs those portrait studios anyway?! Not you... not anymore ;)
See you next time!


PhotoLesa's photography gear provided by: