
PhotoLesa's photography gear provided by:


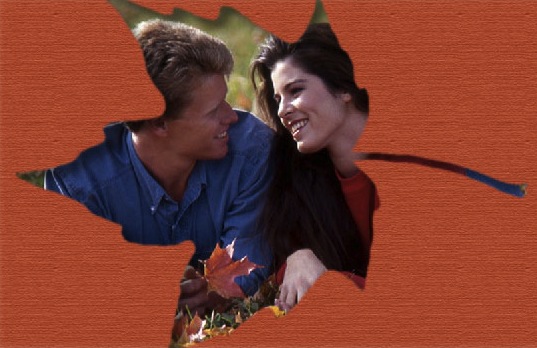
There once was a photo of maple leaf. It was a lonely little leaf, until one fortuitous day when it came upon a photo of young lovers frolicking on the crisp, fall ground. The lonely leaf carefully measured its width, then scrutinized its height. The lonely leaf realized it was big enough to hold the young lovers, and thus offered itself up as a frame. The lovers were thrilled at being cradled inside such creativity and they all lived happily ever after. The End.
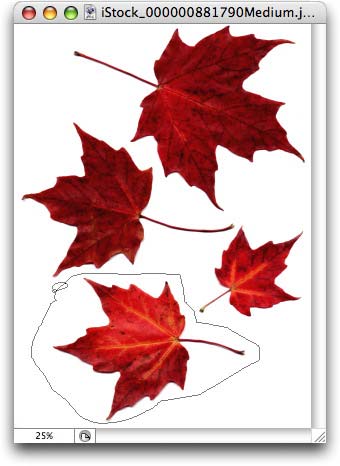
Creative frames can be found anywhere. For example, I typed "leaf on white" into the iStockphoto search box and found a great photo of maple leaves on an easy-to-knock-out white background (hence adding "on white" to the search). With a quick flick of a Threshold adjustment and a well-placed layer mask, I can turn one of these leaves into a really cool frame. Read on!
Step 1: Open the leaf photo and select one of the leaves in the manner of your choice. Since the photo I'm working with has several leaves on a white background, I'll grab the Lasso tool and draw a loose selection around just one.
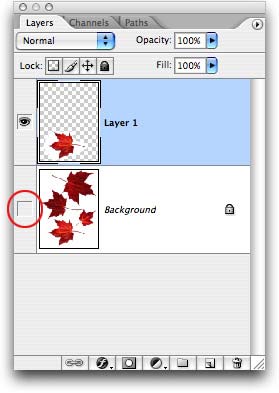
Step 2: Jump the leaf up onto its own layer by pressing Command + J (PC: Ctrl + J), and then turn off the visibility eyeball of the original background layer so you're looking at just the one leaf. NOTE: You only need to do this if you're working with an image of multiple frame (leaf) possibilities.
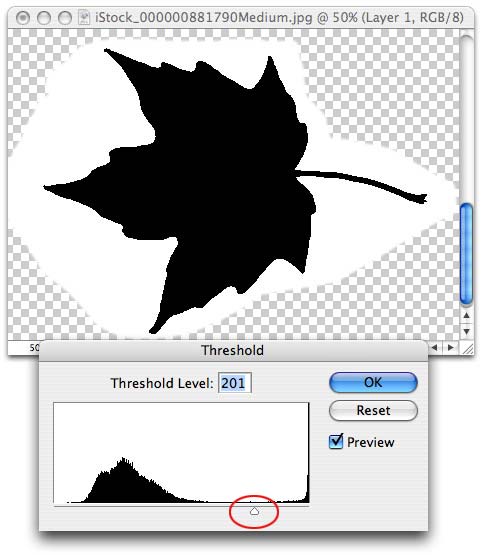
Step 3: Choose Image > Adjustments > Threshold and push the slider right until the leaf goes completely black, then press OK.
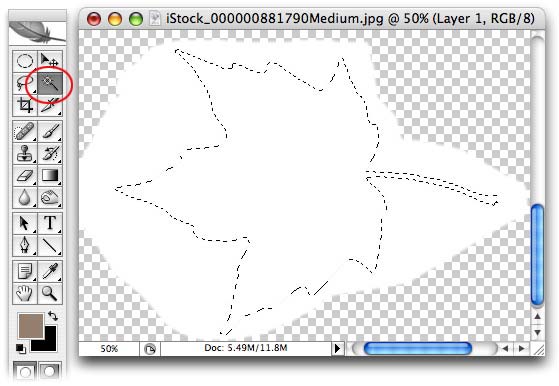
Step 4: Press W to select the Magic Wand and click once within the black area to select the leaf, then invert the selection's color (which will turn the black bits into white) by pressing Command + I (PC: Ctrl + I). Press Command + C (PC: Ctrl + C) to copy the selection onto the clipboard.
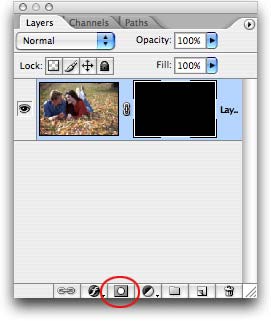
Step 5: Open the photo you want to frame and double-click the Background layer so it's editable. Immediately create a layer mask *that's filled with black* by Option clicking (PC: Alt clicking) the circle within a square icon at the bottom of the Layers Palette. The photo is now effectively hidden by the mask.
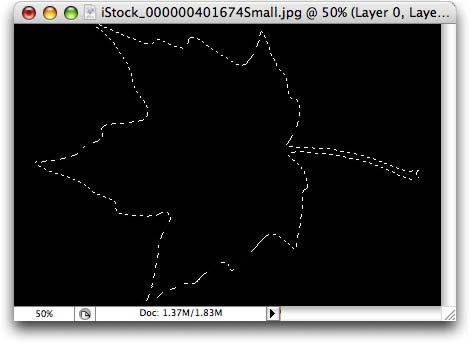
Step 6: Option click (PC: Alt click) the layer mask so that you are actually viewing it (your document should go solid black now). Once inside the mask, press Command + V (PC: Ctrl + V) to paste the leaf selection into the mask.
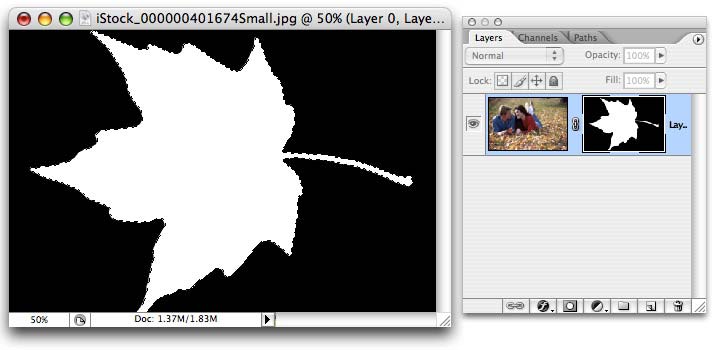
Step 7: With white as the foreground color chip in Ye Ole Main ToolBox, press Option + Delete (PC: Alt + Delete) to fill the selection with white. Now you should see the white leaf in both the layer mask, and in the document window, like so:
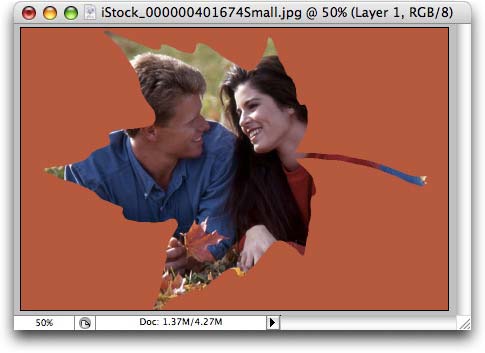
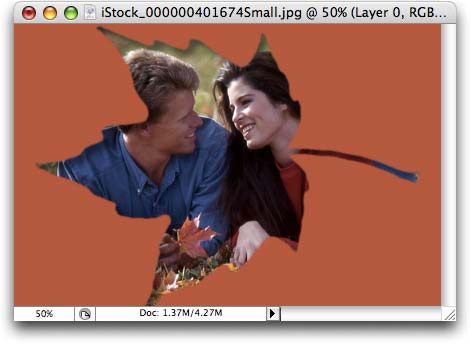
Step 8: Press Command + D to deselect (send the marching ants away) and click the photo thumbnail in the Layers Palette. You should now see the couple peeking through the leaf frame.
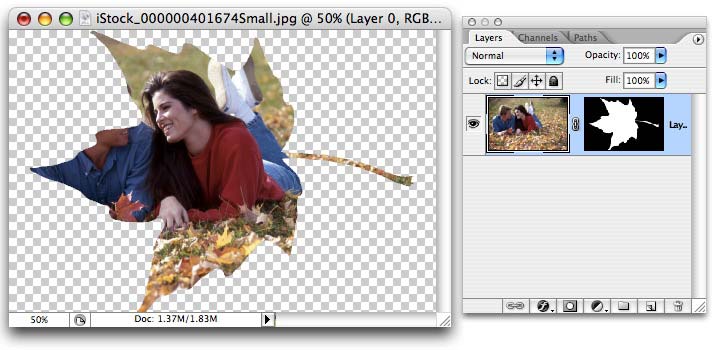
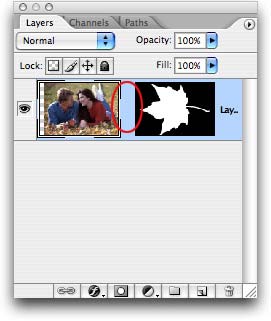
We're doing good, but our photo isn't in the right place. To move the photo independently of the mask (or vice versa) we need to the two.
Step 9: Click once on the chain link icon between the mask and the photo thumbnail in the Layers Palette and it'll disappear.
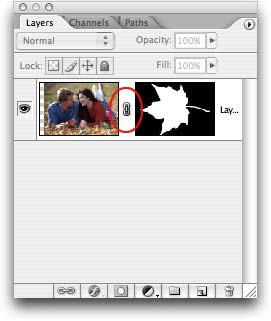
Step 10: Press M to select the Move tool, mouse over to the document and move the photo around at will. Likewise, if you want to move the frame but not the photo, just click once on the mask's thumbnail in the Layers Palette to select it, then move it around.

Step 11: When you've positioned the photo and frame perfectly, click again between the layer mask and photo thumbnail to bring back the chain link, that way you can move both items together as one. This is a protective measure only; you don't have to do it.
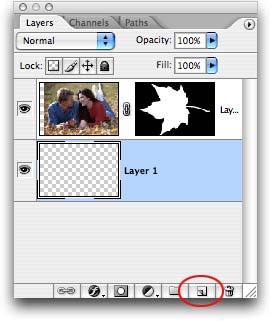
Step 12: Last but not least, Command click (PC: Ctrl click) the new layer icon at the bottom of the Layers Palette to create a new layer below the current one.
Step 13: Grab the Eyedropper tool and click once on a color in the photo.
Step 14: Press Option + Delete (PC: Alt + Delete) to fill the new layer with that color.
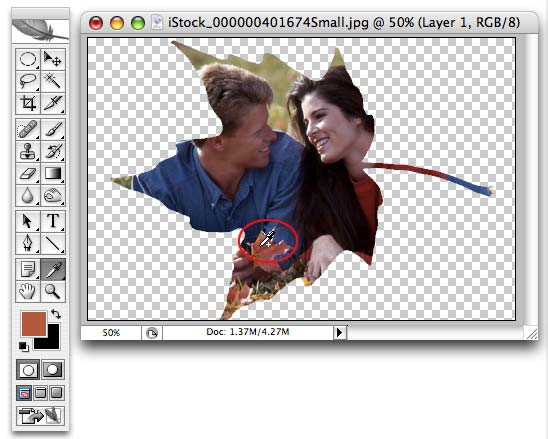
Step 15: Select the photo layer in the Layers Palette, then click the Layer Styles button (the tiny cursive f) at the bottom of the Layers Palette and choose Inner Shadow.
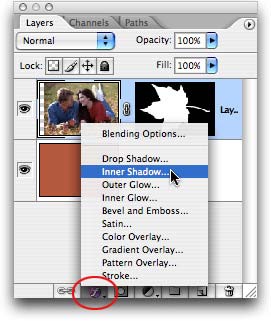
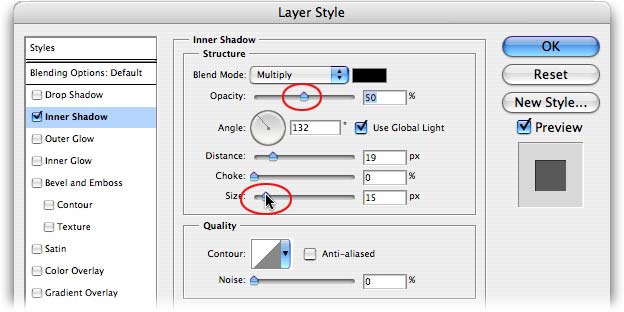
Step 16: Adjust the size to 15 and the Opacity to 50%, and move the drop shadow down and to the right (just click on the document and the shadow around with your mouse), then press OK.
Sit back and enjoy your masterpiece!
TIP: For added creativity, apply a Texture to the solid color background by choosing Filter > Texture > Texturizer. Choose Canvas and press OK. This is what we have now:
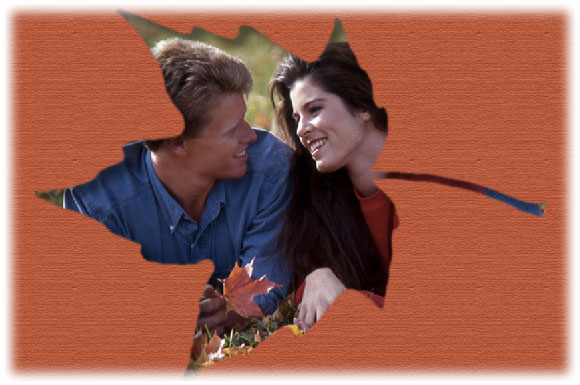
As you can see, all kinds of creative possibilities exist with this technique. Until next time, may the creative framing force be with you all!


PhotoLesa's photography gear provided by: