
PhotoLesa's photography gear provided by:


It seems I've had a rather macabre theme to my tutorials lately (turning people to stone, given them green skin (node#187), and vampire eyes) so I thought I'd lighten the mood this week and go with a quick little ditty about how to create a stacked paper background effect for your holiday photos.
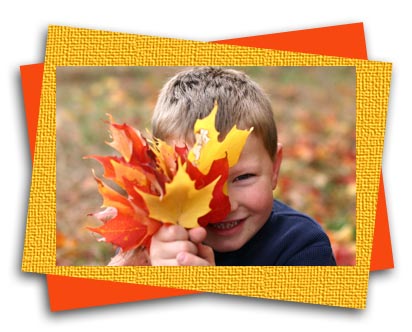
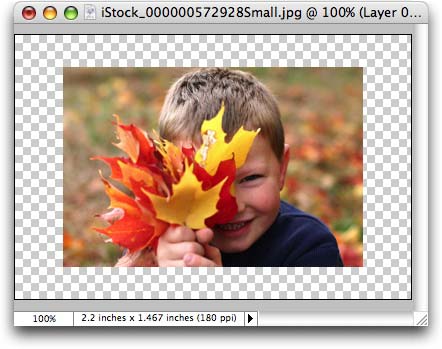
With a vector shape here, a vector shape there, and a quick dash of the texturizer we can create a super cute photo frame primed and ready for a digital scrapbook. We'll start out with a cute photo to begin with, that of a little boy hiding behind some bright fall leaves from iStockphoto.com.
The very first thing we need to do is give ourselves soom room to work and that means increasing the Canvas space. But, who wants to trot all the way up to the Image menu to get that done?!
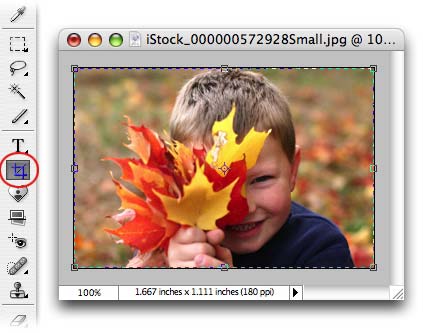
Step 1: In the Layers Palette, double click the background layer so it's editable. Grab the lower right edge of the document window and drag it out a bit so you can see the edges of the photo. Press C to select the Crop tool and draw a box around the picture.
Step 2: Press and hold the Option and Shift keys and drag a handle outward. This will make the crop box larger on all four sides.
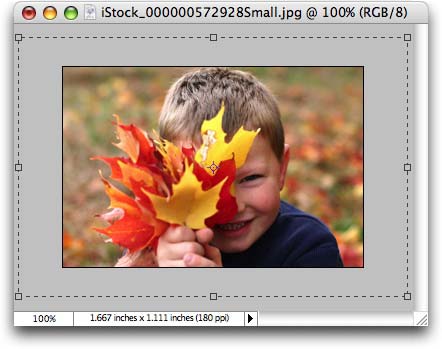
Press Return to accept the crop and poof! Houston, we have more canvas space.
Step 3: Select the Rectangle Tool from the bottom of the main toolbox.
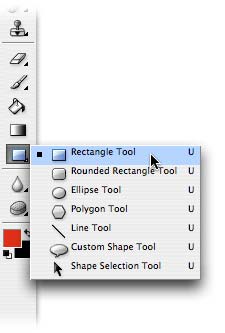
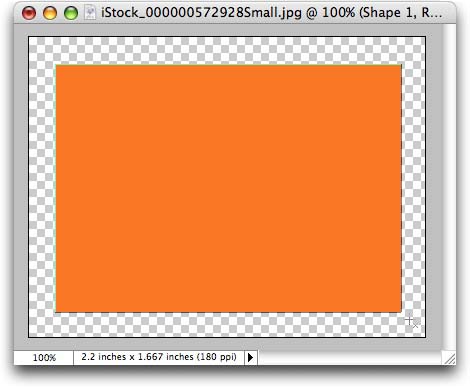
Step 4: Draw a rectangle that's a little larger than the photo. Don't worry about what color it is, we'll change that later. It will automatically pick up the color of the foreground color chip in the main toolbox.
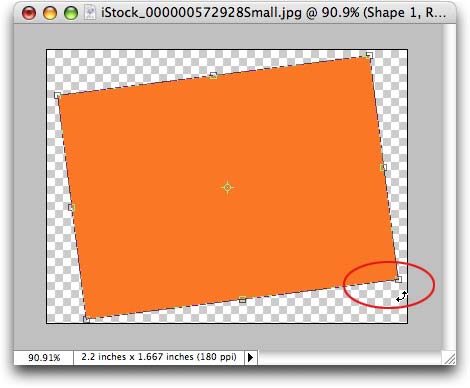
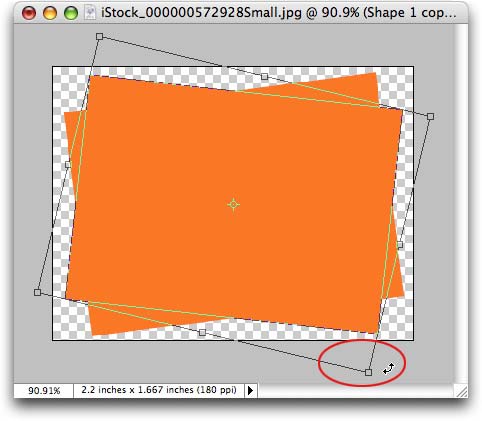
Step 5: Press Command + T (PC: Ctrl + T) to bring up Free Transform. Grab one of the corner handles and rotate the shape slightly, then press Return to accept the transform.
Step 6: Duplicate the shape layer by pressing Command + J.
Step 7: Press Command + T (PC: Ctrl + T) to bring up Free Transform again, and rotate the shape in the opposite direction.
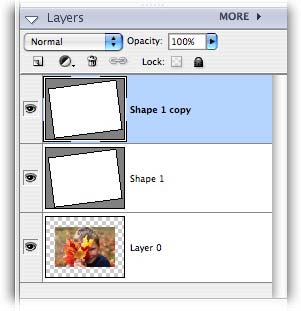
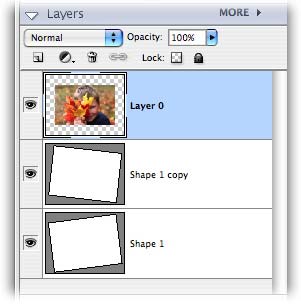
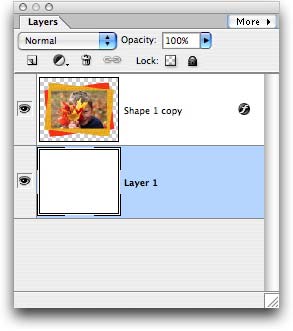
Step 8: In the Layers Palette, click and drag the photo layer to the top of the layers stack.
This is what we have now:
Changing the color of a shape layer is super simple. However, in this instance I'd like to pick up colors from the actual photo.
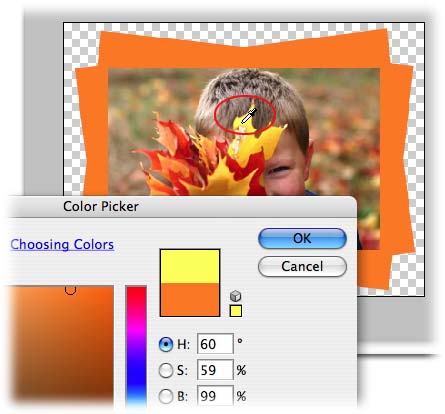
Step 9: Double-click one of the shape layers and the Color Picker will pop open. Mouse over to the photo area and when the cursor turns into an Eye Dropper, select an area of color from the photo, then press OK.
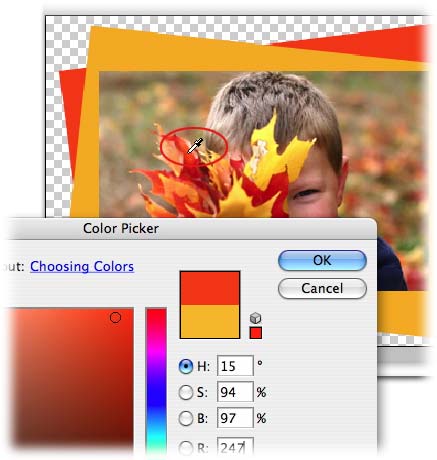
Step 10: Select the duplicated shape layer in the Layers Palette and do the same thing. Double-click it and when the Color Picker pops open, pick up another color from the photo and press OK.
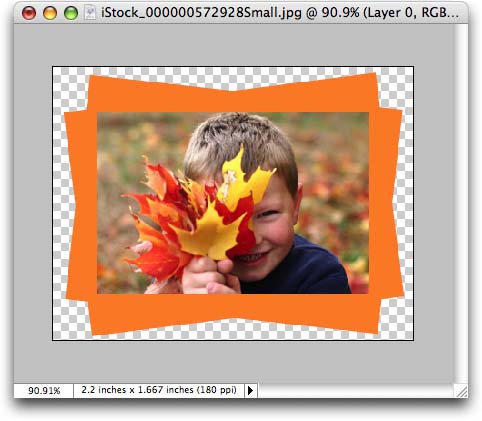
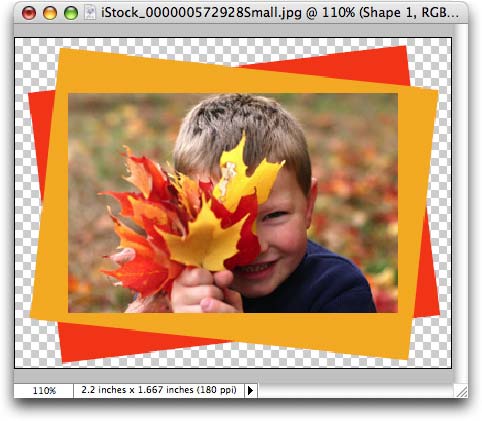
Here's what we have now:
Oh sure it's cute now, but it'll be cuter with some texture.!
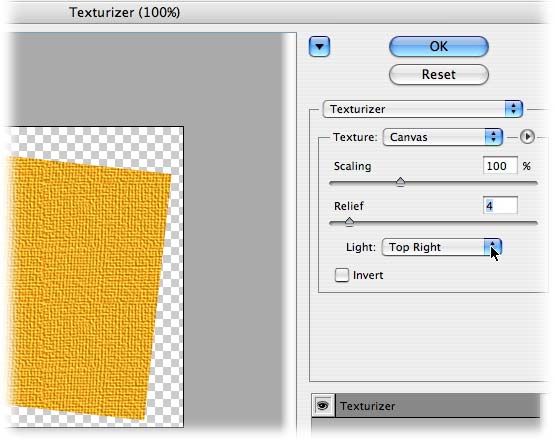
Step 11: With one of the shape layers selected, choose Filter > Texture > Texturizer, and press OK when it asks if you want to "simplify" the shape layer first (this means Elements is turning it into pixels, meaning you don't want to do any resizing from this point forward).
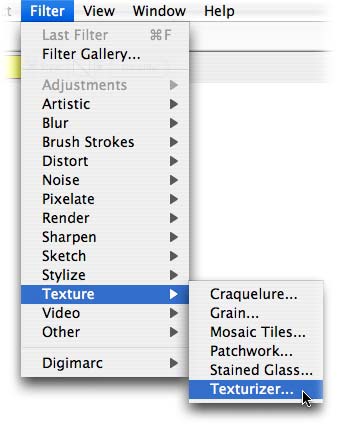
Step 12: Experiment with the different textures listed in the pop-up menu shown below. You can also tweak scaling and relief (relief is how deep the grooves will be). Different Lighting also changes the effect. Press OK when finished.
At this point, you can add texture to the remaining shape layer, or just leave it alone (which is what I did).
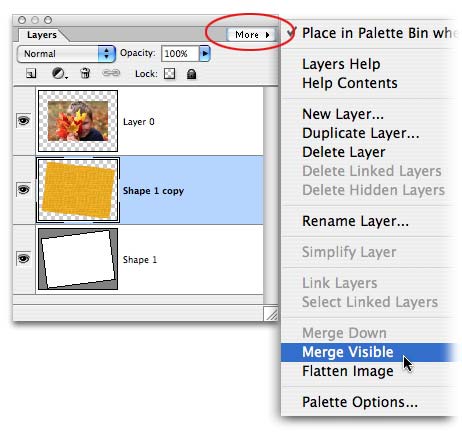
Step 13: When you're all finished, click the More button at the top right of the Layers Palette and choose Merge Visible.
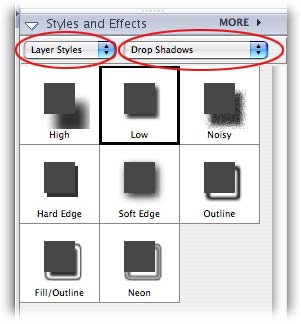
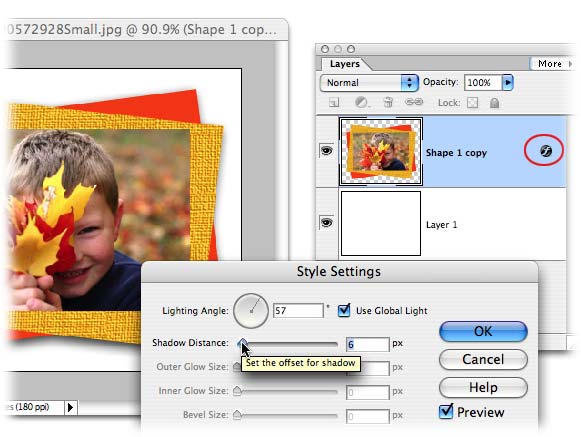
Step 14: Add a drop shadow by locating the Styles & Effects palette, choosing Layer Styles from the lefthand pop-up menu, and Drop Shadows from the pop-up on the right.
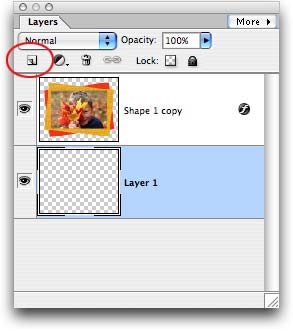
Step 15: Create a new layer beneath your masterpiece by Command clicking (PC: Ctrl clicking) the new layer icon at the top left of the Layers Palette.
Step 16: Click the foreground color chip at the bottom of the Toolbar and pick a color. I picked white for this example, but you could choose any color you like. Fill the new layer with color by pressing Option + Delete (PC: Alt + Delete).
TIP: If this image is destined to live on a web page of another color, you probably want to use that background color so the drop shadow shows.
Step 17: Double click the tiny cursive "f" in the layers palette to tweak the drop shadow, as shown below:
Here's the final result:

See what a difference adding a texture to one of the shapes makes? Feel free to experiment with adding texture to both shapes, the shape in the background instead of the foreground, or even adding another shape to the stack. The possibilities are endless!
Until next time, may the creative force be with you :)


PhotoLesa's photography gear provided by: