
PhotoLesa's photography gear provided by:


The idea for this week's tutorial came from an ad for the TV series named Lost (you may have heard of it). I came across a full-page ad in Entertainment Weekly featuring the main characters, and while I'll admit that all of them are reasonably attractive (except the evil Benjamin), there was something about this ad that made them particularly stunning and somewhat ethereal.
After staring intently at the ad for a few glorious moments (paying close attention to the eyes of Sayid and Sawyer-whee!), the secret was revealed: It was A Classic Case of Iris Enhancement.
As with most things associated with Photoshop, there are many ways to get from point A to B, though I believe the following method proves to be not only one of the shortest routes to a glowing iris of your own, but perhaps the most versatile as well. Let's get started!
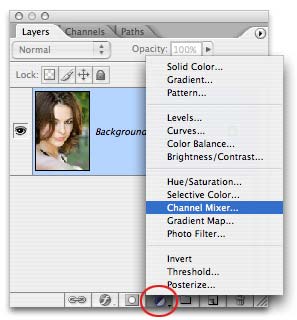
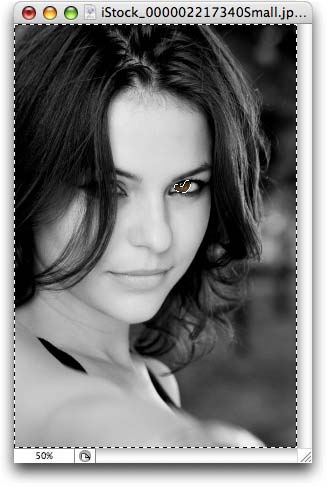
Step 1: A quick search on iStockphoto.com using the keywords "girl" and "eyes" yielded a gorgeous image to play with, and the first thing we need to do to it is make it black and white (see Goin' Grayscale for more details). If, like me, you prefer the Channel Mixer method, just click the half black/half white circle at the bottom of the Layers Palette to create an adjustment layer and choose Channel Mixer.
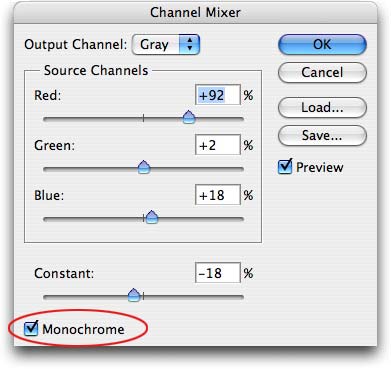
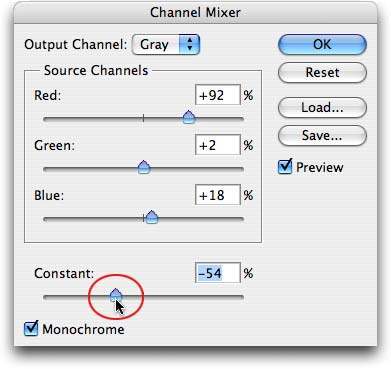
Step 2: In the resulting dialog, click the Monochrome checkbox at the bottom left and adjust the source channel sliders until you get some nice contrast in the image then press OK.
Step 3: Select the layer mask that tagged along with the adjustment layer and take a peek at the color chips in the main Toolbox. Press X until black hops on top, then press B to select the Brush tool.
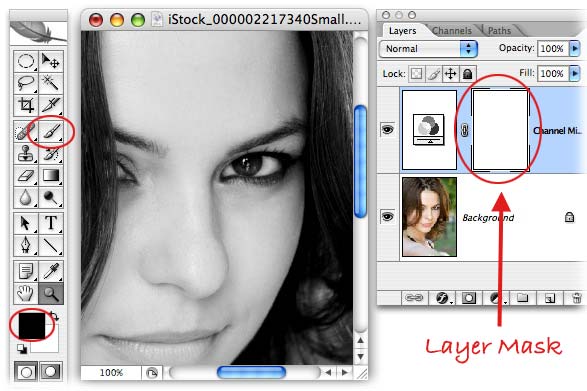
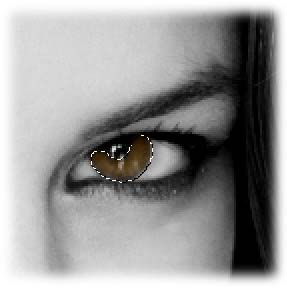
Step 4: With a soft brush, begin to paint the area of the iris. This will bring back the color in only that area.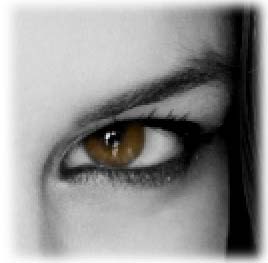
Step 5: Command click (PC: Right click) the layer mask to create a selection of the area you just painted. You should see marching ants appear around the iris and the outer edge of the photo, which is the exact opposite of what we want.
To fix it, invert the selection by pressing Command + Shift + I (PC: Ctrl + Shift + I). Now you should have marching selection ants around the iris only.
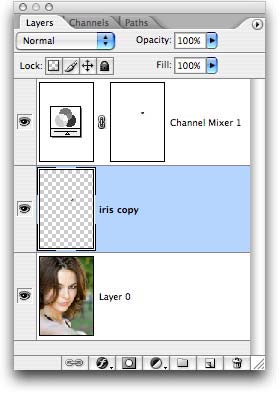
Step 6: Double click the Background layer so that it's editable, and press Command + J (PC: Ctrl + J) to "jump" the iris area up onto its own layer. Now we can tweak it without damaging the original photo.
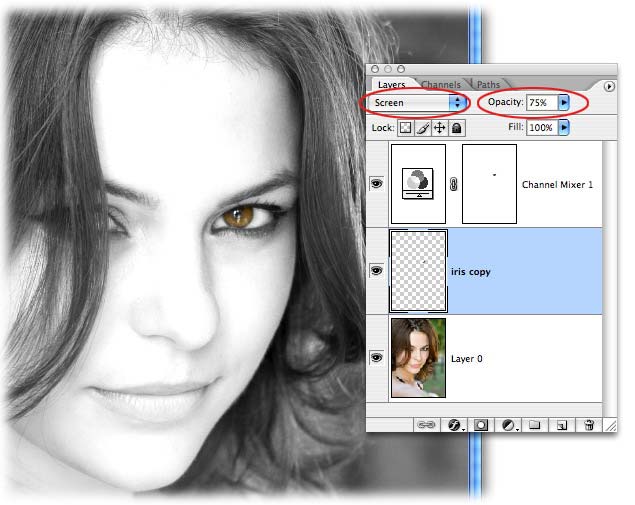
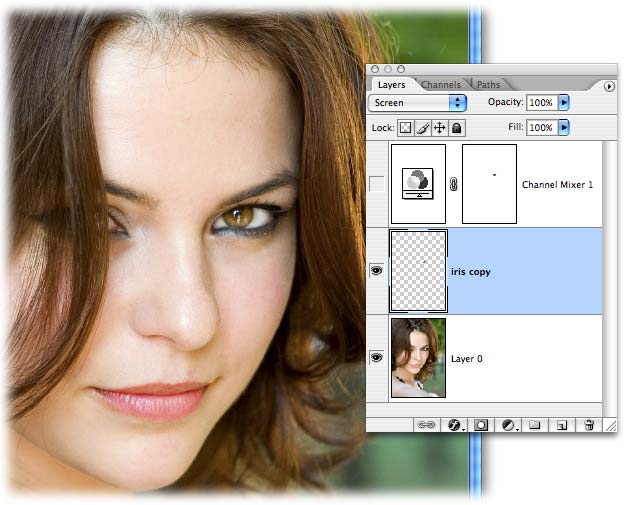
Step 7: Change the Blend mode of the iris layer to Screen, and tweak the opacity to lessen the effect slightly. Voila! Houston, we have a dramatic eye enhancement.
The cool thing about this technique is that we haven't destroyed the original image, meaning we have infinite tweaking ability built right in. Let's use it to take this woman into a slightly darker world, into another realm of existence.
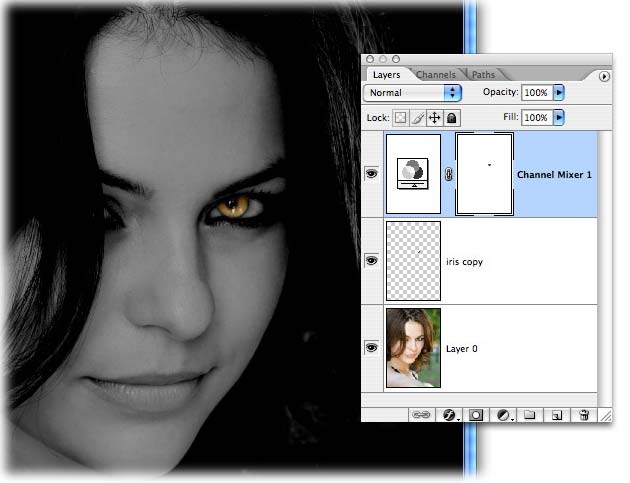
Step 8: Double-click the Channel Mixer adjustment layer and lower the Constant slider until the image gets fairly dark, as shown below. Click OK.
Step 9: If you lowered the opacity of the iris layer earlier, pump it back up to 100%. As you can see below, we've create another look entirely.
TIP: When dealing with blue eyes, you may need to duplicate the lightened iris layer to create an even lighter (almost whitish) effect.
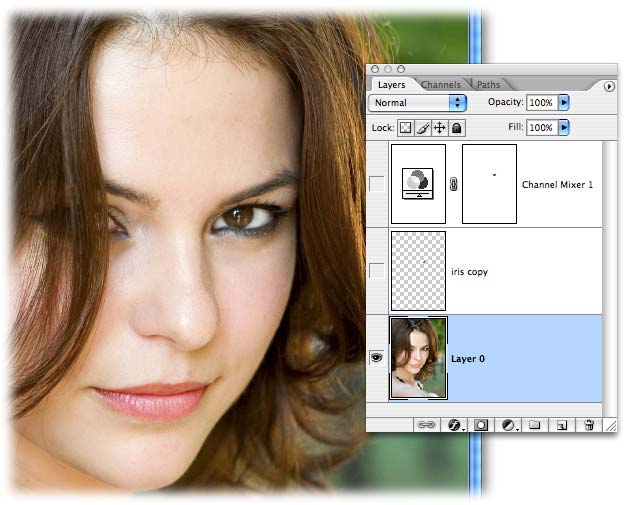
Like I said, extremely versatile and non-destructive. In fact, watch what happens as I turn off each layer individually. You'll immediately see the flexibility of this technique, and its ability to produce entirely different looks.
Iris enhancement only, without the black and white conversion of the channel mixer adjustment layer:
Compared to the original image:
That's all for now folks! Until next time, may the Photoshop force be with you all :)


PhotoLesa's photography gear provided by: