
PhotoLesa's photography gear provided by:


Not much has gone on in the way of travel since I got back from San Francisco for Macworld Expo. That being said, my husband and I did drive to Long Island, NY this past Friday to shoot the Fire Island Lighthouse at dawn the following morning.
However, going out specifically for a photo shoot is a rather new experience for us, and this one taught me several things:
Luckily, both Photoshop and Photoshop Elements can turn a mediocre sunrise into something truly spectacular (it doesn't make up for the missed sleep, but it will make you feel a little better). Please allow me to show you how using the following super-crappy image:

If you think about it, the color of sunrise is a blend from reddish/purple to orange/yellow to white, or some similar combination thereof. That's easily applied with the Gradient tool. However, we need the ability to hide the additional color in certain areas of the photo.
Step 1: With the photo open in Elements or Photoshop (these screen shots are using the new Elements 6 for the Mac), click the half white/half black circle at the top of the Layers palette (it lives at the bottom of the Layers palette in Photoshop). Choose Gradient Map, as shown below.

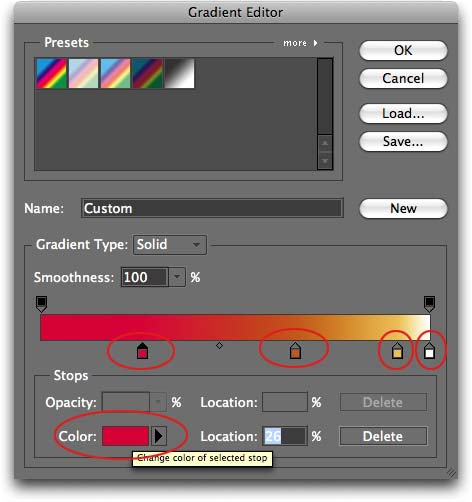
Step 2: In the resulting dialog, click the gradient bar circled below to open the Gradient Editor.

Step 3: To create a custom gradient, click the color stops circled below (the little color block with an arrow on top; there are four shown here). Once you have a color block selected, click the little color well at the very bottom of the dialog box (also circled in red) and pick a nice red from the resulting Color Picker. Keep changing each color stop to the colors shown below. If you need to add a new color stop, click anywhere beneath the gradient bar and a new stop will appear. Feel free to drag them around until they are in similar positions to the ones shown below. Click OK when finished.
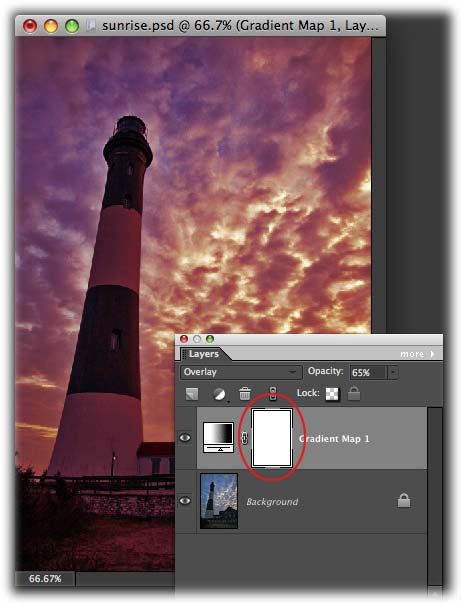
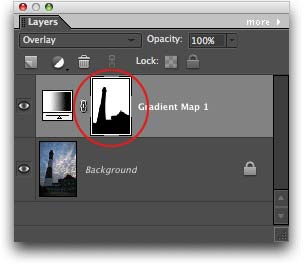
Step 4: Change the blending mode of the Gradient Map layer to Overlay and lower the layer Opacity to about 65%. Next to the adjustment layer thumbnail, you'll notice a layer mask has tagged along for the ride (circled below in red). This is going to allow us to hide portions of the gradient from our photo without actually deleting it.
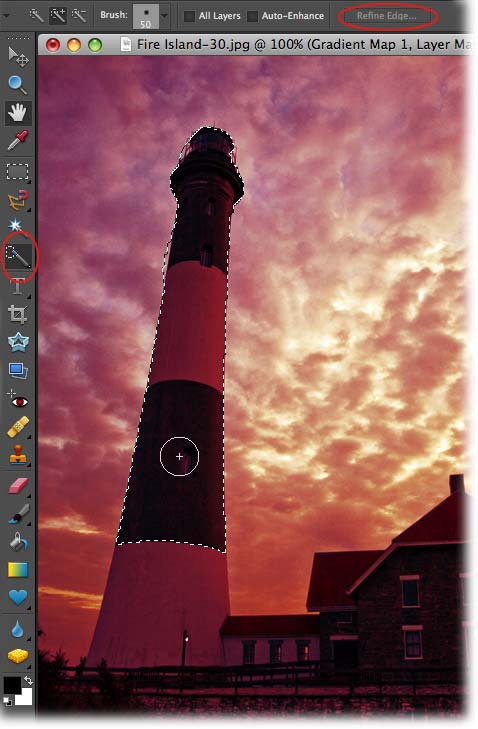
Step 5: Perhaps the hardest part of this technique is creating a selection of the area you want to hide the gradient from. In Photoshop CS3 (and the new Elements 6) you can use the Quick Selection Tool to paint a selection, which I've circled below. With it I can quickly paint a selection onto the lighthouse and treeline, as I'm doing below. If you don't have this tool, you can use any number of selection tools including the Lasso tools, Magic Selection Brush (Elements 4), etc.
Another bonus to CS3 and the new Elements 6 is the addition of the Refine Edge dialog. Once you've created a selection, click the Refine Edges button in the Options bar at the top of your screen.
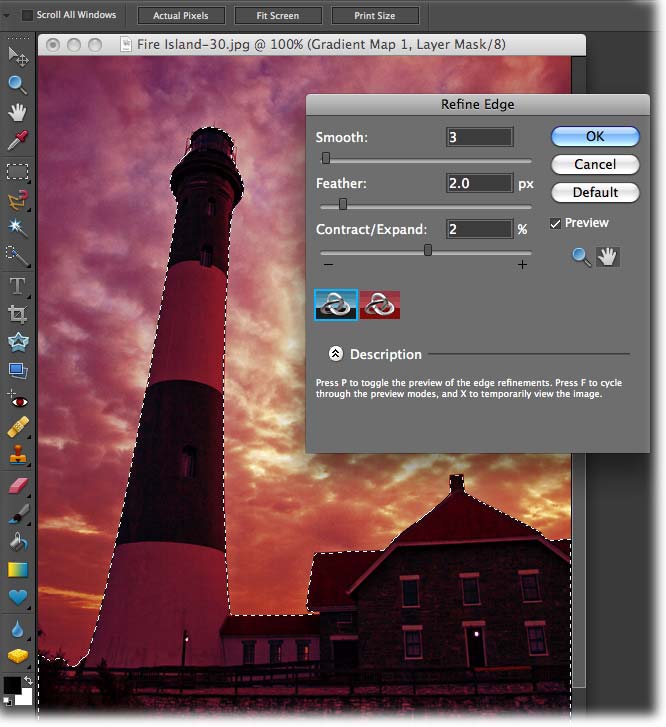
Step 6: In the resulting dialog, adjust the sliders to smooth, feather, and or contract/expand your selection accordingly. If you don't have this tool you can get to most of the same options through the Select menu at the top of your screen. For instance, you can still feather the selection, or choose Modify > Contract or Expand as needed. Press OK when finished.
Step 7: When the selection is all set, make sure the mask is selected, and take a peek at the color chips at the bottom of the main Tools palette. Press X until black is the top color chip, then choose Edit > Fill.
If you reveal too much of the Gradient Map, press X to swap color chips so that black is on top, and then paint that area back out (remember, black conceals).
If you're mask isn't perfect, never fear; it's simple enough to tweak it with the Brush tool.
Step 8: Press B to select the regular Brush tool. In the realm of the layer mask, painting with black conceals and white reveals. So, if you need to hide a bit more of the original image, like we do below (note the blue halo), press X to swap color chips so that white is on top and then paint that area of the image.
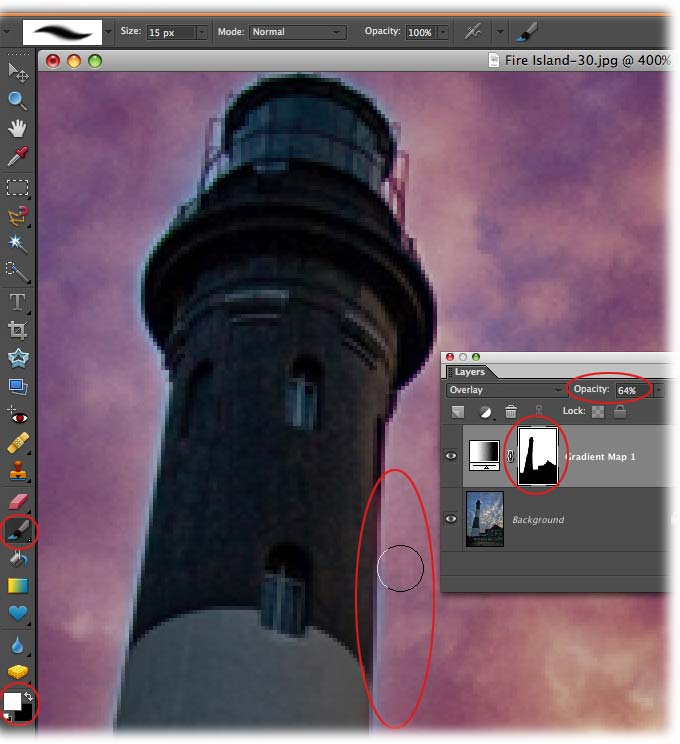
If you reveal too much of the Gradient Map, press X to swap color chips so that black is on top, and then paint that area back out (remember, black conceals).
When it's all said and done, you'll end up with something like this; which, quite honestly, make me feel *a lot* better about getting up at 4:30 am last Saturday morning:
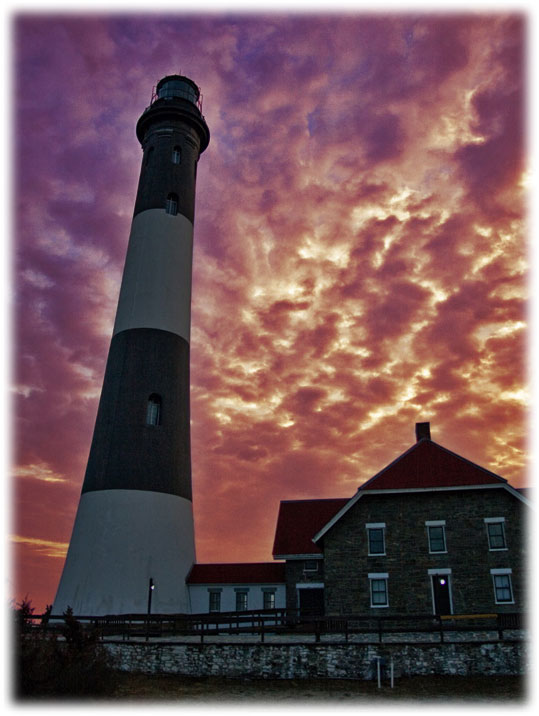
The moral of the story is that while it's great to perfectly capture the moment in-camera, that isn't always possible--Mother Nature doesn't always cooperate. Thank Thor Photoshop and Elements can help us fix it in post :)
Until next week, happy sunrise-enhancing!


PhotoLesa's photography gear provided by: