
PhotoLesa's photography gear provided by:


NOTE: This tutorial works the same way in Photoshop CC.
I'm always amazed at the creative genius of graphic designers. I mean, just look at the things they think up to recreate digitally! Take the Classic Page Curl effect, for instance. Who the heck thought of this thing? It's cool indeed, but who did it first? Food for thought, I suppose.
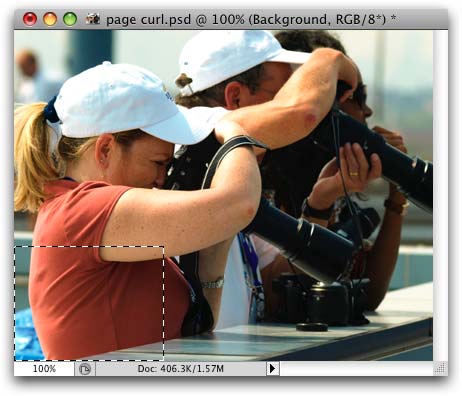
Speaking of page curl, the ever-useful Free Transform tool can get it done fairly quickly. We'll use a photo of me shooting the U.S. Open with the official Olympus team on the roof of the stadium in Flushing Meadows, NY (the legendary Jim Sugar is my partner in crime, shooting to my right). Read on!
As you know, to do much of anything in Photoshop you have to make a selection. Feel free to use the tool of your choice, though it's easy to do it with the Rectangular Marquee tool.
NOTE: If you are officially at peace with the Pen Tool, then scroll down and take a peek at the shape of the selection you need to create. Make it so, create a selection out of the path and continue on. (Overachievers!)
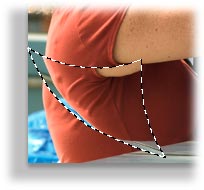
Step 1: Press M to select the Rectangular Marquee Tool, and draw a box around the corner you want to curl.
Step 2: Press Command + J (PC: Ctrl + J) to copy, or rather "jump", the selection onto its own layer.

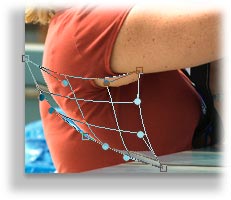
Step 3: Press Command + T (PC: Ctrl + T) to summon Free Transform and then click the Warp Mode button in the Options bar, as shown below.
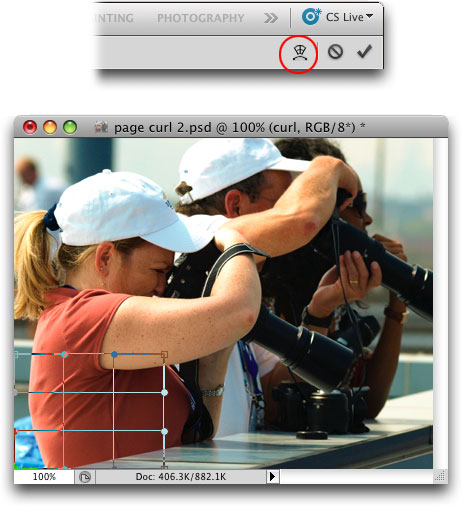
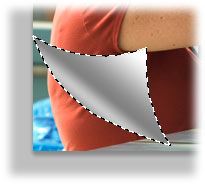
Step 4: Click and drag the various handles of the mesh until you get a curl shape, similar to the one below. Press Return when you're finished.
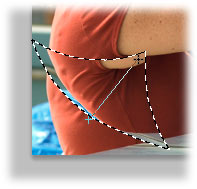
Step 5: Create a selection of the page curl by Command clicking (PC: Ctrl clicking) its layer thumbnail.
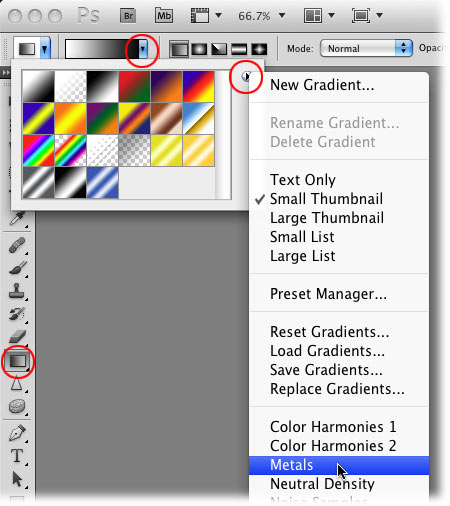
Step 6: Press G to activate the Gradient Tool and in the Options bar, click the down-pointing triangle next to the gradient preview to open its Preset picker, and then click the tiny rightward facing triangle to open the list of options. Choose Metals and when Photoshop asks if you want to replace your gradients or append the new ones. Click Append.
Step 7: Choose the gray/white/gray/white/gray swatch (circled below) from the center of the Gradient Editor, then click the first color stop at the bottom left of the editor towards the bottom (also circled).
Change the color of the stop by clicking the color well farther below (also circled). Pick a medium gray, such as the web (hex) color #999999. Click the next color stop and move it to the left until it lines up with the "s" in the word Smoothness above it (see vertical line in screen shot below). Choose a light gray from the color well (such as #cccccc). Click the next color stop and move it so that it is beneath the "%" sign and make it medium gray too.
Delete the next color stop by clicking and dragging it out of the dialog (feels weird but just do it). Move the final color stop--should be white--all the way to the right. Press OK when finished.

Step 9: Mouse to the document and place the crosshair at the bottom of the page curl selection and drag diagonally upward, as shown below.
This is what we have now:
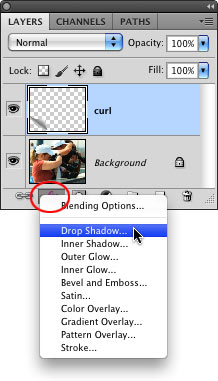
Step 10: Click the tiny cursive "f" at the bottom of the Layers panel to open the Effects menu and then choose Drop Shadow.
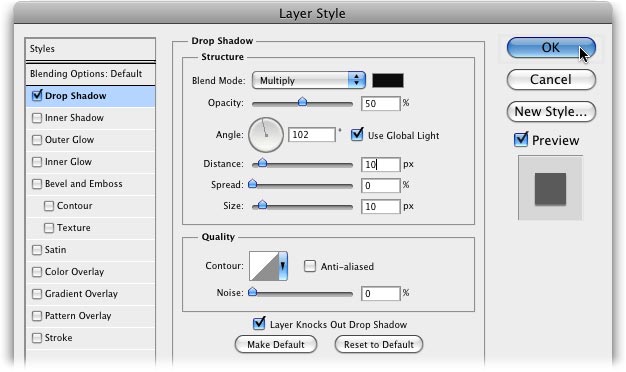
Step 11: In the resulting dialog, enter 50% for Opacity, 102 for Angle, 10 for Distance and Size, and then press Return.
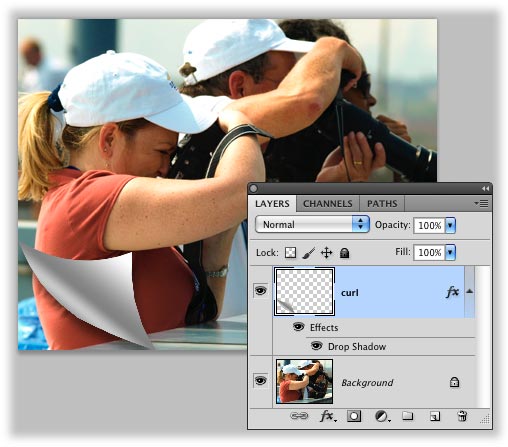
Here's what you should have now, including what your Layers panel should look like:
Because there's some of the original image showing beneath the curl, you need to cover it up. The simplest method (and least destructive) is to paint another color onto a layer positioned below the page curl layer.
Step 12: Command click (PC: Ctrl click) the New Layer icon at the bottom of the Layers panel to create a new layer below the currently active layer (this is a great keyboard shortcut to memorize, by the way). Press B to activate the Brush tool and click the foreground color chip at the bottom of your Tools panel and choose white. Mouse over to your image and paint the corner area so the underlying image doesn't show through. Use the Eraser tool if you paint too much.
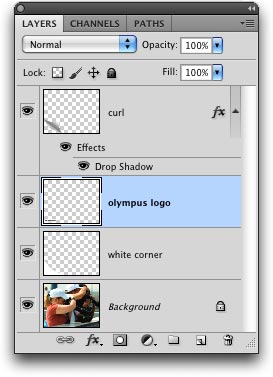
Place whatever you'd like to show beneath the curl--like the Olympus logo--on a new layer above the paint layer though below the page curl layer. Here's what your Layers panel should look like now, with each layer named accordingly:
And here's the final result.

Pretty cool, eh?! Until next time, may the force of the page curl be with you all :)


PhotoLesa's photography gear provided by: