
PhotoLesa's photography gear provided by:


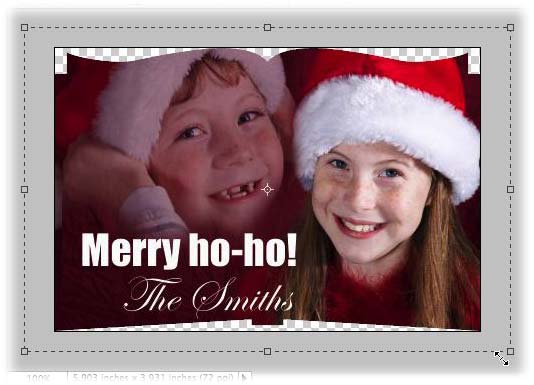
Welcome back, Kotter! (I couldn't resist.) Or rather, welcome back to part 2 of Creative Combinations. This week I'm going to show you how to create neato-cheeto edges for the greeting card we started last week.
Thanks to the Cookie Cutter tool, this is really easy to do and there are shapes-o-plenty dwelling inside that tool just begging to be used. The trick, of course, is knowing how to find the cool shapes that aren't loaded by default.
The first thing we need to do is load the additional shapes that shipped with Elements. Why the Lords of Adobe decided to load only a select (lame) few to begin with, I have no idea. The few that initially show up in the list are *so* lame, in fact, that you may be soured on the tool from the start. If that's happened to you, prepare to be wowed.
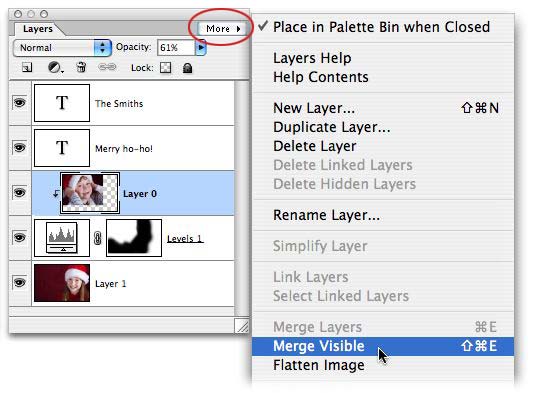
Step 1: Continuing with the image we made last week, let's merge all visible layers so we can apply an edge to the whole image. Click the More button at the top right of the layers palette and choose Merge Visible. TIP: It's probably a good idea to keep the original file with layers intact under another name before doing this. Just choose File > Save As and name this document "greeting card edges" or something similar.
Step 2: Press Q to select the Cookie Cutter tool.

Step 3: Click the little triangle to the right of the Shape button in the Options toolbar at the top of your screen. A little fly-out menu of approx. 30 (boring) shapes will appear. Click the little triangle at the top right of that box (circled below in red) and choose All Elements Shapes.
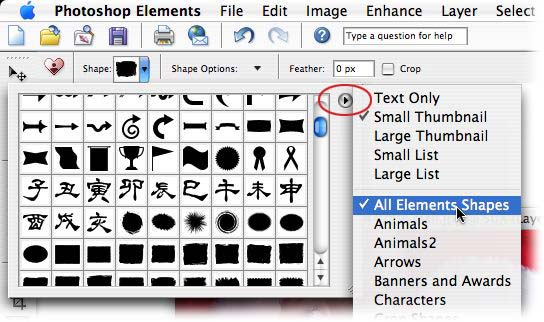
Aha! Now we're talking.
Step 4: Click once on any shape to select it, then mouse over to your photo and draw the shape onto it. The shape will have handles on all sides, just like those of the Free Transform tool. Grab any handle and adjust the shape size at will. TIP: Hold Shift while you drag to constrain the shape proportionately. When you've got just right, press Return to accept the shape.

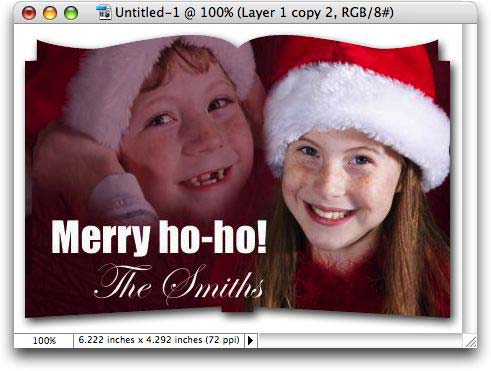
Now that we've got a cool edge, let's dress it up even more by adding a colored background and drop shadow.
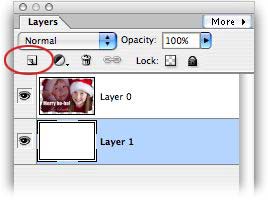
Step 5: Command (PC: Ctrl) click the new layer icon at the top of the layers palette (circled below in red) to add a new layer below the one currently selected. Press D to set your color chips to the default of black and white, then press X until white is on top. Press Option + Delete (PC: Alt + Delete) to fill the new layer with white.
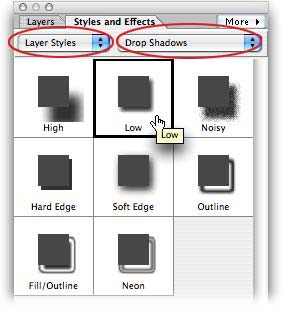
Step 6: From the Styles and Effects palette, choose Layer Styles > Drop Shadows as shown below. Click once on any drop shadow to add it to your photo.
This is what we have now:

TIP: To edit the drop shadow, just double-click the tiny "f" that appears next to the photo thumbnail in the layers palette.
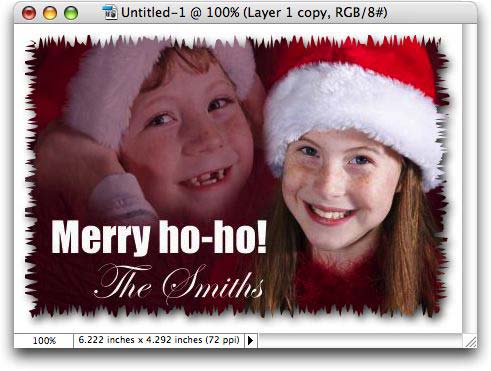
Some of the shapes may require that you need a little extra canvas space around the photo, in order to see the drop shadow. If that's the case, read on.
Step 7: Press C to select the Crop tool and draw a box around the image. While holding the Option key (PC: Alt), drag one of the corner handles outward. You'll see the crop box expand around all four sides at once.
After adding a white layer and drop shadow, we have a cute book shape:
Here are more possibilities using other shapes:
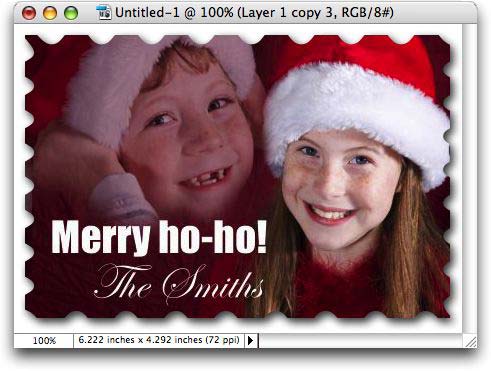
You can create a postage stamp look if you draw this particular shape outside the bounds of the photo itself:
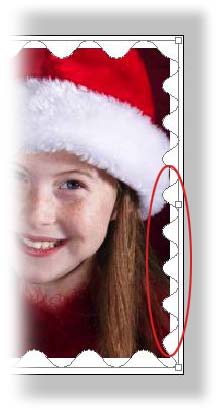
After pressing Return to accept the shape, this is what we get:
That's all for this week! Until next time, happy holidays to you and yours :)


PhotoLesa's photography gear provided by: