
PhotoLesa's photography gear provided by:


It's the holiday season and your digital cameras are bursting at the seams with cute kid photos (okay for me, it's cute cat photos). The question becomes, how does one get the maximum number of aforementioned photos in front of their friends and family while at the same time showing off their creative prowess? Well, if you're the proud owner of either Photoshop CS2 or Elements, the answer is easy: make a creative combination!
Join me now on a journey to creating a super cute holiday card that's just begging to be mass distributed (iCard, anyone?) and gloated over. This tutorial got a little long in the tooth--don't worry, the steps aren't difficult--so I decided to break it up into two parts. Part one concentrates on creating the collage and text, and part two shall divulge how I made the cool edge effect you see above. Read on and you'll glean many image editing techniques that shall serve you well in the future!
Merge the images
The first step to merging the images together is to get them into one document. In Elements, this is a drag and drop process and today I'll use two images snatched from over at iStockphoto.com. (See? If you don't *have* kids, you can always buy them at iStockphoto.com for a buck; no fuss no muss!)
Step 1: Pop open both images and with the Photo Bin visible at the bottom of your screen, press V to select the Move tool. Click within one image and simply drag it into the other image thumbnail in the Photo Bin, as shown below.
TIP: If the Photo Bin isn't visible, just choose Window > Photo Bin.
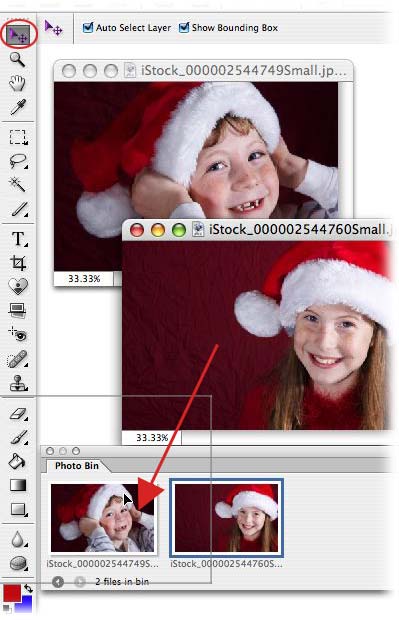
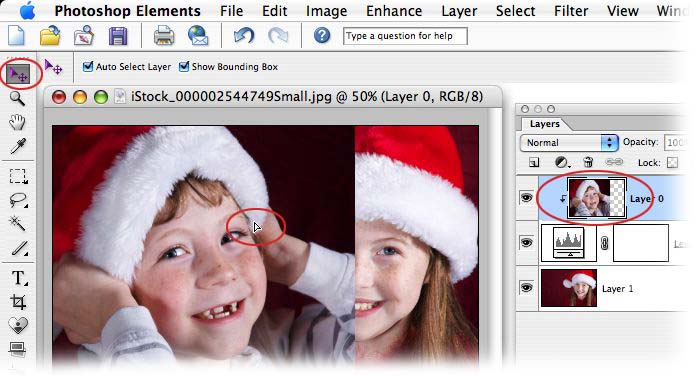
Step 2: You should now have both images viewable in one document, as shown below. Go ahead and close the other photo window because we don't need it anymore.
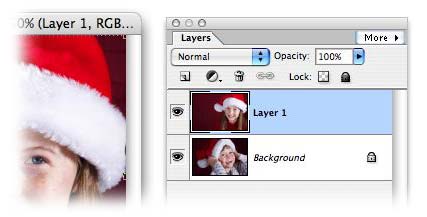
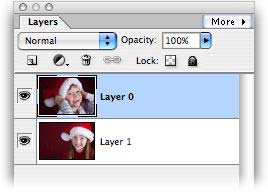
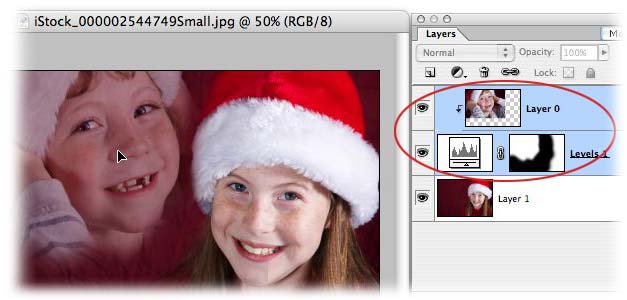
Step 3: Now comes the hard part: You must now decide which image you want in the background. Once you've made the decision, drag that image to the top of your layers stack.
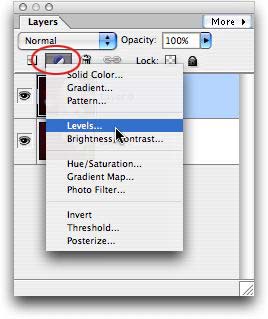
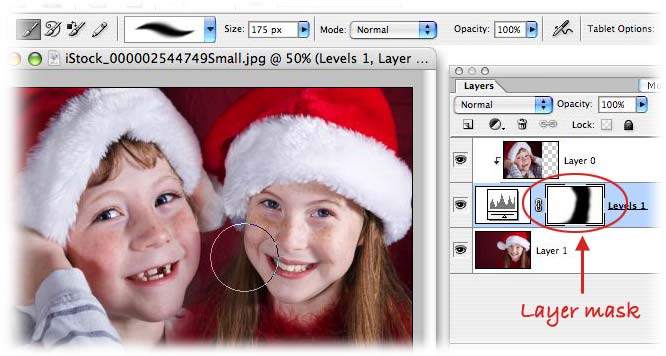
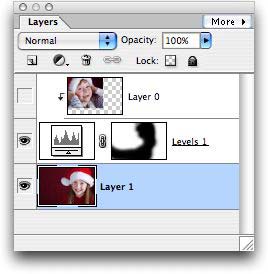
Step 4: Yeah, yeah, Adobe says Elements doesn't support layer masks but I'm here to tell you it does. To make one, just click the half black/half white circle at the top of the layers palette to create an adjustment layer. Choose Levels and press OK in the resulting dialog box to send it away. We only need the layer mask that automatically tags along with this layer, as you'll see in a minute.
Step 5: Drag the adjustment layer inbetween the two photo layers, like so:
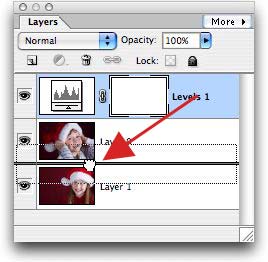
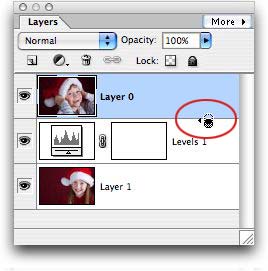
Step 6: Click on the top layer to select it (it'll turn light blue), then hover your cursor between the two layers while pressing the Option key. The cursor will morph into two intersecting circles. When it does, click once. This clips the top layer to the adjustment layer.
TIP: You could also choose Layer > Group with Previous, or just press Command + G (PC: Ctrl + G).
Step 7: To reposition the photo, just press V to select the Move tool and with the top layer selected, just move it around with your mouse, as shown below.
Step 8: Press B to select the Brush tool and press D to set your color chips to the default of black and white. Press X until black hops on top.

Step 9: Click once on the mask itself (circled in red below), and with a nice big, soft brush, begin to paint the area of the photo you'd like to hide with black. TIP: In the realm of the layer mask, black hides and white reveals. If you paint out too much, just press X to swap color chips so that white is on top, and paint that area back in.
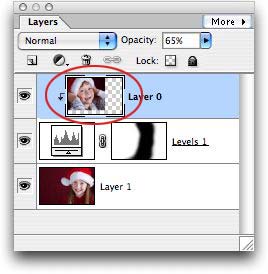
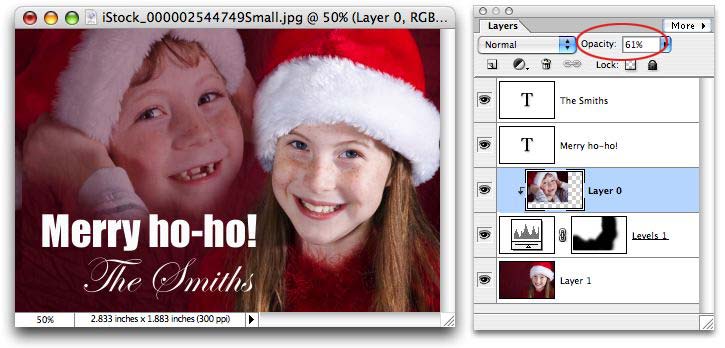
Step 10: To create the effect of the little boy being truly in the background (not to mention levitating), select that layer and decrease the opacity slider at the top of the layers palette to about 65%.
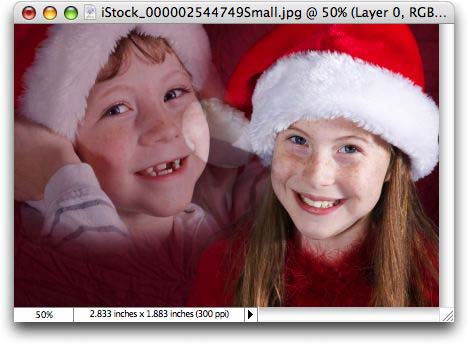
Here's what we have now; it's not bad, but that puff ball on the end of the little girl's hat is messing up our collage. In the next few steps, I'll show you how to zap it.
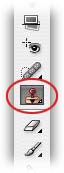
Step 13: Grab the Clone Stamp tool by pressing S. We'll use it to copy some of the background onto the puff ball.
Step 14: While holding the Option key (PC: Alt) click the area you wish to sample from. This is what we'll use to cover up the puff ball.
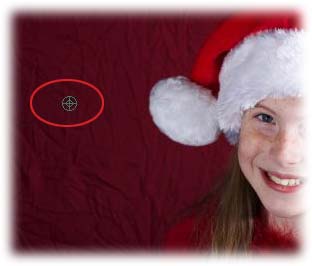
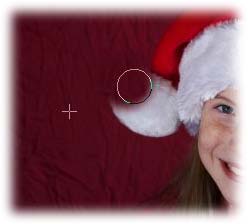
Step 15: Begin to paint over the puffball. Below the crosshair denotes the area being sampled from. That is, we're copying that area onto the puff ball.
Step 16: To move the masked photo and the mask at the same time, just Shift click each layer in the layers palette. Press V to select the Move tool and either move them with your mouse or the arrow keys.
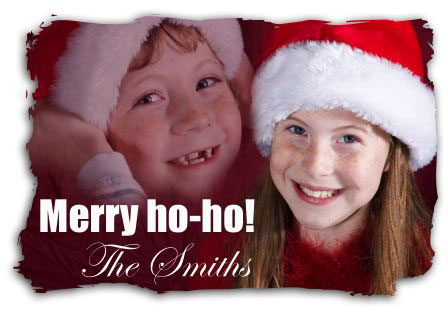
Step 17: The very last thing to do is press T to select the type tool and add a holiday greeting, like I've done below. I also selected the background photo layer and further reduced the opacity to 61%.
Now that wasn't too hard was it? And think of all the wonderfully useful editing techniques you've picked up along the way (creating a layer mask, moving items around, reducing opacity, using the clone tool to zap unwanted bits). Tune in next week and I'll show you how to give this greeting card a super cool edge effect!
Until then, may the creative force be with you all :)


PhotoLesa's photography gear provided by: