
PhotoLesa's photography gear provided by:


It's easy to get caught up making creative projects for grown-ups like calendars, photo books, and scrapbook pages... but what have you made for the little ones lately? The next time the creative bug bites, consider converting your photos into art for the coloring book crowd instead.
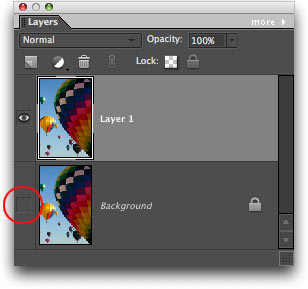
Step 1: Pop open a photo and immediately duplicate the Background layer by pressing Ctrl + J (Mac: Command + J), then toggle its visibility eye off in the Layers palette. This is a self-protective move; you won't use the original layer unless the effect goes horribly wrong.
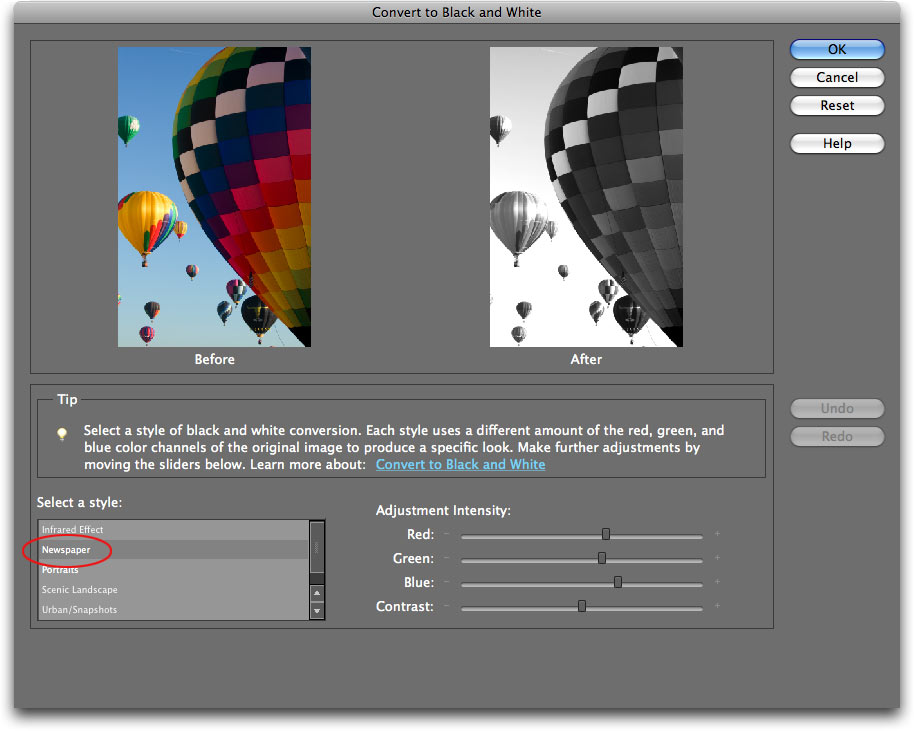
Step 2: Choose Enhance > Convert to Black and White. In the resulting dialog, select Newspaper from the style list. This preset does a good job of introducing contrast while lightening the background, which is useful since you'll want the background to be white eventually. Feel free to adjust the intensity sliders if you wish, then press OK.
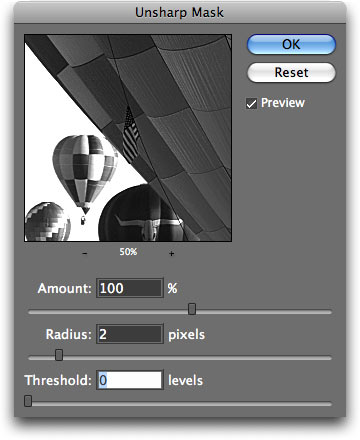
Step 3: Choose Enhance > Unsharp Mask. Enter 100% in the Amount field, 2 for Radius, 0 for Threshold, and press OK. TIP: Radius controls how many pixels are sharpened near the edges (outline) of your image. Threshold lets you specify how far pixels need to be from each other to be considered an edge. By setting the Threshold to 0, you're letting Elements go hog wild and sharpen everything.
Depending upon the amount of contrast in your image, you might want to run Unsharp Mask a couple of times. To rerun any filter with the same settings, press Ctrl + F (Mac: Command + F) or choose Filter > Unsharp Mask. (Unsharp Mask really is a filter, even though it lives in the Enhance menu.)
Step 4: Hop up to the Filter menu and choose Stylize > Find Edges. There's no dialog with this one; it's all or nothing. Your image should be looking decidedly sketch-ish at this point.
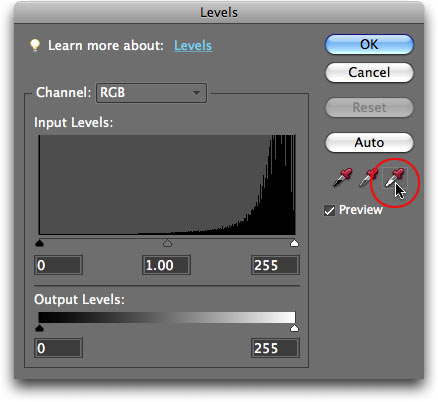
Step 5: You can use a Levels adjustment to make the background more white and less gray. Click the half black/half white circle at the top of the Layers palette and choose Levels from the resulting pop-up menu.
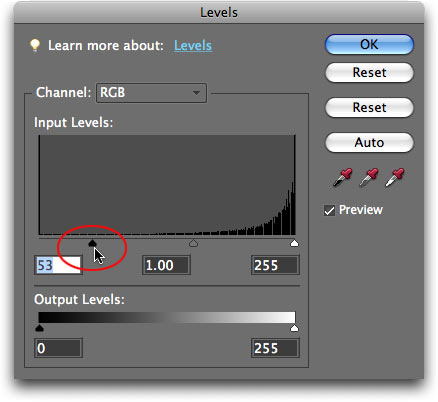
Step 6: The goal here is to reset the white point, or rather, what Elements thinks should be white. To do that, choose the White eyedropper to the far right then mouse over to the document and begin clicking on any gray areas in the background of your image. Keep clicking until the background becomes as white as possible. TIP: In order to see the gray pixels littering your otherwise perfect drawing, zoom in by pressing Ctrl + (Mac: Command +). Press and hold the Spacebar to move around within the image while it's magnified, then press Ctrl - (Mac: Command -) to zoom back out.
Step 7: To darken the edges even more, drag the shadows slider to the right. TIP: If you've already closed the Levels dialog, double-click the Levels adjustment layer in the Layers palette to open it back up. Press OK when finished.
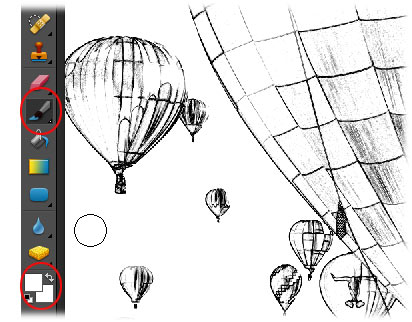
Step 8: In the Layers palette, select the sketch layer and press B to select the Brush tool. Press D to set your color chips to the default of black and white and press X until white hops on top. Mouse over to the image and paint away any unwanted bits or gray areas in the background, or elsewhere in the image.
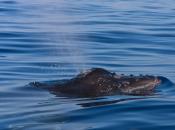
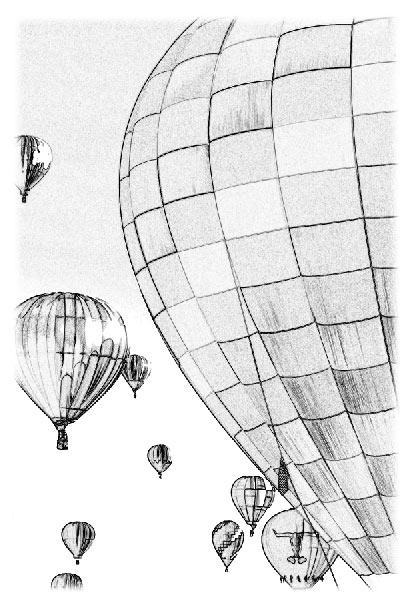
Here's the finished coloring book art:
As you can see, Elements' filters can make short work of turning your photos into a right proper drawing. All that's left now is to load the printer with paper and dig out the crayons!


PhotoLesa's photography gear provided by: