
PhotoLesa's photography gear provided by:


I'm in the throes of creating some killer new video training on both Photoshop CS3 and Elements 6 for the good folks at KelbyTraining.com. That being said, I'm spending a ton of time parked in front of the computer and very little time perched atop my motorcycle. I obviously have no choice but to start using photos of my motorcycle in tutorials (I do hope you understand!).
The other day my husband got an amazing shot of me zipping around a nice big sweeping turn; therefore, hereforetowith, I'm using it to illustrate how to combine two images into an entirely new piece of art. The technique involves selective blurring (node#150), which we've covered before, and uses a Gradient mask to fade one image into the other. Last but not least, we'll zap the color from the bike shot in a gloriously non-destructive manner.
The end result turned out *so* good that you will see this technique in my new training video, "From Photo to Graphic Art" to be released very soon by The Great Kelby.
In order to combine two images, we must first wrangle them into the same document, on two separate layers. Layers are one of the most powerful features of both Photoshop and Elements, though it can also be a tough concept to grasp for beginners.
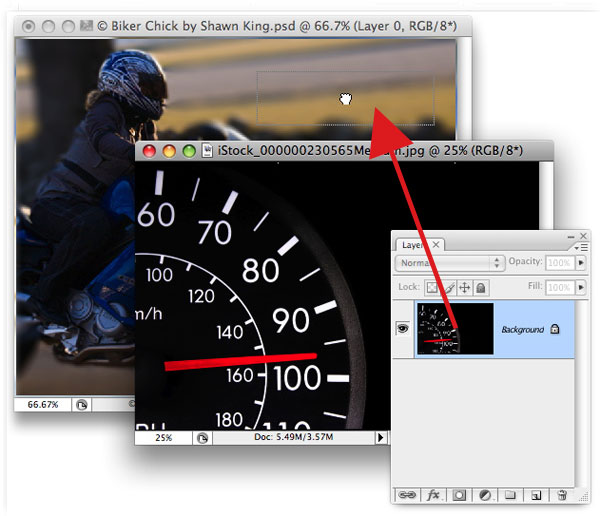
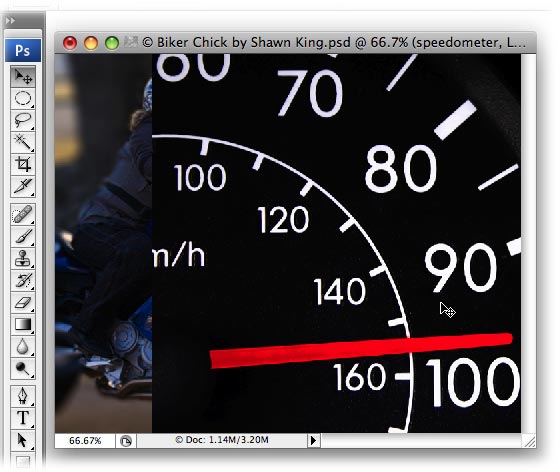
Step 1: Pop open two images and position the document windows so that you can see both of them along with your Layers palette. From the Layers palette, click and drag one image into the other window, as shown below. When you see the inside of the target window highlight slightly (you can barely see it below), release the mouse.
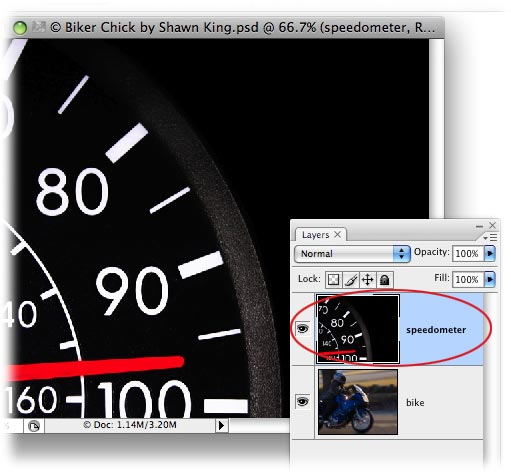
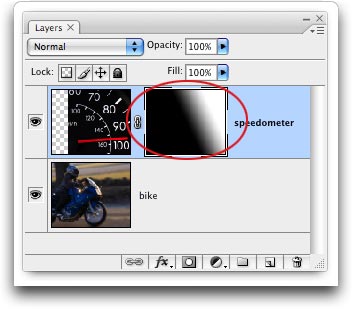
By clicking on the target window (the bike image), I can see that it contains both images, each on their own layer. Since the speedometer layer is at the top of the layers stack (circled in red below), that's the image I see. The image of the bike is being covered by the speedometer.
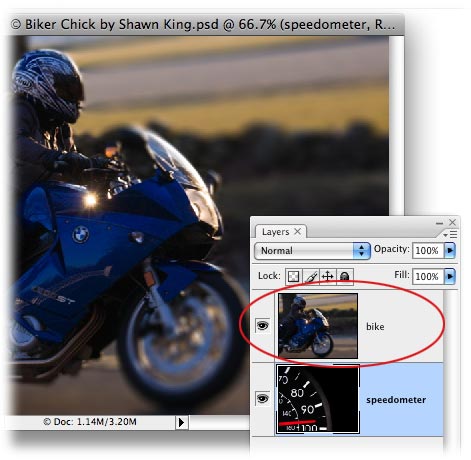
You can rearrange the order of items in the Layers palette by clicking and dragging them upward or downward. In the screenshot below, I've dragged the bike layer to the top of the layers stack which makes it visible. Now the bike is covering the speedometer layer.
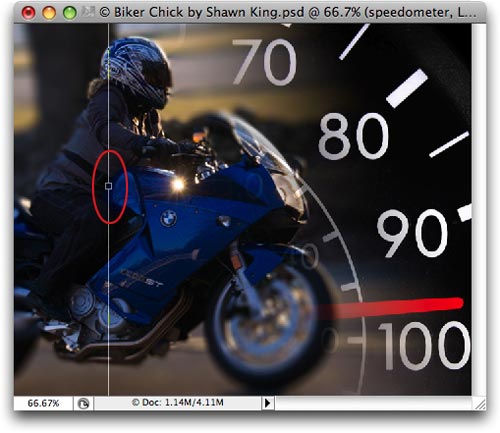
Step 2: For the purposes of this tutorial, I need the speedometer at the top of the layers stack so I dragged it upward. Next, press V to select the Move tool and click and drag within the document to position the speedometer wherever you'd like. Below I've moved it a little to the right. NOTE: If you do this and nothing happens, make sure you have the right layer highlighted in the Layers palette!
To fade these two images together, I'm going to use the Gradient Tool within a layer mask. A layer mask simply gives us the ability to hide pixels, rather than delete them (think of it like digital masking tape). By hiding some of the topmost (speedometer) layer's pixels, we'll see through to the bike layer below, thus the two images will appear blended (or faded) into each other.
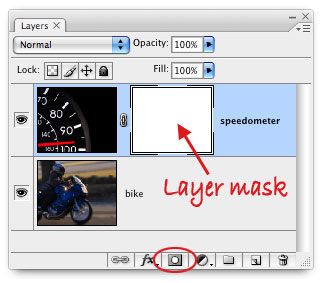
Step 3: Click once to select the speedometer layer (the layer will turn light blue), and click the circle within a square icon at the bottom of the Layers palette. Click once to select the layer mask (a tiny hairline rule will surround it, as shown below).
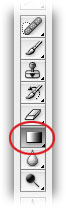
Step 4: Press G to grab the Gradient Tool over in the main Tools palette.
Take a peek in the Options bar at the top of your screen and make sure a black to white gradient is shown in the preview area. If not, click the downward pointing triangle to its right and choose the black to white gradient from the resulting pop-up list. While there, make sure the linear gradient button is also selected (also circled below in red).

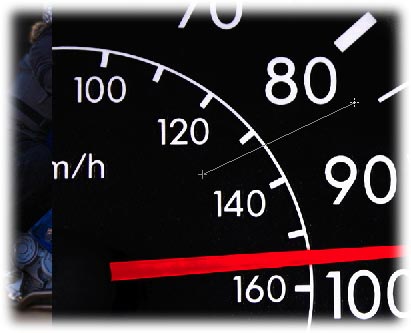
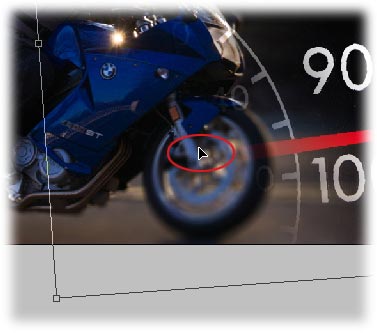
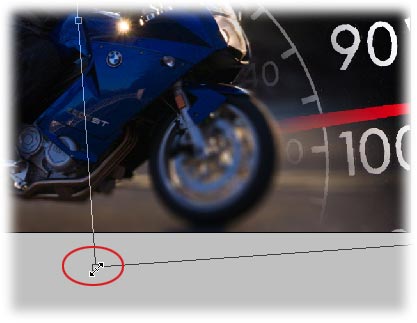
Step 5: Click once on roughly the spot where you want the fade to begin. Drag slightly upward and to the right for a length of 2 inches or so. You'll notice a little bar and two crosshair cursors (shown below) as you drag. These represent start and end points, plus the width of gradient or fade. The shorter the bar (or dragging distance), the thinner the fade will be, and the harsher the transition will appear (it won't be a hard edge, but it'll be close). The longer the bar, the software (wider) the gradient and the softer the fade.
After releasing your mouse, the gradient will appear in the layer mask (circled in red below).
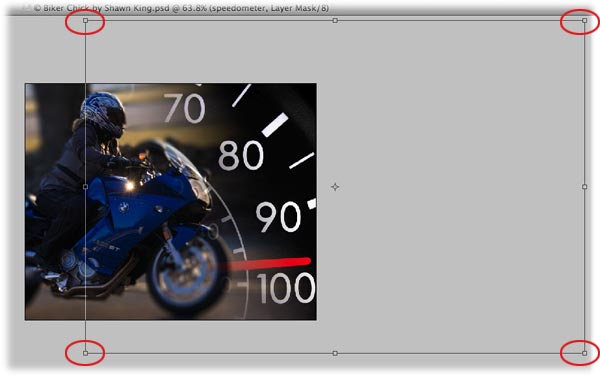
Step 6: If one or other images needs to be reduced in size, press Command + T (PC: Ctrl + T) to summon the Free Transform tool. The only problem is that the speedometer image is so big that I can't see all the resizing handles (I've circled the only visible handle below in red).
To remedy this problem, press Command + 0 (PC: Ctrl + 0). This will fit the image to the size of the screen, meaning the document window is resized just enough where all four resizing handles are viewable (they are all circled below in red).
Step 7: To rotate the image, hover your cursor below any corner handle and drag in any direction.
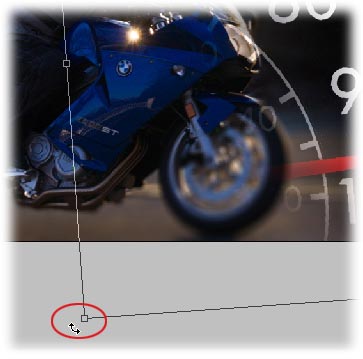
You can also move the image around by clicking within the resizing box and dragging (the cursor will turn into an arrow, as shown below).
If you want to make the image smaller, press and hold the Shift key while dragging inward with any corner handle. TIP: Pressing the Shift key resizes the image proportionately. Do restrain yourself from making images larger, as you will effectively "blow up" pixels beyond their original dimensions. You won't lose quality if you make an image smaller, but it'll quickly go to hell in a handbasket if you make it bigger.
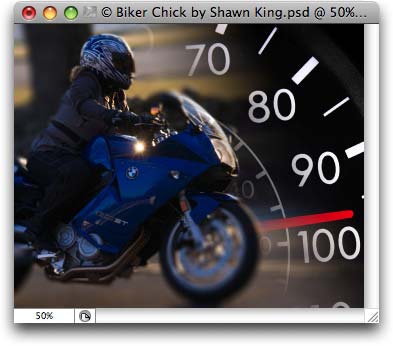
Step 8: When finished with all the transformations (rotating, repositioning, resizing), press Return to accept. Here's what we have now:
The collage is looking pretty good, though I think it would look even better if the bike photo was black and white. To do this we can use an adjustment layer so that the black and white conversion happens on its very own layer. That way we don't harm the original photo, you know, in case we don't like the effect or change our mind (which I often do... a lot).
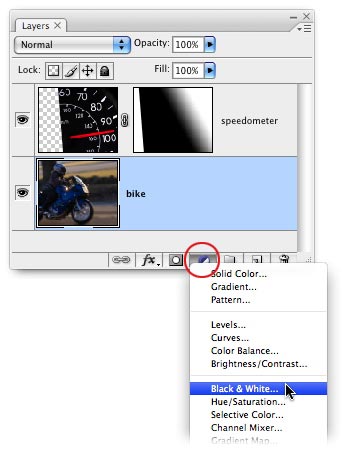
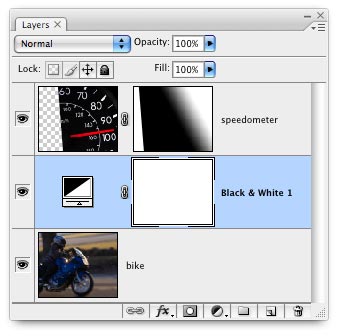
Step 9: Click once to select the bike layer and click the half black/half white icon at the bottom of the Layers palette to create an adjustment layer. If you have Photoshop CS3, choose Black & White. If you have CS2, choose Channel Mixer and click the Monotone checkbox at the bottom of the resulting dialog.
Step 10: In the resulting dialog, tweak the sliders until you have a nice and contrasty grayscale image. When finished, press OK.
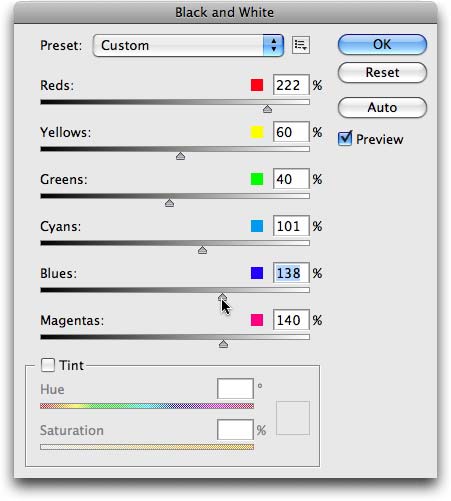
Over in the Layers palette you'll notice the Black & White adjustment layer also sits on it's very own layer, atop the bike layer.
Here's the finished product:
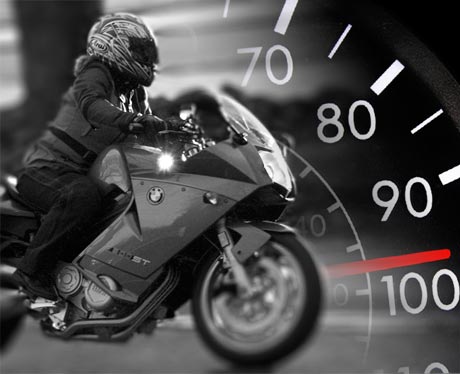
Not bad, eh?! Incidentally, this is a great example of how to use your own imagery in conjunction with stock photos. For example, I picked up this little speedometer for $3 over at iStockphoto.com. I mean, just think of the possibilities here: a wedding photo faded into some flowers, piano keys faded into a sheet of music, Spock faded into a shot of the Enterprise... :)
I hope you can see now that by using layers and masks, two images (or several) can be combined to create something truly unique. The trick is to pay attention to the layers stacking order to determine which image covers up what, and then to use layer masks to hide bits of one to let the other show through.
Until next week, live long and prosper.


PhotoLesa's photography gear provided by: