
PhotoLesa's photography gear provided by:


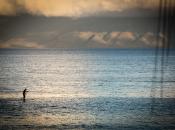


Few techniques can draw a viewer’s eye to a focal point—or save a busy photo—like selective blurring. However, what we're really talking about here is creating a shallow depth of field, which is the result of shooting in macro or portrait mode, or from using one of your camera's manual modes to specify a small f-stop (f1.8, f2, f2.8 and so on). This opens your camera’s lens (or aperture) wide, thereby reducing the size of the area which can be in focus. If you’ve ever had your pupils dilated, it’s the same principle in effect: The more dilated your pupils, the blurrier your field of vision.
It's easy to create this effect using Photoshop Elements, and today you'll learn two techniques for getting it done: One using the Eraser tool (for beginners) and another using a layer mask (more advanced). As a bonus, the good folks at iStockphoto are giving away the image so you can follow along (download the iStockphoto image by clicking here). Let’s get started!
NOTE: If you're going to Macworld Expo in San Francisco, CA, be sure to sign up for my two-hour, hands-on Elements Image Editing Bootcamp class from 4:00-6:00 pm on Thursday, February 11! Click here for more details.
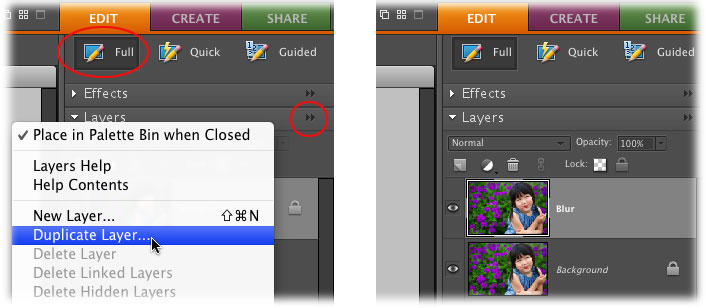
Step 1: Open the offending image, click the orange Edit tab at the top of your screen, and then click the Full button to make sure you're in Full Edit mode. Locate your Layers panel on the right side of your screen, click to activate the image layer, and from the Layers panel fly-out menu (circled below in the middle), choose Duplicate Layer. Give it a clever name like "Blur" and press OK.
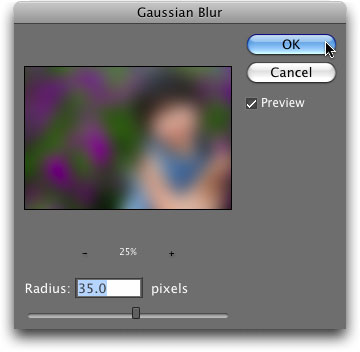
Step 2: Over in your Layers palette, make sure the Blur layer is active (it should be highlighted in blue or gray), and then choose Filter > Blur > Gaussian Blur. In the resulting dialog, drag the Radius slider to the right to about 35 pixels or so. Press OK when finished.
Punching a hole through the blur
There are two methods you can use to punch a hole through the blurry layer, in order to see through to the original sharp layer below. The first method is easy but involves the Eraser tool so there’s no room for error or tweaking (save for undoing by pressing Command + Z [PC: Ctrl + Z] repeatedly). The other method involves using an empty Adjustment layer to fake Elements into thinking it has masking abilities. The advantage there is that you’re hiding pixels instead of erasing them, meaning you can tweak the effect endlessly. If you’re a beginner, start with the Eraser method but bookmark this page so you can come back and try the masking method later.
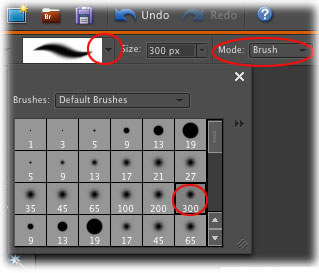
Step 3: Press E to grab the Eraser tool and in the Options bar at the top of your screen, choose Brush from the Mode pop-up menu (circled). Open the Brush preset picker by clicking the downward point triangle to the left of the Mode menu (also circled) and click once to select a big, soft-edge brush (like 300 pixels).
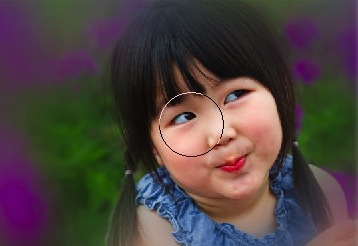
Step 4: Mouse over to your image and click once on your focal point (like this little girl’s face). Reduce your brush size by roughly half by pressing the left bracket key ([) repeatedly, click the focal point a few times, reduce the brush size even more and click a few more times to ensure the face area is sharp. You’re literally erasing part of the Blur layer so you can see through to the original layer below.
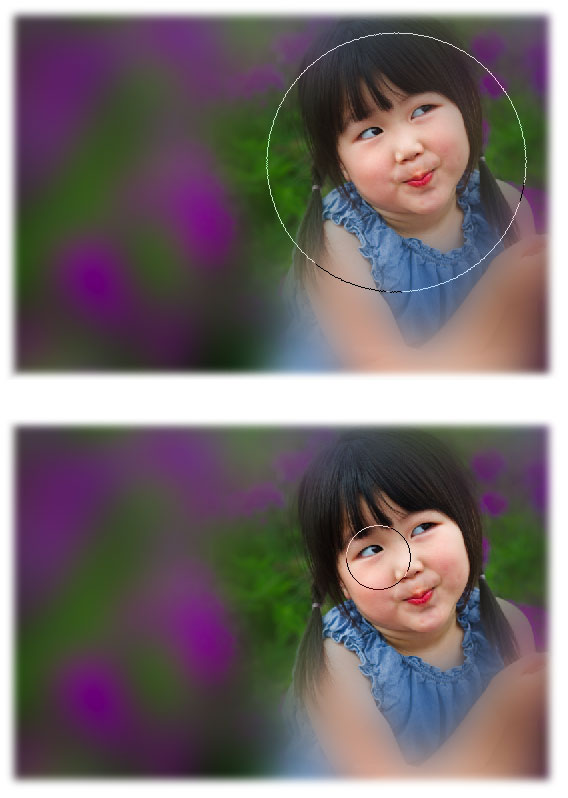
Here’s a before and after, along with what your Layers palette should look like if you used this method:
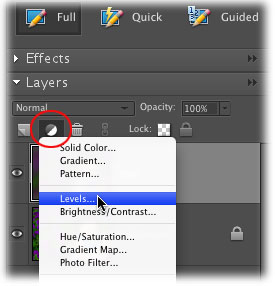
Step 3: Click the little half black/half white circle at the top of the Layers palette (circled) and choose Levels. Press OK to immediately close the Levels dialog. You’re just using a Levels adjustment to get at the layer mask that tags along with it—it’s sneaky but it works!
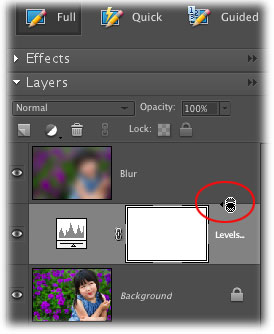
Step 4: Drag the resulting Adjustment layer below the Blur layer in your Layers palette. This effect won’t work unless the Adjustment layer is sandwiched between the original and Blur layers. While pressing the Option (PC: Alt) key, hover your cursor atop the dividing line between the Blur and Levels Adjustment layer. When you see two tiny intersecting circles, click once to group the layers together. Now whatever we do inside the Adjustment layer’s mask will affect the Blur layer. Whee!
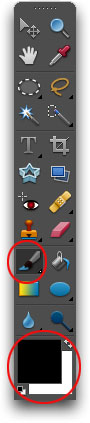
Step 5: In the Realm of the Layer Mask (which is basically digital masking tape), painting with black conceals and painting with white reveals. Since the goal is to hide part of the blur, you need to paint with black. Press B to grab the Brush tool and pick a big, soft brush from the preset picker at the top left of the Options bar. Take a peek at the color chips at the bottom of your left-hand Tools panel and press D to set them to the default of black and white, and if black isn’t already the top color chip, press X to flip-flop your chips until it’s on top.
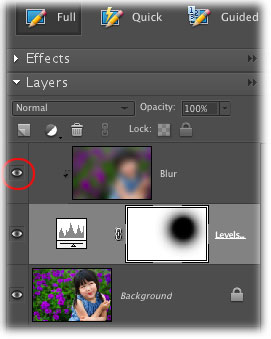
Step 6: Mouse over to your image and, with the Adjustment layer active, click once in the area you want to remain sharp, reduce your brush size and continue clicking on the face area to ensure it’s not blurry. If you hide too much of the blur layer, you can paint with white in the same area to reveal (remember, black conceals and white reveals!) the blur. Just press X to flip-flop your color chips so that white is on top, and click to paint that area.
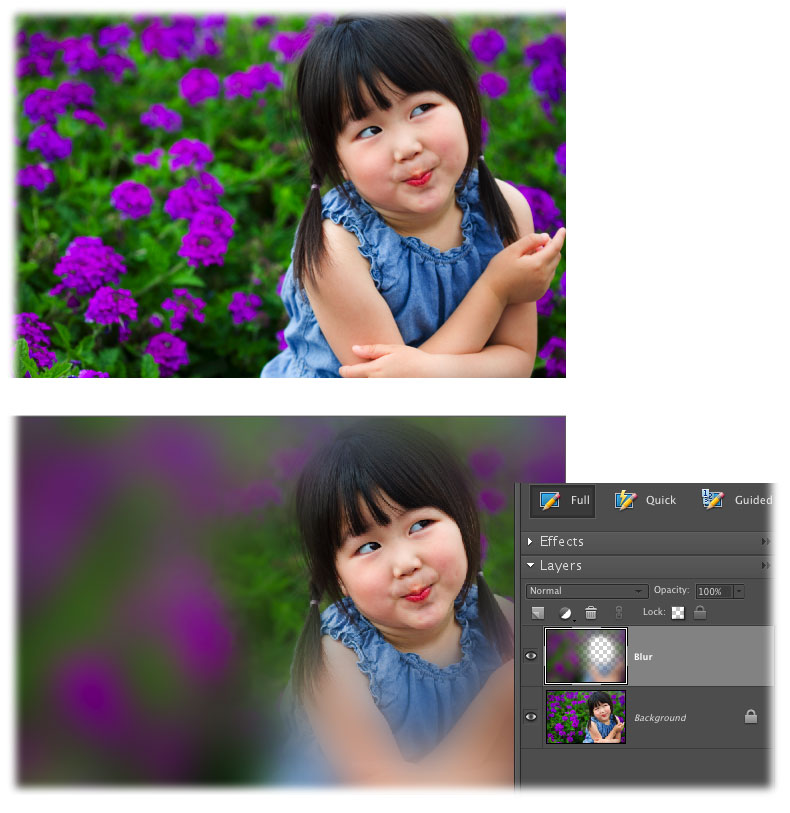
For a quick before and after preview, click the little visibility eye to the left of the Blur layer (circled). Click it again to turn the visibility of that layer back on.
That's all for now! Until next time, may the selective softening force be with you all!


PhotoLesa's photography gear provided by: